Accucraft 3-cylinder Shay safety valve fail......................

As long as the valve isn't as tight as the dome threads . .

Another thought. Now you have the dome open, can you open up the hole by cutting away the thick sides? I have no idea what kind of tool would do that! Taper drill? Sanding drum in a Dremel?
Give yourself more room to grab the valve body.

Thinking about it............maybe a LARGE standard drill bit in a press. I don't have anything that big, and I certainly don't have a drill press that would hold one that big, but I know a man who has. Thanks. :)
 
I suspect your safety valve looks like this, which is the common older-style. (I googled "Accucraft safety valve".)

AP-21101-Safety-Valve.jpg
Tac,
More thinking produced some more gloomy thoughts.

You'll note that valve has 2 serrated parts. I think the top one unscrews and is just a cover on the mechanism of the safety. Should you manage to unscrew it you will probably find that it comes out and leaves the rest of the safety still in the boiler bush. Which means making another tube/box wrench to fit the wider part.
You might try making the wrench fit the wider part before anything else.

Secondly, reading the first post [which describes what the problem is in the first place] it seems your safety is stuck. A pessimist might say that the same thing blocking your dome threads is jamming the safety valve. If the spring rots away, the valve stays open, so it isn't that.

Looking forward to hearing the next phase of this saga. . .
 
Phil, with the construction of the dome, filling the dome does nothing... a fact that 80% of the commentors fail to "grok" even after repeated attempts.
Not sure why you insisted on repeating this, Greg. Take a look at the this pic of the dome that I've annotated.
Edit added: and the actual dome of Tac's loco now that the top of the dome cover is sawed off.

Screen Shot 2022-03-14 at 5.55.38 PM.png

Tac has filled the boiler and inverted it, the only way to get to the threads, other than building a "dam" around the dome and filling the "moat" between the dam and the dome.

No, in fact filling the boiler with penetrating oil as you suggested did nothing and had no chance to get to the stuck threads. This only succeeded in making a mess inside the boiler Tac will need to clean out!

Second edit added: Filling the boiler with penetrating oil may not have been completely useless. It might assist in removing the safety valve.
 
Last edited:
Take a look at the this pic of the dome that I've annotated.
Phil,
You are right about the 'void space', but the safety valve is threaded into a bushing in the actual boiler. The base of the dome is bolted to the boiler casing which surrounds the boiler and its lagging. The dome base (in all the locos I've taken apart) is just a big wide hole.

Here's the boiler casing and the dome parts all separated from my C-19 which is the same age as Tac's Shay. You can see (top left) the hole for the boiler bushing and safety valve, and the new dome base and dome (bottom right) that will be installed when the mounting holes are drilled 90 degrees different.

IMG_3137-sm.jpg


Given that the valve is not sealed to the casing, then pouring penetrating oil in the dome to fill it (theoretically a good idea,) might mean the oil soaks in to the boiler lagging and dissipates by dripping out of the bottom of the bolier casing. :shake:
 
Yep, even easier!
Agree. I suggest making the holes as big as reasonable given the dome thickness. Then use hardened steel pins, such as inverting the drills used to make the holes, inserted into the holes.

Edited to hopefully make my meaning clearer.
 
Last edited:
The base of the dome is bolted to the boiler casing which surrounds the boiler and its lagging. The dome base (in all the locos I've taken apart) is just a big wide hole.
I had not realized the loco had a boiler casing surrounding the actual boiler. I was visualizing my much simpler Aster 0-6-0. Filling the dome with penetrant probably made a mess of the lagging between the casing and boiler.
 
A question for those in the know. Was there originally a thin paper or fiber gasket that went between the flat surfaces of the dome's base and cover? If not, those with similar locos may want to consider adding one (in addition to some anti-seize to the dome cover threads) to reduce the chances of having Tac's problem in the future.
 
Then use hardened steel pins, such as inverting the drills used to make the holes, inserted into the holes.
Tac mentioned that using the strap wrench made him worry about bending the chassis (!) so adding the pins and twisting looked a bit dangerous.
I had not realized the loco had a boiler casing surrounding the actual boiler.
IMG_3122-10-c19-boiler-removal-pthornton.jpg

Well, I have not taken the boiler out of a Shay, but I found a couple of pics and they seem to have the same type of construction. This is my C-19, which I did take apart.
Was there originally a thin paper or fiber gasket that went between the flat surfaces of the dome's base and cover? If not, those with similar locos may want to consider adding one
Nope. Nuthin'. In fact, if you think about the threads, the bottom of the dome threads are inside the dome and therefore I suspect that is where the rot started. A gasket at the joint at the top of the threads won't help.
Better to unscrew the darn thing every year and put it back with some oil/grease on the threads. I have never had one seize on me but they can be real tight.
 
Ok so now I am really confused.

So where the safety valve fits, is it threaded into the base of the saddle (seems not) but into the boiler?

but there is a seal between the base of the valve and the saddle?

but the hole in the saddle looks much larger in diameter? how could that seal around the valve?

so there is a statement that penetrating oil in this area would soak the boiler insulation?

Well if that is true, then that area having steam when the valve lets go would also put steam/moisture into the insulation also, right?

is there a nut inside the boiler, or a threaded fitting soldered to the boiler proper?

several things do not make sense, but I do see that filling the boiler with penetrating fluid will not help, now that I understand the saddle is not "live" with steam... of course it will not cause damage either, it cannot get into the insulation... filling the dome area might cause that issue.

Greg
 
Tac mentioned that using the strap wrench made him worry about bending the chassis (!) so adding the pins and twisting looked a bit dangerous.
I only suggested that as it would be an easier job than trying to find the type of tool illustrated. Obviously if the offending article is jammed that solidly, any trick tac tries will put unwanted stress somewhere. It may well be that the action of sawing the top off has made things looser. TBH, knowing my luck, if I'd done it, the dome would have started turning half way through the cutting,leaving me with a nice loose dome with a dirty great slice in it
 
So where the safety valve fits, is it threaded into the base of the saddle (seems not) but into the boiler?

but there is a seal between the base of the valve and the saddle?

but the hole in the saddle looks much larger in diameter? how could that seal around the valve?

so there is a statement that penetrating oil in this area would soak the boiler insulation?

Well if that is true, then that area having steam when the valve lets go would also put steam/moisture into the insulation also, right?

is there a nut inside the boiler, or a threaded fitting soldered to the boiler proper?
Greg, time you got yourself a live steam engine so you could become an expert at that too. >:)

The safety valve is screwed in to a threaded bush which is soldered in to the boiler. The bush is flush (queue for a song?) with the boiler outside, so the boiler can slide in or out of the casing during assembly. Here's a boiler being built - you can clearly see the bushings. There is a fiber or similar washer to seal around the base of the valve.

4.Boiler.chassis.jpg


To confirm my statement about the boiler fitting inside the boiler casing, here's the cab of that shay (taken from a review.) The actual boiler, with all the fittings, protrudes from the casing which can be seen under the front cab wall.

cab.jpg


The boiler casing has a hole larger than the bush so, when the boiler is in position, you can screw the safety valve in to the bushing through the casing. There is no connection between the valve and the boiler outer casing.

The hole in the casing allows water or other contaminants to soak in to the insulation, but as that is fiberglass (or something similar) it doesn't get hurt. There's a hole in the underside to allow anything to drain out. However, if we're only worrying about condensed steam from the safety, note that the boiler is curved so the water collects at the side of the dome base first, and probably evaporates before too much has soaked in - it's all rather hot in there.
 
A question for those in the know. Was there originally a thin paper or fiber gasket that went between the flat surfaces of the dome's base and cover? If not, those with similar locos may want to consider adding one (in addition to some anti-seize to the dome cover threads) to reduce the chances of having Tac's problem in the future.

I recall offering that advice to any new owners as one of the first things to do when getting the locomotive, new or used.
 
I recall offering that advice to any new owners
Yes. My EBT #12 had an unencumbered steam dome which actually came loose in shipping - allowing the loco to move and bend the cab which was not allowed to move!

Your dome, with all the pipes bolted to the outside, is a more complicated problem. Just removing the bolts can scratch the paint if you don't have the right tools.
 
so filling the dome from above would have the fluid drip down to the surface of the boiler, not hitting the threads at all. (clearly the end of the threaded part of the dome is not resting on the boiler).

so the penetrant would hit the boiler where the safety valve screws into the bushing.

the only way from the top with the loco right side up would any minor wicking of the insulation, and the insulation would have to be in intimate contact with the interface between the saddle and the dome. Clearly not happening, as we can see that the insulation stops short of that area.

turning the loco upside down and somehow injecting penetrant so it gathered in that area might be the only way.

Now a question, what the heck is holding Tac's saddle in place? is it soldered? Yours was screwed to the jacket. Is tac's soldered to the jacket?

In any case, pouring penetrant into the dome accomplishes nothing as it would drain away, not be forced by pressure or gravity UP into the interface between the saddle and the dome.

As I said, filling the dome does nothing, but for a different reason I did not fully understand.

Greg
 
as we can see that the insulation stops short of that area.
How did you figure that? The insulation on my boiler almost covers the bushing of the valve.

I'm pretty sure Tac's dome saddle will be bolted in place from underneath (inside the boiler casing.)

However, you are on the right track, though we don't know how fast the penetrant might soak away through the insulation. Tac could find out by experimenting how much comes out after he leaves it full for an hour or so. Another option would be to leave the loco almost on its side and soak each side individually.

At this point he should be able to get the valve out, which is the point of the exercise, I think.

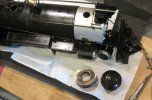
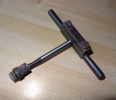
Indeed it be's - and here is the basta- culprit, still impaled on my trusty old Eezy-out...

1647362346330.png

Now, to find as suitable replacement that has a hexagonal body, so's I can use a tube wrench to install it..........
 
Back
Top