Good to see you back Nod. One of the things I find of help is a sort of diary of operations that lists the date, weather and locomotives used on each session. I only use an A5 notebook for this, things like ‘ended session with loco xxx in shunt mode’ a big help. All my locomotives when DCC had a credit card with the DCC functions listed on them laminated with magnetic tape so that they sat on a tin board. I know it all sounds a bit of a faff when you are short of time as I know you are but they helped me and once done and followed allow me to get more enjoyment when I do run the line.
You are using an out of date browser. It may not display this or other websites correctly.
You should upgrade or use an alternative browser.
You should upgrade or use an alternative browser.
Eighton Bahn AKA testing testing RhB
- Thread starter Nodrog1826
- Start date
Nodrog1826
Professional Idiot
Yep I had great plans to have a "Rolling stock index" You know date of purchase, servicing history, mods made etc., and it remains just that a plan.
One of those Round Tuit ideas, if I ever do get, well, as it says around to it.
One of those Round Tuit ideas, if I ever do get, well, as it says around to it.
Trouble is that when you do start, you won't remember what you need to knowYep I had great plans to have a "Rolling stock index" You know date of purchase, servicing history, mods made etc., and it remains just that a plan.
One of those Round Tuit ideas, if I ever do get, well, as it says around to it.
Nodrog1826
Professional Idiot
I have in a round about way discovered an errant point blade lack of lecy contact issue.
To put it another way, found a stalling point, point blade which stops an O-4-O dead in it's tracks.
Initially it just looked like a wobbly blade issue but it wasn't, it was dead as a door nail in the lecy continuity dept., so a repair has been done.
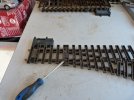
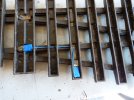
...as this pont has had a previous repair to one of contact strips, that gave me an option to install a screw to screw jumper wire...
...track voltage test...
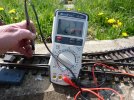
...followed by a run through and a park it on the point blade loco test...
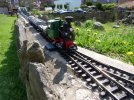
...mind you some people just turn up for the photo op...
To put it another way, found a stalling point, point blade which stops an O-4-O dead in it's tracks.
Initially it just looked like a wobbly blade issue but it wasn't, it was dead as a door nail in the lecy continuity dept., so a repair has been done.


...as this pont has had a previous repair to one of contact strips, that gave me an option to install a screw to screw jumper wire...

...track voltage test...

...followed by a run through and a park it on the point blade loco test...

...mind you some people just turn up for the photo op...

Last edited:
Nodrog1826
Professional Idiot
After track repairs yesterday, today has seen a freight running day...
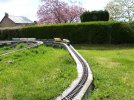
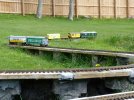
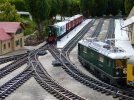
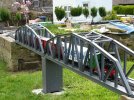
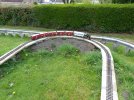
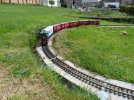
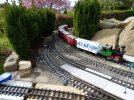
...I have probably de valued those anniversary wagons by taking them out of the box and running them, let alone by fitting the second coupling hooks and springs.
It was all going so well until I took my eye off the ball...
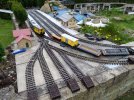
There are a couple of vids as well, if I can get them to upload, If so I will post a link for a few mins., of your life you will never get back.
Managed to upload...


...I have probably de valued those anniversary wagons by taking them out of the box and running them, let alone by fitting the second coupling hooks and springs.
It was all going so well until I took my eye off the ball...

There are a couple of vids as well, if I can get them to upload, If so I will post a link for a few mins., of your life you will never get back.
Managed to upload...
Last edited:
Rhinochugger
Retired Oik
How many centenary anniversaries have LGB had ? 

Nodrog1826
Professional Idiot
Nog the vid is "Private" so we cannot view it. Also the track with the vry pale sleepers (7th photo) what make are they
Hopefully the second vid is now public, as for the sleepers they are:-

just replaced them the rails are Aristo if I recall correctly. once bought some with std gauge sleepers, the sleepers were shipped off to pastures new.
Nodrog1826
Professional Idiot
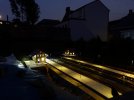
Lighting fix today. the plan was to sort out the blown LED on the MPD building find the short in the Station building circuit and repair the platform lights.
So item one fix blown MPD building LED, done, and this time I also fitted a resistor, the lack of which caused it to blow in the first place.
Item two sort out the Station building short, done but not in the way I intended...
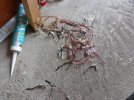
... they were an adapted set of Christmas lights, a daft idea which had never worked out as I intended so...
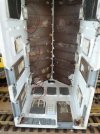
...individual LEDs for the outside and a Piranha cluster for the inside all 5V with resistors, to bring it in line with the MPD building.
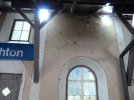
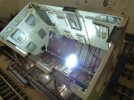
...Just need a darkness test now.
Platform lights, well that will be a job for another day
Edit...
It's getting dark now, so...
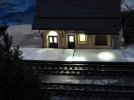

So item one fix blown MPD building LED, done, and this time I also fitted a resistor, the lack of which caused it to blow in the first place.
Item two sort out the Station building short, done but not in the way I intended...

... they were an adapted set of Christmas lights, a daft idea which had never worked out as I intended so...

...individual LEDs for the outside and a Piranha cluster for the inside all 5V with resistors, to bring it in line with the MPD building.


...Just need a darkness test now.
Platform lights, well that will be a job for another day
Edit...
It's getting dark now, so...


Last edited:
Nodrog1826
Professional Idiot
Further progress today, or a start has been made on the platform lights repairs/replacement.
Island platform done and under 9V test...
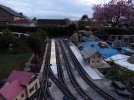
...main platform, two out of five done and tested...
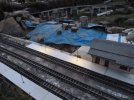
'''two of the three remaining ones are ready to go as it were, with the last awaiting a platform crack repair (Fiberglass patch) to set...
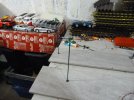
Island platform done and under 9V test...

...main platform, two out of five done and tested...

'''two of the three remaining ones are ready to go as it were, with the last awaiting a platform crack repair (Fiberglass patch) to set...

FatherMcD
Registered
Nice platforms. What are they made of? Almost look like marble!Further progress today, or a start has been made on the platform lights repairs/replacement.
Island platform done and under 9V test...
View attachment 297738
...main platform, two out of five done and tested...
View attachment 297739
'''two of the three remaining ones are ready to go as it were, with the last awaiting a platform crack repair (Fiberglass patch) to set...
View attachment 297740
Greg Elmassian
Guest
looks like quartzite, the sparkly bits give it away, not marble
Nodrog1826
Professional Idiot
They are made from floor tile offcuts that I got from next door when they were having their extension built.
I also have some sandy colour full size ones that will serve as platforms in due course.
I also have some sandy colour full size ones that will serve as platforms in due course.
Nodrog1826
Professional Idiot
Nodrog1826
Professional Idiot
Managed to get hold of some S/H AML track the other day...
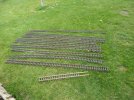
...50 odd feet of the stuff, have spent the last few days cleaning and sorting it out into straights, varying from 2 ft to 6 ft with the odd few 5 ft 6in bits and a 5 ft 9 in bit.
So the (5) 6 Ft lengths are now installed, having swapped out shorter 2 and 4 ft lengths where I can, cutting out both track joints and potential lecy continuity problems on the far reaches of the phase two (not yet finished ) loop.
The added bonus is that the shorter lengths removed are easier to store in the shed.
Nodrog1826
Professional Idiot
Ok. It may be buried somewhere within this thread (pages 20 and 21 ) or even repeated somewhere else on the forum.
So doing this from memory, I'll may have to or someone else can correct me if my sizes are wrong.
I bought a set of taps and drills for the Aristo screw thread size 2mm with a 0.4 pitch and the drill was a 1.75mm. I would need to look back to confirm my supplier source, but I bought 3 sets of drill and taps.
I still have two, one was given to a fellow member of this forum who was looking to do the same as me.
So my method is to set up a crude jig for the hole drilling, and it is as basic as this...
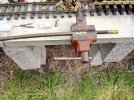
...by aiming for the ctr of the oval with the drill bit and going for it, up to now it has worked out quite well, but you may need to change the fishplate after a while. I also had/have a reverse jig for the other hole as it speeds up operations when doing a larger batch. Otherwise you would keep having to turn the rail over to get the other end as it were.
The tapping is done by slow speed drilling, as my battery drill has a slow speed setting, and with a bit of forward and reverse to get to the full tapping, as you would by hand, but just taking it slow I can get away without that.
One thing to watch out for though not all fishplates of this type are the same, Aristo (Difficult to get hold of), USA Trains and Bachmann all have their variances in size and the expansion oval slot, and indeed some of the same makers fishplates can be different lengths, so in essence one jig does not fit all.
For me it started out as a belt and braces fix for lecy continuity, and up to now it has worked. I only have three feeds to the line, one in the shed and the other two are in the station area, yes I have jumper connections between the tracks as it is DCC, in the shed, the station area, the phase one passing loop and at the start of the phase two loop, which is yet to be finished, so is in effect two dead end spurs for now.
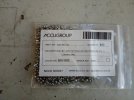
Still use copper grease when fishplating up and I have also invested in screws, whilst they have a different size key head they are the same dia and pitch.
I also use rail clamps on pointwork and the lift out bridges for ease of access for maintenance and access.
Edit, remembered my supplier...

 www.tracytools.com
So doing this from memory, I'll may have to or someone else can correct me if my sizes are wrong.
I bought a set of taps and drills for the Aristo screw thread size 2mm with a 0.4 pitch and the drill was a 1.75mm. I would need to look back to confirm my supplier source, but I bought 3 sets of drill and taps.
I still have two, one was given to a fellow member of this forum who was looking to do the same as me.
So my method is to set up a crude jig for the hole drilling, and it is as basic as this...

...by aiming for the ctr of the oval with the drill bit and going for it, up to now it has worked out quite well, but you may need to change the fishplate after a while. I also had/have a reverse jig for the other hole as it speeds up operations when doing a larger batch. Otherwise you would keep having to turn the rail over to get the other end as it were.
The tapping is done by slow speed drilling, as my battery drill has a slow speed setting, and with a bit of forward and reverse to get to the full tapping, as you would by hand, but just taking it slow I can get away without that.
One thing to watch out for though not all fishplates of this type are the same, Aristo (Difficult to get hold of), USA Trains and Bachmann all have their variances in size and the expansion oval slot, and indeed some of the same makers fishplates can be different lengths, so in essence one jig does not fit all.
For me it started out as a belt and braces fix for lecy continuity, and up to now it has worked. I only have three feeds to the line, one in the shed and the other two are in the station area, yes I have jumper connections between the tracks as it is DCC, in the shed, the station area, the phase one passing loop and at the start of the phase two loop, which is yet to be finished, so is in effect two dead end spurs for now.
Still use copper grease when fishplating up and I have also invested in screws, whilst they have a different size key head they are the same dia and pitch.

I also use rail clamps on pointwork and the lift out bridges for ease of access for maintenance and access.
Edit, remembered my supplier...

Home - Taps & Dies, Reamers, Milling Cutters, Tracy Tools
Full range of left hand, special thread and insert tapsDrills, reamers, endmills, chasers, saws, milling cutters, carbide tools and more…
Last edited:
Rhinochugger
Retired Oik
Yep, I bought a set of ten drills and I bought two taps.
I've still got two or three of the drills left - it's quite easy to break them
I turn the tap manually with a very small wrench on the end - I'm pretty sure that you can get purpose made bars to fit over the end, but it's not worth it. Work it slowly, backwards and forwards going a bit further each time
Alignment / verticality is key. Don't be tempted to try and do one in-situ to save time
As an aside, and a tip to help maintain one's sanity - when joining Aristo track with the tiny screws, place an upturned ice-cream tub lid under the joint for when you drop the screw
Nodrog1826
Professional Idiot
Over the past few weeks I have benefited from various amounts of "recycled" building materials from the neighbourhood...
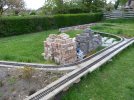
...bricks, 7N blocks/concrete floor joists offcuts and rubble, which have found/are planned for various uses...
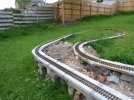
,,,but today has seen me playing with some blue/grey bits of stone that i have the odd bit of mixed with my sandstone pile...
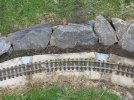
,,,not sure what it is, but it's a bugger to split/cut, and it appears to have an seaweed-ish smell to it, when you do get it split/broken, so I have been informed, but the smell is lost on me.
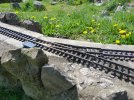
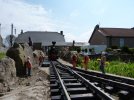
Anyhow as the previous picture shows, it has been put to use as a cutting side, of sorts, more of a boundary for grass cutting/strimming in my mind...
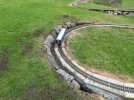
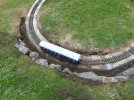
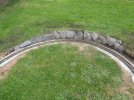
...it's more of a dig and bung it in style of building, than planned, but it's not fixed in place yet, so can be adjusted, but has plenty of clearance.

...bricks, 7N blocks/concrete floor joists offcuts and rubble, which have found/are planned for various uses...

,,,but today has seen me playing with some blue/grey bits of stone that i have the odd bit of mixed with my sandstone pile...

,,,not sure what it is, but it's a bugger to split/cut, and it appears to have an seaweed-ish smell to it, when you do get it split/broken, so I have been informed, but the smell is lost on me.
Anyhow as the previous picture shows, it has been put to use as a cutting side, of sorts, more of a boundary for grass cutting/strimming in my mind...


...it's more of a dig and bung it in style of building, than planned, but it's not fixed in place yet, so can be adjusted, but has plenty of clearance.
Last edited:

