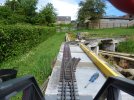
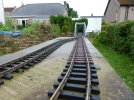
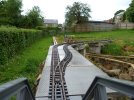
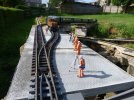
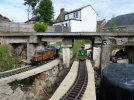
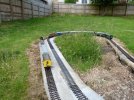
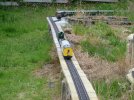
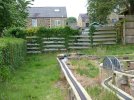
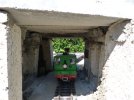
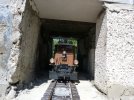
Eighton Bahn AKA testing testing RhB

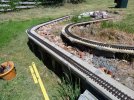
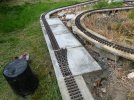
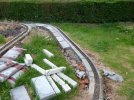
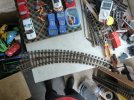
More loop building prep, as the civils have been in action in the cutting section, stockpiling is building...

P1040015.JPG

P1040017.JPG

...still awaiting the curved point to arrive, then the time to get a decent stab at it.
 
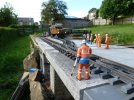
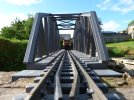
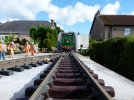
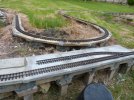
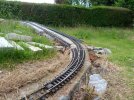
Well a full line closure today has resulted in the Lawnmower Bridge/passing loop end extended...

P1040020.JPG

...half slabs lifted and replaced by full size ones, the halves will be recycled for the next loop build...

P1040022.JPG

P1040024.JPG

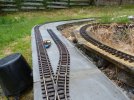
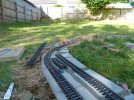
...track re laid between the showers with fettled curves as required...

P1040026.JPGP1040027.JPG

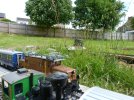
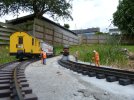
...then the hangers on, every outfit has some, I call then the photo opportunity guys, turned up just for that, as they have never been seen doing any work..

P1040029.JPG

P1040028.JPG

...so after testing, the line closure order was lifted, and the line handed back to the running department.
 
Last edited:
Although I am not in the best of fettle at the moment, today has seen the start of works on the final (Unless the plan (There isn't one.) changes.) passing loop.

P1040031.JPG

The before...

P1040032.JPG

...the after. So track lifted, four half slabs lifted, cement bed cut back and roughed up, new cement added to the hardcore and old cement bed, full slab then laid, track cut to allow for new-ish point and then re laid.

So it has begun, stiill awaiting the arrival of the curved point, ordered on the 16th of May for the other end of the loop, but not yet dispatched from the retailer, even after chasing it up.:(
 
Have managed some slight progress in the passing loop trackbed today...

P1040034.JPG

...whilst it looks rough and ready, there is a reason for it, because it is...

P1040035.JPG

...also managed a trial fit of some track, not yet decided if I want a wider spacing with a short straight between the point and curve. I am toying with the idea of a loop cum old disused station.
 
The verdict is in an I am going with the short straight between the point and the curve...

P1040039.JPG

...so without too much fuss the manual rail bending exercise has been executed between the showers today...

P1040041.JPG

...then add a straight five footer...

P1040042.JPG

...and then test...

P1040048.JPG

...so curved point aside (It's pending.) I am down to my last 14 feet of track, to be mangled, cut to fit, when I decide the length of the loop, and where the point will be installed.

I appear to also have some building supplies to start the two short tunnels at the Dead Ctr. loop.
 
Having been initially let down in the supply of a curved point from a retailer, a fellow member was in the process of exchanging his Piko one for a Trainline one, so the opportunity for the Piko one was too good to pass up.

So today it arrived...

P1040051.JPG

...It was given the once over and the fishplates replaced with Massoth clamps as per group standards here as well as the installing of one of my pass on the left reset springy springs...

P1040052.JPG

...so a positioning trial fit to see where it would fit in...

P1040060.JPG

...so pending the laying of the trackbed slabs, it was looking good, but I wouldn't have time today to do that, or would I...

P1040062.JPG

...and so this is the current state of play as it were, just need to install a short curve, trim the straight back at the joining point, drill and tap the holes for fishplate screws, assemble, then test.

But that will have to wait for another day probably Sunday as tomorrow is taken up with something pre planned.
 
Last edited:
Having been initially let down in the supply of a curved point from a retailer, a fellow member was in the process of exchanging his Piko one for a Trainline one, so the opportunity for the Piko one was too good to pass up.

So today it arrived...

View attachment 328923

...It was given the once over and the fishplates replaced with Massoth clamps as per group standards here as well as the installing of one of my pass on the left reset springy springs...

View attachment 328924

...so a positioning trial fit to see where it would fit in...

View attachment 328925

...so pending the laying of the trackbed slabs, it was looking good, but I wouldn't have time today to do that, or would I...

View attachment 328926

...and so this is the current state of play as it were, just need to install a short curve, trim the straight back at the joining point, drill and tap the holes for fishplate screws, assemble, then test.

But that will have to wait for another day probably Sunday as tomorrow is taken up with something pre planned.
Glad it's worked out for you Gordon, just the job :)
 
The loop was closed today with the final track fettling session.

So all that was needed was a test of the point returning springing...

P1040064.JPG

...even it involved propelling through the points as well...

P1040065.JPG

...going round the loop, forwards and backwards, but at least the word hadn't got out to the photo opportunity guys...

P1040066.JPG

...but then maybe it had...

P1040068.JPG

;)
 
Last edited:
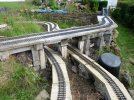
So now to the tunnels, which has basically been a ladder bridge since 2015/6.

Now if you are looking for craftsman quality workmanship, then this is not the place for you...

P1040070.JPG

P1040072.JPG

...now remember this is behind the scenes area, not sure how front of house will look...

P1040069.JPG

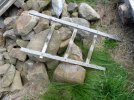
...short uneven ladder for disposal, if anyone is interested, I don't want to know.;)

Edit,

Managed to do a clearance test tonight...

P1040074.JPG

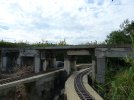
...what is not readily obvious is that there is a difference in trackbed height, it's the reason for the differing tunnel "roof" heights...

P1040077.JPG

P1040085.JPG

P1040086.JPG

...also did a run through test of the point re setting springs, from a distance, and all behaved as expected.
 
Last edited:
More work on the tunnels yesterday, which means that they had to be clearance tested again...

P1040088.JPGP1040092.JPGP1040094.JPG

...don't worry the excess cement spills will be cleaned up in due time...

But why just stop at tunnel clearance tests...

P1040095.JPGP1040096.JPGP1040097.JPGP1040098.JPGP1040100.JPGP1040104.JPGP1040108.JPG

...now you should try using two Navigators to control three trains, leaving the fourth setting for route setting :eek:
 
More work on the tunnels yesterday, which means that they had to be clearance tested again...

View attachment 329398View attachment 329399View attachment 329400

...don't worry the excess cement spills will be cleaned up in due time...

But why just stop at tunnel clearance tests...

View attachment 329401View attachment 329402View attachment 329403View attachment 329404View attachment 329405View attachment 329407View attachment 329408

...now you should try using two Navigators to control three trains, leaving the fourth setting for route setting :eek:
Not for my brain, enough trouble with 1 loco! Re cement, best to clean up off slabs before fully dry if you can. Lump hamner and cold chisel can easily undo work when trying to ckean up hard ment.
 
Today after the purchase of various spare parts, I have revived something I have had in my mind to try for a while.

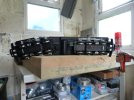
So as some of the photos have not come out, you will just have to take my word for it, but I have fitted a second traction tyre to the older Crock.
Now as it is on the opposite corner, it's not as simple as swapping out an axle for a traction one, you have to strip and swap the actual wheels over
because if you just drop it in the drive gear won't mesh.

P1040110.JPG

.. see what I mean about the earlier photos, i must have had the shakes...

P1040111.JPG

...but as you can see there is now a traction tyre at both ends, as well replacement skates and as always there is also something else that comes to light, yep light, one of the bulbs had blown...

P1040112.JPGP1040113.JPG

...so a haulage test was called for, just to see if a longer and heavier train could be hauled up the spiral...

P1040114.JPG

...additional items have also arrived so I can manage both navigators, and have the option to have hands free, I will knowing my luck hang myself.
 
Last edited:
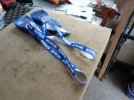
Not seen Massoth handsets with a Lanyard before, how are they fitted?
 
It's basically a cat cable connector with the ribbon, so it just plugs into the connector plug.
 
It's basically a cat cable connector with the ribbon, so it just plugs into the connector plug.
Thanks, I wonder how secure that would be if dropped. On my Tx’s I put in a Split Pin with a loop and the clip on Lanyard which does support dropping the hand unit ok providing lanyard is round my neck.
 

Attachments

  • image.jpg
    image.jpg
    924.8 KB · Views: 0
So having posted on another part of the forum using my phone, may as well do the same here with todays activity.
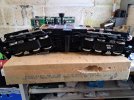
The rain has stopped whilst I was pottering in the shed, so now the newer Crock has an additional set of power pick ups on one of the inner wheelsets and a second traction tyre wheelset.

20240714_173749.jpg

Mind you given the size of the weight lump over the bogies, the 3 oz I added to the older Crock feels rather feeble.

20240714_191140.jpg
 
Last edited:
So having posted on another part of the forum using my phone, may as well do the same here with todays activity.
The rain has stopped whilst I was pottering in the shed, so now the newer Crock has an additional set of power pick ups on one of the inner wheelsets and a second traction tyre wheelset.

View attachment 330288

Mind you given the size of the weight lump over the bogies, the 3 oz I added to the older Crock feels rather feeble.

View attachment 330289
So, while teaching my grandmother to suck eggs, I assume that you've checked that the skates aren't too stiff ?

I'm not into skate - my railway is a skate-free zone, but the thought just passed through my head :nerd:
 
Back
Top