You are using an out of date browser. It may not display this or other websites correctly.
You should upgrade or use an alternative browser.
You should upgrade or use an alternative browser.
Eighton Bahn AKA testing testing RhB
- Thread starter Nodrog1826
- Start date
To be brutally honest 4 wheel locomotives like Stainz are never going to be that reliable outside in the garden. For one thing the traction tyre takes power away from that side. So you have 2/3 pickups assuming all working. Then you have even the slightest bit of carp or uneven track can take you down to 1 pickup on the tyre side. Then you get a stall, even dust or any other kind of dirt on the track can have an effect. When still on track power I gave up on all 4 wheekers running in the garden, though I suspect you track level will be better than mine is. For what it is worth it is nice to have just 1 battery loco and Stainz fits the bill nicely. Peverly the LGB RHB tractors appear to run fine outside, not sure why this would be? Could it be they have no traction tyres or like the 4 wheel railcars (no skates(both later LGB builds than Stainz)) they have compensation that keeps all the wheels on the track.
Nodrog1826
Professional Idiot
Gordon, have you checked pickup is on all the wheels and skates on the Stainz?
I would also clean the back faces of the wheels.
PhilP
Yep, all checked and cleaned, even had the carbons out and polished up as well, continuity checked with the multi meter as well
There may be a weight balance issue, stalling is in general when the front end is pointing down hill, but a simple press down on the front end, and she is up and running until the next stall.
(Why does it always pick the most out of the way/difficult to reach place to stall, sods law I guess.)
I am thinking there may be an internal wire/contact issue, but if I am going to open her up, I may as well do the upgrade at the same time.
Nodrog1826
Professional Idiot
Power buffer and light/smoke upgrade is now in progress...
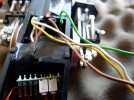
...opening her fully up showed another problem that needs sorting, not shorting out...
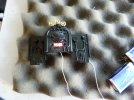
...firebox flicker location may be a bit unconventional, but it works for me, and that is all that counts...
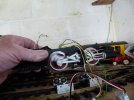
...power buffer run experiment with sound and lights, gives approx 25 seconds, of non powered running.

...opening her fully up showed another problem that needs sorting, not shorting out...

...firebox flicker location may be a bit unconventional, but it works for me, and that is all that counts...

...power buffer run experiment with sound and lights, gives approx 25 seconds, of non powered running.
Good luck getting it all back in, not a lot of room in Stainz.Power buffer and light/smoke upgrade is now in progress...
View attachment 318447
...opening her fully up showed another problem that needs sorting, not shorting out...
View attachment 318448
...firebox flicker location may be a bit unconventional, but it works for me, and that is all that counts...
View attachment 318449
...power buffer run experiment with sound and lights, gives approx 25 seconds, of non powered running.
Nodrog1826
Professional Idiot
It's all gone quiet on the Stainz upgrade front, and there is a good reason or two for it.
I had it almost done then I went and damaged it, not in the way you may think, I got too close to the smoke box end with a soldering iron, and scorched it,
so I have had to find a new boiler shell. The damaged one is now had all the bits to fit onto the new one removed ready for fitting when it arrives.
So when it gets here posted photos will show the new boiler sans builders plates on the dome. I have also gone all in and bought a new red running plate as well,
as this had a repaired crack in it as a result of an accident (Toppled off the end of the line to the ground.) a couple of years back.
So don't ask when I post a picture, you know in advance, it's the same loco, bit like the twenty year old sweeping brush, it's had many new heads and shafts..
Second I have been struck down with Shingles, which on top of my lack of sensitivity in my fingers, is not the best for doing delicate work.
Sorry to hear about the shingles Gordon, hope all goes well with Stainz. Soldering Iron issues on bodywork can be a real pain.It's all gone quiet on the Stainz upgrade front, and there is a good reason or two for it.
I had it almost done then I went and damaged it, not in the way you may think, I got too close to the smoke box end with a soldering iron, and scorched it,
so I have had to find a new boiler shell. The damaged one is now had all the bits to fit onto the new one removed ready for fitting when it arrives.
So when it gets here posted photos will show the new boiler sans builders plates on the dome. I have also gone all in and bought a new red running plate as well,
as this had a repaired crack in it as a result of an accident (Toppled off the end of the line to the ground.) a couple of years back.
So don't ask when I post a picture, you know in advance, it's the same loco, bit like the twenty year old sweeping brush, it's had many new heads and shafts..
Second I have been struck down with Shingles, which on top of my lack of sensitivity in my fingers, is not the best for doing delicate work.
Nodrog1826
Professional Idiot
The Shingles have reduced and the replacement boiler and running plate have arrived so back to work...
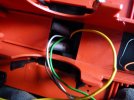
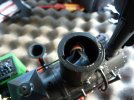
...Micro power buffer stuffed into the dome and the firebox sides...
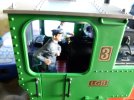
...second crew man added...
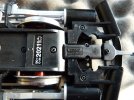
'''and for good measure I modified the front auto coupler, by bringing it back inline of where is should be...
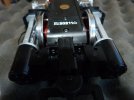
'''when i first started to fit these, i was not confident enough to hack into the gear box casing to get a proper fit so I moved it forrward 6mm, but now it's fitted where it should have been all along.
The Massoth blurb says to need to do do some modifications to do this, so cut into geaerbox to get it to fit, removes the cylinders bottom locating tab, so they have to be re fitted another way,
hence the soloution is to go with two screws to attatch to the gear box. You also need to either shave a bit off the red frames as its a tight fit or the moving part of the coupler, I went for the latter,
plus a minor set of mods to the front plow as awell...
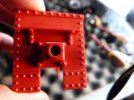
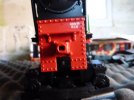
'''the new frame is different, in so far as i needed to get a round peg to fit into a square hole to re fit the buffers. Still got the builders plates to try and transfer over, and sort a few CV setting, as along the way I appear to have created an
inertia setting, I don't want, then done.
Oh yes one final daft thing, may origional Navigator threw a fit yesterday, as in the display flipped both ways, so at one point it was both backwards and upside down, so I was having to read it with the buttons at the top and all the info was, right to left so I had a, ZNIATS, 61, 51.41 etc., function key indicators, but as mysteriously as it happened it corrected itself.


...Micro power buffer stuffed into the dome and the firebox sides...

...second crew man added...

'''and for good measure I modified the front auto coupler, by bringing it back inline of where is should be...

'''when i first started to fit these, i was not confident enough to hack into the gear box casing to get a proper fit so I moved it forrward 6mm, but now it's fitted where it should have been all along.
The Massoth blurb says to need to do do some modifications to do this, so cut into geaerbox to get it to fit, removes the cylinders bottom locating tab, so they have to be re fitted another way,
hence the soloution is to go with two screws to attatch to the gear box. You also need to either shave a bit off the red frames as its a tight fit or the moving part of the coupler, I went for the latter,
plus a minor set of mods to the front plow as awell...


'''the new frame is different, in so far as i needed to get a round peg to fit into a square hole to re fit the buffers. Still got the builders plates to try and transfer over, and sort a few CV setting, as along the way I appear to have created an
inertia setting, I don't want, then done.
Oh yes one final daft thing, may origional Navigator threw a fit yesterday, as in the display flipped both ways, so at one point it was both backwards and upside down, so I was having to read it with the buttons at the top and all the info was, right to left so I had a, ZNIATS, 61, 51.41 etc., function key indicators, but as mysteriously as it happened it corrected itself.
Last edited:
Nodrog1826
Professional Idiot
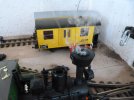
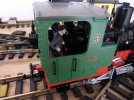
So whilst Stainz testing was in progress today, a low speed light engine run of almost a quarter an hour to from the station to the shed, with all the functions on, lights smoke sounds etc...
...I tried to lift the builders plates to transfer them over, but without success, never mind...
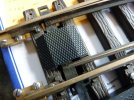
...I did manage to anchor down, by drilling and screw fixing from the underside the rails on the remaining R3 point, a bit of prep for next years additional passing loops works, never too early to start...
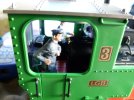
...the second crewman has been promoted to the position of driver, by the removal of the shovel he was fitted with...
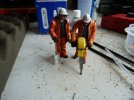
...now one of the turn up for the photo opportunity guys did have a shovel at one point until he lost it. He has now been fitted with a new one, which has recently become available.
Whilst his mate, who was suffering from a dislocated hands and jack hammer, has been re fitted as well...
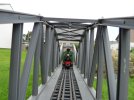
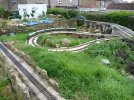
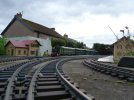
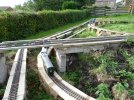
...also fitted in a five coach haulage test, on the un cleaned, damp and partially overgrown track, which went well.


...I tried to lift the builders plates to transfer them over, but without success, never mind...

...I did manage to anchor down, by drilling and screw fixing from the underside the rails on the remaining R3 point, a bit of prep for next years additional passing loops works, never too early to start...

...the second crewman has been promoted to the position of driver, by the removal of the shovel he was fitted with...

...now one of the turn up for the photo opportunity guys did have a shovel at one point until he lost it. He has now been fitted with a new one, which has recently become available.
Whilst his mate, who was suffering from a dislocated hands and jack hammer, has been re fitted as well...


...also fitted in a five coach haulage test, on the un cleaned, damp and partially overgrown track, which went well.
You have done very well with your Stainz Gordon, stuffing all that gear in is no mean task. Certainly sounds as if the Power Buffer makes the baby avoid stuttery running, the bain of 4wheelers on track juice on less than perfectly clean track. My pal has a Swiss 2-8-0 (forget make but available in the naughties) where the sound stutters on slightly mucky track. A power buffer may be just what the thing needs, but pulling it apart not for the faint hearted.So whilst Stainz testing was in progress today, a low speed light engine run of almost a quarter an hour to from the station to the shed, with all the functions on, lights smoke sounds etc...
View attachment 318945
View attachment 318949
...I tried to lift the builders plates to transfer them over, but without success, never mind...
View attachment 318946
...I did manage to anchor down, by drilling and screw fixing from the underside the rails on the remaining R3 point, a bit of prep for next years additional passing loops works, never too early to start...
View attachment 318947
...the second crewman has been promoted to the position of driver, by the removal of the shovel he was fitted with...
View attachment 318948
...now one of the turn up for the photo opportunity guys did have a shovel at one point until he lost it. He has now been fitted with a new one, which has recently become available.
Whilst his mate, who was suffering from a dislocated hands and jack hammer, has been re fitted as well...
View attachment 318950View attachment 318951View attachment 318952View attachment 318954
...also fitted in a five coach haulage test, on the un cleaned, damp and partially overgrown track, which went well.
Last edited:
Nodrog1826
Professional Idiot
As referred to in another thread, been looking for a longer single turn preset knob, for the Massoth volume control, that I fitted during Flu Lockdown, so removed the existing one, from the new crok.
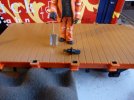
...because of the way it was fitted, required the gutting of the loco to access it, as the collar prevented it from been pulled straight out...
The plan was to visit ESR in Cullercoats to try and source a longer one, but their stock was not suitable as a replacement. So it had go back, without resorting to gutting the loco again.
So it has been modified to be a push fit...
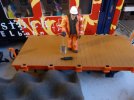
...and will just push into the hole,,,
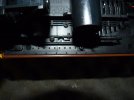
...ready for easy removal, if or when I find a longer one, or come up with a plan to extend it somehow.

...because of the way it was fitted, required the gutting of the loco to access it, as the collar prevented it from been pulled straight out...
The plan was to visit ESR in Cullercoats to try and source a longer one, but their stock was not suitable as a replacement. So it had go back, without resorting to gutting the loco again.
So it has been modified to be a push fit...

...and will just push into the hole,,,

...ready for easy removal, if or when I find a longer one, or come up with a plan to extend it somehow.
Nodrog1826
Professional Idiot
Tidying up in the (train) shed has resulted in a bit of sideways thinking, involving plastic wall plugs, black marker pen, and a stanley knife.
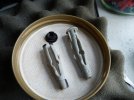
...no it's not a top hat for the photo opportunity guys, loco crews or passengers, but rather...
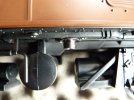
...an extension for the volume control single turn preset. It may not appear to be much, but it makes it easier for Mr., numb fingers here, to get a grip of the control knob.

...no it's not a top hat for the photo opportunity guys, loco crews or passengers, but rather...

...an extension for the volume control single turn preset. It may not appear to be much, but it makes it easier for Mr., numb fingers here, to get a grip of the control knob.
Lateral thinking indeed.Tidying up in the (train) shed has resulted in a bit of sideways thinking, involving plastic wall plugs, black marker pen, and a stanley knife.
View attachment 319065
...no it's not a top hat for the photo opportunity guys, loco crews or passengers, but rather...
View attachment 319068
...an extension for the volume control single turn preset. It may not appear to be much, but it makes it easier for Mr., numb fingers here, to get a grip of the control knob.
Nodrog1826
Professional Idiot
Spent yesterday packing things away, as it's getting too cold and damp (condensation) in the shed, to leave things out there now.
I still may get the odd day when I can get stuff out and run, but we shall see.
Sorting out things as i went, the odd errant, passenger, who had either fallen over or off their seats, etc.
Reflecting on what has been done this year, trackbed extended by a 100 ft +, track and the first passing loop laid, Stainz power buffer upgraded etc.
Then I got to wondering, if you can still upgrade the Massoth system software the old way, as per the instruction via a usb cable and a computer, or do you need the Service Tool now?
Nodrog1826
Professional Idiot
So we are now into the new year and the first sort of update of the goings on or not here at Eighton Bahn Towers.
Firstly the answer to the last question is no, well at least it was when I tried to update the system, so I had to resort to buying the PC Module and Service Tool.
It all went swimmingly (Not) as reported here.

 www.gscalecentral.net
Which also contains my woes with the Evo-S point motors, they do not work in the way that Massoth's promotional video suggests.
But we are sort of sorted now.
I was planning as part of the software upgrades to go with the newer RC set up, but it appears to be an expensive exercise for little gain, again as reported.

 www.gscalecentral.net
But on the general railway front, there has been some prep work for the second passing loop, with the purchase of 24 ft of s/h track from that auction site.
Consisting of halved 5 ft lengths and a brace of 2 footers. All have cleaned, and fish plated as per standard here for installing when the time comes.
All I need are two points and the actual construction materials.
There is also a recent, as in less than two days old plan to adapt the orig., passing loop on Ph I, to a propper loop and a curve chord junction.
Measurements confirm it can be adapted and hold a 6 coach train and a crok loco, the longest I have, with a bit of spare space.
No pictures to post, of progress, as of yet, but plans are starting to form.
Firstly the answer to the last question is no, well at least it was when I tried to update the system, so I had to resort to buying the PC Module and Service Tool.
It all went swimmingly (Not) as reported here.

Massoth PC Module and service tool and Evo -S set up HELP!!!!!!
I know my strap line says Professional Idiot, but this is getting beyond me. I have tried to set up the Massoth PC module and service tool onto the computer, without any success, the light is on but no one is at home as it were. Unless I am totally thick the printed instructions are as much...
But we are sort of sorted now.
I was planning as part of the software upgrades to go with the newer RC set up, but it appears to be an expensive exercise for little gain, again as reported.

Navigator Controller 2.4Ghz upgrade.
At the risk of repeating a thread elsewhere, I seeking advice on the above. What are the advantages/disadvantages over the older wireless version, is the remote range improved, etc.. Whilst I know what kit is needed re both my navigators and receiver, and it's going to be a fair wedge of gelt...
But on the general railway front, there has been some prep work for the second passing loop, with the purchase of 24 ft of s/h track from that auction site.
Consisting of halved 5 ft lengths and a brace of 2 footers. All have cleaned, and fish plated as per standard here for installing when the time comes.
All I need are two points and the actual construction materials.
There is also a recent, as in less than two days old plan to adapt the orig., passing loop on Ph I, to a propper loop and a curve chord junction.
Measurements confirm it can be adapted and hold a 6 coach train and a crok loco, the longest I have, with a bit of spare space.
No pictures to post, of progress, as of yet, but plans are starting to form.
Last edited:
Nodrog1826
Professional Idiot
So now the implementation of change to the Ph I loop begins.
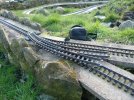
...remove curved point...
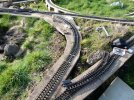
...replace with plain track...
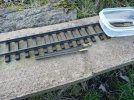
...the new rails were out of my scrap wagon load, were a perfect fit, only requiring drilling and tapping for fishplate screws at one end, so it was a waste of time getting the hack saw out...
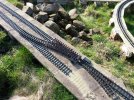
...illustration of how the next bit will look when i get ahold of a LH point, this will allow trains in either direction to access the loop from the main line...
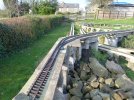
...the loop will fit a six coach train and a crok loco, but it's a bit tight for length, I have room at the other end to make more space, but that will be more of a civils project...

...the next loop will start on a curve, as for some reason I now have a spare curved point.
The new chord, which is now just a shortcut back to the station, will be worked by those troublesome Evo-S motors, paired number wise, and set to re- set to the main line after a time limit.

...remove curved point...

...replace with plain track...

...the new rails were out of my scrap wagon load, were a perfect fit, only requiring drilling and tapping for fishplate screws at one end, so it was a waste of time getting the hack saw out...

...illustration of how the next bit will look when i get ahold of a LH point, this will allow trains in either direction to access the loop from the main line...

...the loop will fit a six coach train and a crok loco, but it's a bit tight for length, I have room at the other end to make more space, but that will be more of a civils project...

...the next loop will start on a curve, as for some reason I now have a spare curved point.
The new chord, which is now just a shortcut back to the station, will be worked by those troublesome Evo-S motors, paired number wise, and set to re- set to the main line after a time limit.
Last edited:
Nodrog1826
Professional Idiot
With the arrival of a pair of R3 L/H points, and a R1 L/H as well over the last week or so, work has commenced...
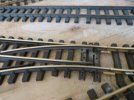
...the R1 is for the shed storage lines, and I have decided to remove all the manual switches and replace with over ctr. springs, several of Swmbo's sewing box safety pins, gave there all for this to happen...
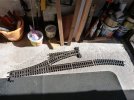
...initial mock up of the passing loop east entry point with the twin manual switches on and also the idea of a reverse into headshunt, loco stabling, or whatever siding...
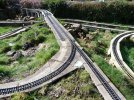
...so now to translate that to the worksite. which involved liberating/replace two five footers with some of that cut down straights I purchased recently, leaving a one foot gap to fill. If only I had a one footer somewhere...
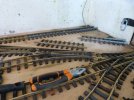
...now it happens that I have a couple in the shed in what passes for a headshunt/prog track, so if I liberate them and replace with a two footer, then I can close the gap...
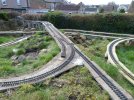
...so all now sorted, well not quite, still got to fit those Evo-s point motors, and that will be when I get a running session in. The side clearance on the Headshunt maybe a bit tight, but I can fettle that later.
As for the double manual switch on the loop entry point, it's an attempt to try and get the blades to re-set to the left after a train runs through the other way.
Not too sure how or if it will work, but time will tell I guess.

...the R1 is for the shed storage lines, and I have decided to remove all the manual switches and replace with over ctr. springs, several of Swmbo's sewing box safety pins, gave there all for this to happen...

...initial mock up of the passing loop east entry point with the twin manual switches on and also the idea of a reverse into headshunt, loco stabling, or whatever siding...

...so now to translate that to the worksite. which involved liberating/replace two five footers with some of that cut down straights I purchased recently, leaving a one foot gap to fill. If only I had a one footer somewhere...

...now it happens that I have a couple in the shed in what passes for a headshunt/prog track, so if I liberate them and replace with a two footer, then I can close the gap...

...so all now sorted, well not quite, still got to fit those Evo-s point motors, and that will be when I get a running session in. The side clearance on the Headshunt maybe a bit tight, but I can fettle that later.
As for the double manual switch on the loop entry point, it's an attempt to try and get the blades to re-set to the left after a train runs through the other way.
Not too sure how or if it will work, but time will tell I guess.
Tricky lasting solution with LGB stuff. Try some thin springy wire bent round a screw screwed into a sleeper, much softer to pass through but more reliable return to normal route. For other route a point motor shove one way or lever.With the arrival of a pair of R3 L/H points, and a R1 L/H as well over the last week or so, work has commenced...
View attachment 324876
...the R1 is for the shed storage lines, and I have decided to remove all the manual switches and replace with over ctr. springs, several of Swmbo's sewing box safety pins, gave there all for this to happen...
View attachment 324877
...initial mock up of the passing loop east entry point with the twin manual switches on and also the idea of a reverse into headshunt, loco stabling, or whatever siding...
View attachment 324878
...so now to translate that to the worksite. which involved liberating/replace two five footers with some of that cut down straights I purchased recently, leaving a one foot gap to fill. If only I had a one footer somewhere...
View attachment 324879
...now it happens that I have a couple in the shed in what passes for a headshunt/prog track, so if I liberate them and replace with a two footer, then I can close the gap...
View attachment 324880
...so all now sorted, well not quite, still got to fit those Evo-s point motors, and that will be when I get a running session in. The side clearance on the Headshunt maybe a bit tight, but I can fettle that later.
As for the double manual switch on the loop entry point, it's an attempt to try and get the blades to re-set to the left after a train runs through the other way.
Not too sure how or if it will work, but time will tell I guess.
