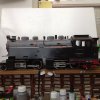
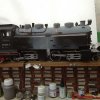
Harz Mallet Bash from Newquid Body and 2 x 20231.2 Chassis. Battery Powered.

Your loco build is really impressive. I see that the prototype and your loco has massive side water tanks possibly containing half an ocean, whereas the coal bunker barely has enough space for little more than enough for a medium barbeque!
Maybe the full size loco just managed to get between refueling points before exhausting it's bunker.

One possibility could be to extend the bunker with the one from the unused cab section, and have a bogie underneath.

But it's your build!!

Malcolm
The situation on the Harz now and I guess when these beasties were running was to do a trip up and down the Broken or one way between Wernigerode and Nordhausen before a refill of coal. Not sure what the capacity would be but must have been ample for those journeys. On the Selktalbahn where the donor 99-6001 still works they had a wagon of coal for topping up purposes between trips at Alexisbad. This Practice and the siding where the wagon was kept in Alexisbad is now no more. So the Coal top up always occurs now at Gernrode. I guess that may be the reason that 6001 has the extension to the coal bunker but it was present when I first visited in 1984.
 
According to wikipedia they could carry 2.5 t of coal which is the same as the "alt" 2-10-2s (the "neu" ones could carry 3.6 t). Sometimes what appear to be side water tanks conceal coal compartments, don't know if that was the case with these locos.
 
We have now got to the interesting bit, getting it all to work and getting ready to add the detail.
THE ELECTRICAL WORKS.
I obtained from Steve at Fosworks all the parafanalia to get the beast running. I tend to rough up a Battery Shape with tape and send a Pic to Steve so that he can have built what I require. When stuffing Batteries in a loco (I currently only use NiMh) it is important to test out what will fit and where. The pack in this beast is a 10 pack of AA's, previous conversions have used 8 including my Wizzy Cranks so the power and duration should be fine. Other parts are:-
Wiring Loom
Electron 12 Controller ESC-100
Reciever OMNI Rx-2 H
Transmitter OMNI Tx-2.1 Train
My Third Smart Charger, this time the larger capacity one.

All obtained in double quick time as always from Fosworks.
Note no speaker, I used the 8 ohm one from the Newquid Loco, right spec and going nowhere.

So a week or so ago on a wet day I put it all together and when the rain ceased tried it out. Disaster on the reverse curve by the House the bogies were clearly not going anywhere but upwards at one end. Not turning correctly or even levitating in the way that they previously had. Upon investigation there were two reasons both to do with the Electrics Installation. Firstly I had screwed some Ally L to the Plate just behind where the Smokebox Door is, this would mean that the On/Off Switch and Charging Socket would be behind a closable door. See pic below. However it was wrong done and the screws protruding under the plate were exactly on the lugs of the bogie stopping swivel! DoH. After fixing that by removing the screw the problem still persisted, I had left the Power Supply Lugs to the Bogies too high in that the wire was shoving the Chassis Plate up againg stopping swivling. Remedy for that was to bend the Lugs and problem solved it now runs perfectly on the line.

Pic below shows the offending Ally with Switch and Charge Socket after being mived back a little.
image.jpeg
Door closed nicely hides things.
image.jpeg
I had stuffed all the Electronics inside the boiler and taped it all in place with Gafa Tape, this was not the best of plans as the tape stopped the boiler siting flat. So taking a cue from Terry Sohams Funkey I made a Box to fit the Battery and the Speed Controller in as seen below, still a bit busy but much better believe me. I still need to sort out the speaker a little better, it sits nicely in front of the Cab but a better method to hold it in place is required. Also a sound baffle to the rear as suggested by Fosworks.
image.jpeg
So a short Vid of it running on Blocks.


As you can hear on the Vid there is an annoying Grinding sort of noise from the Chassis, whether this is a feature of the chassis, a need for a good run in or just noise being amplified by the Chassis Plate and noise box of the Boiler and Tanks I am not sure.

Anyone out there with one of these locomotives sans sound have the same issue? Mine were both obtained very cheep from a Shop in York so they could have been a slightly dodgy batch certainly I was warned not to try adding a Chip to the Board which is not used anyway now.
 
Last edited:
As was a rather nice evening I decided to give the Beast for that is her nickname now a run to test out clearances. Just one spot on entering the shed was an issue, this has had some wood removed but will need a little attention from Mr Angle Grinder to remove some meat from a length of Shelf Bracket! Still never mind.

I created 2 vids on You Tube and am please to say that she managed 20 axles round the full circuit even including the 1:30 that I was a little worried about. Plus she also managed a shunt of 38 axles out of Gernrode which includes a push back from standing start on a 1:40 so I am well pleased with that. Max speed scales out at around 40KPH which is my norm for all Steam Locomotives, though on the Selktalbahn 20KPH is the Max allowed.

Part 1

Part 2

I rather like watching her run as the rythmic pumping up and down of 2 sets of rods is quite therapeutic.

Certainly for me Battery is the future now that I am reaching critical mass with my collection. Next up will probably be my troublesome Pffifi or is it Ffifi, wish now that I had bought a non sound one!
 
Last edited:
Really cool looking and it runs very nice. Can't wait to see it all painted. Great video you have an amazing layout .
 
Really cool looking and it runs very nice. Can't wait to see it all painted. Great video you have an amazing layout .
Many thanks Jack and to all the other kind comments. Next stage may be a bit slow depending on weather being carp! But if I get a little organised I can look at jobs as a ten minutes here ten minutes there progression. What that will mean is sitting with some pictures and making lists and a rough sketch of what I will be doing pipe wise as it were.
 
Looking good Jon. You can run the sound on Pfiffi with battery, You wont get all the functions and it will take a bit of battery life but should work as good as analogue.
 
Looking good Jon. You can run the sound on Pfiffi with battery, You wont get all the functions and it will take a bit of battery life but should work as good as analogue.
I forget that option, may be a possibility but I would like to operate the whistle or bell at least, these being the sounds that most interest me. Perhaps a system with a magic wand to replicate the LGB Track Magnets in some way with extra Reed Switches mounted somewhere may be an option. At least then if a Battery DCC option is tried I have not trashed too much of the loco.
 
Very nice indeed, JonD! A very well thought out and executed conversion. The chuff and bell are quite acceptable, though to me the whistle still sounds terribly "synthetic" - I wonder why they can't get this right when DCC sound decoders all seem to manage just fine, presumably it's to do with the way the sounds are generated rather than recorded....?

Lovely job on the loco though!

Jon.
I have been moaning about this on My Loco Sound for some time, the only thing now that I believe is synthasised electronically is the Whistle. Just the thing that most of us will use. I believe the issue is to do with space on the chip, but as they try to do all things for all men on this ie US UK and Oz Whistles why not do decicated chips for those countries? Would mean that more whistles could be incorporateed. As for me I would say ditch the "all aboard" for a better whistle! But that is me.

Thanks for your kind comments on my meagre efforts.
 
Last edited:
181F18DD-9E56-45C2-A77B-FF5D83011A30.jpeg AD630FFA-7D73-4FC5-9AA8-1EAD5F42CD47.jpeg Just roughed out scematics for the basic pipe runs. Took photo and scribbled on it after importing to Penultimate on the iPad. Great app and a real breeze to get concepts in a rough and ready way to chanel the mind (such as it is).
 
Really looking good now Jon, perhaps you should call it "Dunnys Improved Harz Mallet" I like the next stage, adding bits of detail that bring a model alive. looking forward to seeing the finished loco :)
 
Been a funny old sort of day, had intended due to the "sea fret" in the nits that I would spend much of the day doing pipeworks. However next door started on the fence pannel replacement to my fence at shared cost so felt obliged to do whatever I needed to do my side, which was a bit including re-hanging a 1/2 Relief Station Building and other stuff. But did manage a little, the Sand Pipes all done on one side as shown below. All held in by Tension then finished off with some Super Glue out of sight to hold in place. When all the wiring done Gaffa Tape will sit on top inside the boiler just in case of Electrical Issues with the Battery Kit.image.jpegimage.jpeg
 
The previous post showed Pipe Runs with little explanation as to how they were done. Well anyway I have undone them today because I realised that they were too small. The wire I used should be used for Electrical runs to Lights etc. So perhaps a little explanation of what and how I am achieving Pipe Runs and what with would be in order.

Below can be seen the source material from 3 kinds of Mains Wire.
Top Ring Main gives me 68 and 54 Thou.
Next Lighting main gives me just 45 Thou.
Bottom Mains Cable Multi Strand gives me 20 Thouimage.jpeg
All of these can be used to differentiate different sizes of Pipe. In some instances I can define what a pipe run is for, most I do not have a clue. Neither have I (Rivet Counter Like) been clambering over Harz Locomotives at Wernigerode Shed in the depth of the night with a Vernier Measuring them in case you wonder. Most of it is done by Eye and in this Locomotive's instance being a sort of like liberties will be severely taken. So long as there are lots of pipes going all over the place to different things I will be happy.

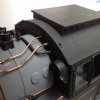
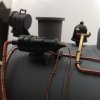
Below can be seen todays efforts with the revised Sand Pipes from the Dome and the utilisation of some Newquida Pipes and bits, front of 2nd right dome, bell and front light. These are all perfectly good parts and deserve to be reused. Electrical wires can be seen running from in front of the Cab and splitting to varying purposes. Also the long one from the cab to just behind the Chimney I define to be a Multiple Light Wire with one going from a small Junction Box before disappearing below the Smokebox Casing presumably to the other two lamps.
image.jpeg
 
Pretty well finished on the Right Hand side looking from the Cab.image.jpeg
It was getting to be a but of a trial poking wires through the varying holes in the cab so Inhave rsorted to short lengths of slightly larger Brass tube as lead ins. Thus far it works quite well.image.jpeg
Below I believe is the Steam Electric Turbine which has sundry wires aboutvincluding the large wrapped one. Just to the right can be seen the Bell with a bogeled nut as the striker.image.jpeg
Overall view of the front end bits and closer view if the handrails which have been made with knobs made of very thin wire, 2mm tube, thicker wire soldered together before being tgreaded through small holes (No.68) in the Tanks.image.jpeg
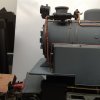
The right hand side has been started as well with the Sand Pipes, Handrails, Brake Pump and various Plastic Newquid Parts replaced.image.jpeg
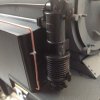
Close up of the Brake Pump and the start of wires.image.jpeg
 
Incredible build, considering the amount of hacking you have had to do it all looks very well suited to itself, like it's how it was meant to be. Well done
 
Back
Top