The Woodlock Line

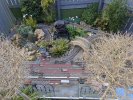
Great railway duncan1_9_8_4 duncan1_9_8_4 , it looks fantastic. I have just read through your thread from the start, in my spare time. I like how over the years you have slowly expanded and detailed it. Its a shame you lost the nice little pine tree beside the engine shed, it really added to the scene. Look forward to seeing more of the Woodlock Line when the weather warms up for you.
Cheers mate. It was a sad loss to the line. It was there quite a few years without any change around it. Then for no obvious reason went totally brown over 5 months or so. Enter the ferns, now they never let me down. Probably because it's so damn wet here in the UK.
 
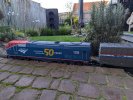
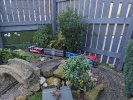
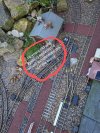
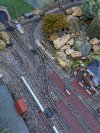
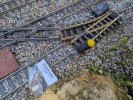
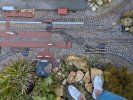
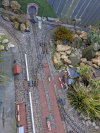
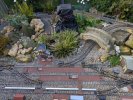
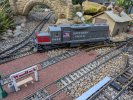
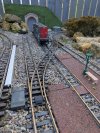
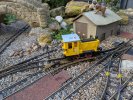
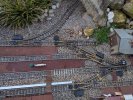
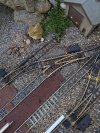
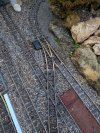
Today confirms that the snow has officially gone. So the P42 is out with a small trip working, whilst point maintenance continues in the Yard. I'm just waiting on some new rail clamps to put the new points in. I cannot reuse the existing ones as the thread has gone on the actual brass clamp. Oh well.
PXL_20250114_105133533.jpgPXL_20250114_091831971.jpgPXL_20250114_091744550.jpgPXL_20250114_091806599~2.jpgPXL_20250114_091809364.MP~2.jpg
 
Today confirms that the snow has officially gone. So the P42 is out with a small trip working, whilst point maintenance continues in the Yard. I'm just waiting on some new rail clamps to put the new points in. I cannot reuse the existing ones as the thread has gone on the actual brass clamp. Oh well.
View attachment 337489View attachment 337490View attachment 337491View attachment 337494View attachment 337495
More than likely it is the permanent connection under the pint in the sleeper that has come disconnected. The slidy bit by the blade end is not really reliable for current contact. Simplest solution is to solder a jumper wire from the main line rail to the blade which will likely resolve your issue. I tend to do this mod on all points when I lift them or get new/second hand LGB points. Oh and yes please use black wire!
 
More than likely it is the permanent connection under the pint in the sleeper that has come disconnected. The slidy bit by the blade end is not really reliable for current contact. Simplest solution is to solder a jumper wire from the main line rail to the blade which will likely resolve your issue. I tend to do this mod on all points when I lift them or get new/second hand LGB points. Oh and yes please use black wire!
Yes I've done this on a couple of others, but access to these is quite difficult, and I guess the age of them, I sort of thought well they don't owe me anything.
 
Yes I've done this on a couple of others, but access to these is quite difficult, and I guess the age of them, I sort of thought well they don't owe me anything.
If using black wire it can just be done in full view, becomes barely noticeable in the garden with some neat soldering. The solder and connection once proved could be painted track colour.
 
Yes I've done this on a couple of others, but access to these is quite difficult, and I guess the age of them, I sort of thought well they don't owe me anything.
It seems to be a common failing of LGB points. I too have had to solder jumper wires from the main rail across to the switch blade, done on the top side of the points, so no need to lift them. The key is a good, clean area at the point of soldering, and I also drill a very, very small hole in the base of the rail for the tinned end of the wire to go in, then the solder has a good key when applied. A good iron, and done quickly will prevent any heat damage to sleepers, etc. A fiddly job, best done when the weather is a little warmer, but worth it.
 
It seems to be a common failing of LGB points. I too have had to solder jumper wires from the main rail across to the switch blade, done on the top side of the points, so no need to lift them. The key is a good, clean area at the point of soldering, and I also drill a very, very small hole in the base of the rail for the tinned end of the wire to go in, then the solder has a good key when applied. A good iron, and done quickly will prevent any heat damage to sleepers, etc. A fiddly job, best done when the weather is a little warmer, but worth it.
I've never managed to solder to the rails, I always use rail clamps cut in half with a lugg. Subject for another thread, soldering for amateurs. Me.
 
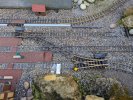
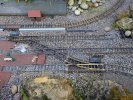
Well, after a night shift not doing particularly much, I was the meal man last night. Up at dinner today, and decided to get the new points in as a direct replacement for the failed ones. Just need to get the point motor on one, but it's bloody cold here in deepest darkest West Yorkshire.
Had to use new clamps too, as the pressure from holding the rails has distorted some of the clamp screw holes. One use only it appears. Tested with a big locomotive and a little locomotive. Just need to ballast them in when I have some alpine grit. I ran out and couldn't get any in the run up to Christmas, as all the garden centres were full of Christmas crap....
PXL_20250118_140926282.jpgPXL_20250118_140929660.jpgPXL_20250118_142228995.jpgPXL_20250118_142327453.jpgPXL_20250118_142359343.jpgPXL_20250118_142528509.jpgPXL_20250118_142539787.jpgPXL_20250118_143305570.MP.jpgPXL_20250118_143309555.jpgPXL_20250118_143711136.jpgPXL_20250118_143926484.jpgPXL_20250118_144048572.jpgPXL_20250118_144205809.MP.jpg
 
It seems to be a common failing of LGB points. I too have had to solder jumper wires from the main rail across to the switch blade, done on the top side of the points, so no need to lift them. The key is a good, clean area at the point of soldering, and I also drill a very, very small hole in the base of the rail for the tinned end of the wire to go in, then the solder has a good key when applied. A good iron, and done quickly will prevent any heat damage to sleepers, etc. A fiddly job, best done when the weather is a little warmer, but worth it.
To be fair, the points have been in situ for 16 years, with all sorts of weather from snow and ice to hot and dry, so they haven't done too badly!
 
To be fair, the points have been in situ for 16 years, with all sorts of weather from snow and ice to hot and dry, so they haven't done too badly!
That's it, they only started playing up about a year ago. Nothing I did made them any better. These points have been in those exact spots since this thread started in 2014, and before that, they were at Dewsbury for 6 years.

One thing I did notice taking them out, the screw holes had split in the sleepers on the points, into which the motors attached.

I wonder if because of this, the motor was not capable of pressing or pulling the blade against the adjoining rail. The reason I say this is, because when a train stalled on the blade, if you got down on hands and knees, and pulled or pushed the blade against the rail, it made the locomotive start again. There was no other wear to the points, everything underneath was tight.
Well it may be worth tightening the point motor fixings somehow a cabletie round the motor and through the track webbing perhaps?
 
That's it, they only started playing up about a year ago. Nothing I did made them any better. These points have been in those exact spots since this thread started in 2014, and before that, they were at Dewsbury for 6 years.

One thing I did notice taking them out, the screw holes had split in the sleepers on the points, into which the motors attached.

I wonder if because of this, the motor was not capable of pressing or pulling the blade against the adjoining rail. The reason I say this is, because when a train stalled on the blade, if you got down on hands and knees, and pulled or pushed the blade against the rail, it made the locomotive start again. There was no other wear to the points, everything underneath was tight.
That suggests to me that the other electrical connections have failed and you were making a direct connection between the stock rail and blade orvpossibly making the sliding connection work.
 
Back
Top