You are using an out of date browser. It may not display this or other websites correctly.
You should upgrade or use an alternative browser.
You should upgrade or use an alternative browser.
What happened at your workbench today?
- Thread starter Henri
- Start date
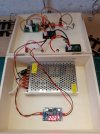
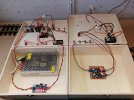
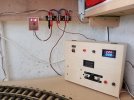
Really all that lot for a buffer stop light? You do tempt our inquiring minds with interesting e stuff!Turning surplus items into something useful. View attachment 304427
View attachment 304426
View attachment 304428View attachment 304429
View attachment 304430
View attachment 304431
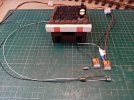
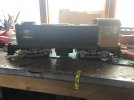
Repairing lamp holders for buffer stops.
View attachment 304432
Henri
refuses to grow up
You're loosing 0.7V already!Turning surplus items into something useful.
View attachment 304431
Repairing lamp holders for buffer stops.
The Shed
Citizen of the Republic of the North East.
For the observant amongst the readership, a new cutting mat, well four to be precise, uncovered from the mass of junk when conducting the shed clear out!
As Flu has struck again amongst the immediate family members, enforced self isolation in the shed for the next week or so.
What's been occurring on the workbench, since the clear out have a clear workspace to work in, plus regained five empty shelves.
Most of the acquired spares have now been used, replaced numerous plastic wheel sets with metal ones, including several pairs that were in the socks that went for a spin in the washing machine!
Plus many facets and aspects too numerous to mention, plus making use of recently discovered junk.
Three recent posts on topics on the Forum have piqued my interest, further research required.
Sorted out a number of items for disposal, will put the advertising on hold for the present due to the recent announcement of impending Postal strikes.
Recent update to the Massoth Service Tool program, appears a couple of my requests from back in May have appeared, need to investigate and test out the functionality, needless to say they are irrelevant to Normal Users, only of any use for designing and creating Decoder Templates.
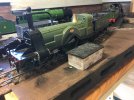
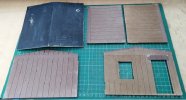
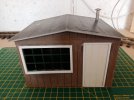
First up the following building, no idea of its providence, replacement window from the PIKO Loco shed, replacement door and frames made from plastic card, unearthed the long lost chimney, repaired and affixed.
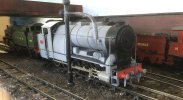
ECR short wheelbase flatbed wagon.
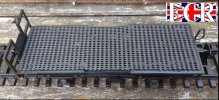
Disposed of the rubber mating and filled the gap with plastic card, removed all the protrusions from the flat bed surface, re surfaced with Lolly sticks.
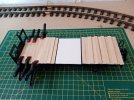
What to do next....a rummage through the junk box, found four old but serviceable metal steps, a couple of tanks from HLW, and a few unused LGB spares from their tank wagons.
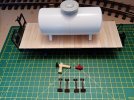
Basis for ideas came from these.

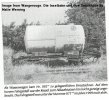
That's enough wittering for today, the sun is shinning and if some what chilly, orf out to the shed, later Peeps.
As Flu has struck again amongst the immediate family members, enforced self isolation in the shed for the next week or so.
What's been occurring on the workbench, since the clear out have a clear workspace to work in, plus regained five empty shelves.
Most of the acquired spares have now been used, replaced numerous plastic wheel sets with metal ones, including several pairs that were in the socks that went for a spin in the washing machine!
Plus many facets and aspects too numerous to mention, plus making use of recently discovered junk.
Three recent posts on topics on the Forum have piqued my interest, further research required.
Sorted out a number of items for disposal, will put the advertising on hold for the present due to the recent announcement of impending Postal strikes.
Recent update to the Massoth Service Tool program, appears a couple of my requests from back in May have appeared, need to investigate and test out the functionality, needless to say they are irrelevant to Normal Users, only of any use for designing and creating Decoder Templates.
First up the following building, no idea of its providence, replacement window from the PIKO Loco shed, replacement door and frames made from plastic card, unearthed the long lost chimney, repaired and affixed.


ECR short wheelbase flatbed wagon.

Disposed of the rubber mating and filled the gap with plastic card, removed all the protrusions from the flat bed surface, re surfaced with Lolly sticks.

What to do next....a rummage through the junk box, found four old but serviceable metal steps, a couple of tanks from HLW, and a few unused LGB spares from their tank wagons.

Basis for ideas came from these.


That's enough wittering for today, the sun is shinning and if some what chilly, orf out to the shed, later Peeps.
Last edited:
Nothing so creative as Shed. But I have an area in my workshop that has been doing my head in for ages. As I am housebound awaiting a delivery at lunchtime it was time to sort it.
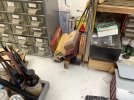
As you can see above the area is used for blocks of wood for use in modeling projects and sundry abrasive papers. All jumbled up.
I made a quick sketch yesterday of what I wanted thinking it may not get done for a while as original plan was to use MDF. But being stuck indoors and MDF being in the shed got me thinking some. I have some 3mm Perspex odds and a tube of Bostic Hard Plastics fast drying glue. Sundry bouts of measuring, squawking and glueing have resulted in order being given to another small part of the workshop.
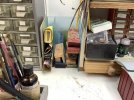

Rhinochugger
Retired Oik
Yes, I have a shed, but no area 

The Shed
Citizen of the Republic of the North East.
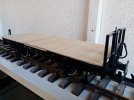
Spent an hour or two on refurbishing the steps from the junk box, removing the worst of the rust, wire brush, burnishing brush and finally a run over with a file, quick spray with Grey undercoat and then a top coat of Satin Black.
Fitted with replacement screws, whist at it, replaced the white springy thingy with a black one on the coupling.
Due to the kitchen refurbishment, now banned from said space, negotiations took place for an allocation of space in 'Herself's' shed.
After several hours rummaging in the back of cupboards and crawling about in the roof space, which played havoc with my Greek philosopher's, put together a spraying box, tested and checked over both Air Compressors, all five Air Brushes checked over and spray tested, all good.
Found the fittings to extend the Air lines, all good and ready for action.
Box constructed from sheets, 4 for £10 from Hobbycraft, preferably to the usual cardboard box and newspaper, which tend to flak off micro fibers, that end up on the chosen spraying surface.
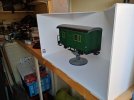
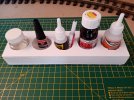
A few scrap pieces left over, bottle holder, not pretty but functional.
Fitted with replacement screws, whist at it, replaced the white springy thingy with a black one on the coupling.

Due to the kitchen refurbishment, now banned from said space, negotiations took place for an allocation of space in 'Herself's' shed.
After several hours rummaging in the back of cupboards and crawling about in the roof space, which played havoc with my Greek philosopher's, put together a spraying box, tested and checked over both Air Compressors, all five Air Brushes checked over and spray tested, all good.
Found the fittings to extend the Air lines, all good and ready for action.
Box constructed from sheets, 4 for £10 from Hobbycraft, preferably to the usual cardboard box and newspaper, which tend to flak off micro fibers, that end up on the chosen spraying surface.

A few scrap pieces left over, bottle holder, not pretty but functional.

The Shed
Citizen of the Republic of the North East.
Warning Cheapskate Alert!
Continuing the theme of recycling, reclaim, and reusing items that can be put to alternative good use.
If the DCC system is only able to transmit Parallel commands, the LGB 55040 additional function board is only of academic interest.
More info and details can be found here, and here.
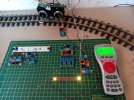
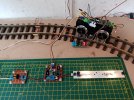
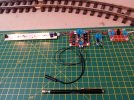
Continuing the theme of recycling, reclaim, and reusing items that can be put to alternative good use.
If the DCC system is only able to transmit Parallel commands, the LGB 55040 additional function board is only of academic interest.
More info and details can be found here, and here.


Parkdesigner
Registered
A little - and I mean little - progress on the LGB Abe 4/4 to Xe 4/4 build in the past two months...
I found some "1/24 scale" lockers on eBay a while back (basic 3D prints) but, they looked like they would do the job for approximating the tool lockers in the 1st class compartment of the Xe 4/4.
Due to the LGB mold, there are absurd screw bosses and random floor undulations (to accommodate deflection in the bogies) all over the model. As such, the lockers had to be notched and hacked to clear any floor interference when assembled. So... hacking and cutting with the Xactos to get them to fit has been the main effort.
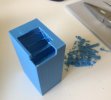
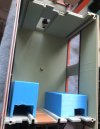
I think it gives the result though...
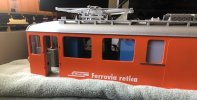
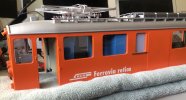
I also spent some time adding paint to spare LGB fire extinguishers (the type you find in their Americanized Cabooses - White Pass, etc). I then mounted these to the interior end walls of the Xe's compartments. Not sure it's 100% prototypical to the RhB, but it's just one of those little details that helps break up the sparse interior to my eye - sorta puts a feel of "permanent way / maintenance use" into the model.
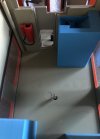
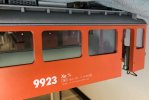
Also got the end doors remounted, and am now pretty close to reassembling the body.
From here it should be mainly an effort of mounting the remaining cab-end details and then turning my attention to the undercarriage.
(I've got more photos of the whole build going in a thread over on the RhB modeling forum if you care to see them.)
Slow and steady...
I found some "1/24 scale" lockers on eBay a while back (basic 3D prints) but, they looked like they would do the job for approximating the tool lockers in the 1st class compartment of the Xe 4/4.
Due to the LGB mold, there are absurd screw bosses and random floor undulations (to accommodate deflection in the bogies) all over the model. As such, the lockers had to be notched and hacked to clear any floor interference when assembled. So... hacking and cutting with the Xactos to get them to fit has been the main effort.


I think it gives the result though...


I also spent some time adding paint to spare LGB fire extinguishers (the type you find in their Americanized Cabooses - White Pass, etc). I then mounted these to the interior end walls of the Xe's compartments. Not sure it's 100% prototypical to the RhB, but it's just one of those little details that helps break up the sparse interior to my eye - sorta puts a feel of "permanent way / maintenance use" into the model.


Also got the end doors remounted, and am now pretty close to reassembling the body.
From here it should be mainly an effort of mounting the remaining cab-end details and then turning my attention to the undercarriage.
(I've got more photos of the whole build going in a thread over on the RhB modeling forum if you care to see them.)
Slow and steady...
Parkdesigner
Registered
Well, I guess when you're on a roll... 
So while I had all the tools out, I decided there was no time like the present to put her back together.
Step one was getting the internal wiring reconnected (in the right way!)"
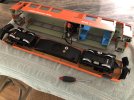
Then a little bench test to check all the lights and connections:
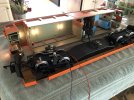
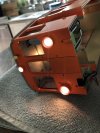
And with everything checked (and one bulb replaced - whew!), it was time for the final screws into the bottom of the chassis:
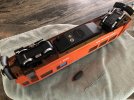
Big milestone...
Next big efforts include building the undercarriage aprons and appliances, adding the last car side details (wipers, whistle, cables) and some moderate weathering.
But - for now, I couldn't help but take her outside and get some shots in the daylight...
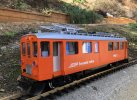
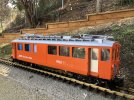
... and a short work extra (with the next two projects in tow):
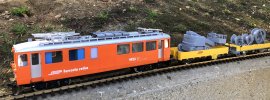
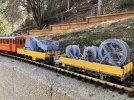
Onwards and upwards... thanks for looking!
So while I had all the tools out, I decided there was no time like the present to put her back together.
Step one was getting the internal wiring reconnected (in the right way!)"

Then a little bench test to check all the lights and connections:


And with everything checked (and one bulb replaced - whew!), it was time for the final screws into the bottom of the chassis:

Big milestone...
Next big efforts include building the undercarriage aprons and appliances, adding the last car side details (wipers, whistle, cables) and some moderate weathering.
But - for now, I couldn't help but take her outside and get some shots in the daylight...


... and a short work extra (with the next two projects in tow):


Onwards and upwards... thanks for looking!
Parkdesigner
Registered
duplicate - sorry
maxi-model
UK/US/ROW steam narrow gauge railways 1:1
Fezwig
Just a man in the middle of a complicated plan.
Not my workbench but one in Somerset building an unloading area shed for a cement works. Plus chipping a Stainz, again! Third time for this one, hopefully the larger chip will be ok now.
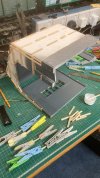
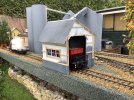
Shed now awaiting next visit to complete Wood planking from roof hight to just go over the stonework. This should then match the Pola/Piko Gravel loader elsewhere on the line.
View attachment


Shed now awaiting next visit to complete Wood planking from roof hight to just go over the stonework. This should then match the Pola/Piko Gravel loader elsewhere on the line.
View attachment
The Shed
Citizen of the Republic of the North East.
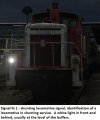
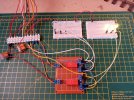
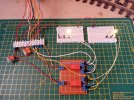
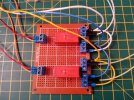
Been mulling over this scenario for a few days, on how to implement the light signals of Zg 1 and Fz 1 on a locomotive.

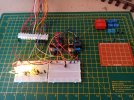
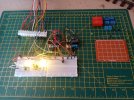
Astonishingly the Rats Nest in the above pictures, does actually work and provides the correct Function Key operations to implement the light signals of Zg 1 and Fz 1 on a locomotive.
Zg 1 is maintained as per convention on the F0 Function Key and directional using the Function Outputs LF and LR.
Fz 1 is achieved by using an unconventional method of the connections of NC1 & NC2, COM1 & COM2, and NO1 & NO2 across both Relays.
Using Function Outputs A1 and A2, assigned to the standard Massoth configuration and operated by the F8 Function Key, single light on front and rear irrespective of direction, when in Shunting Mode, CV 59 Switching speed (Half Speed) Function Key command allocation.
When Shunting Mode is disabled via the F8 Function Key, Fz 1 extinguish, and Zg 1 operates as per normal, and as per direction of travel.
Next task, pencil, ruler, eraser and several sheets of graph paper, to design a layout for the PCB, for the Relays and the associated paraphernalia to make it work.
Then a plastic card mock up of the front and rear of a locomotive, for fitting of the LED's, colour coding for the wiring, etc., and to provide a visual guide as a reference for a later time, when fitting and connecting up to the genuine article, the Old Grey Cells need a gentle reminder from time to time!
Last edited:
The Shed
Citizen of the Republic of the North East.
Connection diagram for Zg 1 and Fz 1.
Continuing on from this mornings earlier efforts, bit tidier all round.
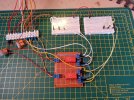
Continuing on from this mornings earlier efforts, bit tidier all round.


Last edited:
The Shed
Citizen of the Republic of the North East.
Continuing the theme of recycling and reusing ideas from one project to another.
Yet another use for the Modified Servo Tester, near the bottom of Blog posting is a video of the Beacon in action.
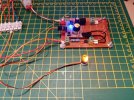
Manual version with either a Reed or Button switch, video of the Beacon in action can be found here, at the bottom of the Blog posting
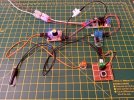
Yet another use for the now infamous Dual Relay! Using the LGB 55040 additional function board
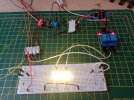
And, finally testing an idea for a future project, short video of the idea in action, details can be found here.
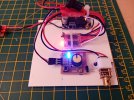
Yet another use for the Modified Servo Tester, near the bottom of Blog posting is a video of the Beacon in action.
Manual version with either a Reed or Button switch, video of the Beacon in action can be found here, at the bottom of the Blog posting
Yet another use for the now infamous Dual Relay! Using the LGB 55040 additional function board

And, finally testing an idea for a future project, short video of the idea in action, details can be found here.

Last edited:

