What happened at your workbench today?

Hello together,
you can't have enough locomotives - or maybe you can.... Well, at least you can always use suitable ones.
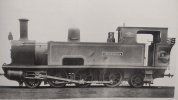
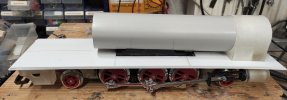
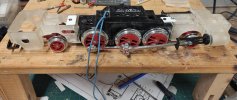
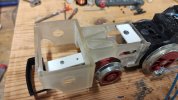
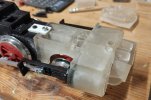
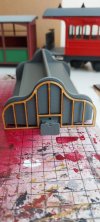
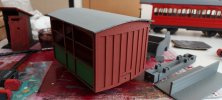
So I started to build the locomotive "Lisdoonvarna" of the West Clare Railway. As always, the loco is built on a LGB engine block, so the wheelbase is not correct. I adjust everything so that it fits optically in the end.
Here is the beginning.
 

Attachments

  • IMG_20230414_091059~2.jpg
    IMG_20230414_091059~2.jpg
    455.9 KB · Views: 0
  • IMG_20230501_173938.jpg
    IMG_20230501_173938.jpg
    195 KB · Views: 0
  • IMG_20230501_173946.jpg
    IMG_20230501_173946.jpg
    155 KB · Views: 0
  • IMG_20230501_173952.jpg
    IMG_20230501_173952.jpg
    323.8 KB · Views: 0
  • IMG_20230501_173956.jpg
    IMG_20230501_173956.jpg
    316.9 KB · Views: 0
  • IMG_20230501_174003.jpg
    IMG_20230501_174003.jpg
    336.1 KB · Views: 0
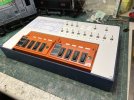
On a bit of a roll today, after postie delivered several little eBay packages. The shed now has its own separate control panel, which can be switched in and takes over from the main panel for operating the branch line passing loop, plus controlling the various new storage sidings. Made from an old light box, donated to me; won't be ready to use until the weather improves, as I still need to run boosted power up from the LGB 52750 in the main panel.
Morella_sub-panel.jpg
 
On a bit of a roll today, after postie delivered several little eBay packages. The shed now has its own separate control panel, which can be switched in and takes over from the main panel for operating the branch line passing loop, plus controlling the various new storage sidings. Made from an old light box, donated to me; won't be ready to use until the weather improves, as I still need to run boosted power up from the LGB 52750 in the main panel.
View attachment 313318
A very neat and efficient piece of work.
 
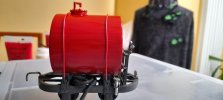
That looks excellent. Printed in resin or filament?
It's printed with filament. It was actually very difficult to get the convex ends to work, they're not good, as they were printed in steps that needed filling and smoothing and getting the high point in the middle was a problem. Still I've already put a docket in for another 1!
 
It's printed with filament. It was actually very difficult to get the convex ends to work, they're not good, as they were printed in steps that needed filling and smoothing and getting the high point in the middle was a problem. Still I've already put a docket in for another 1!
Forget another tank - can she do a 1:20 South African Class 91 ? :nerd::nerd::nerd:
 
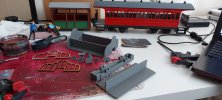
I've been building up some Ffestiniog stock to run with my live steamer. This is all 3d printed and laser cut from some designs on Thingiverse.com. I had to create the laser cutting file for end wooden moulding on the flying benches, but it was easy enough, as the 3d file was available. Some final painting and another couple to build, along with a guards van to finish off the set.

The W&U coach has nothing to do with the new stock - being the wrong scale, it's just in for some additional detailing
20230509_092035.jpg20230509_093918.jpg20230509_092750.jpg
 
What this does show up is how much my 3D printing has improved. The bug box was printed a few years ago on an older printer, and looks terrible alongside the newly printed flying benches!
 
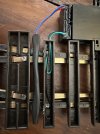
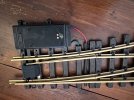
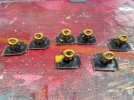
A step towards my wireless implementation attempt. I have always had trouble soldering to the track even using resistance setup, I was quite easily able to drill and tap an M2 into the rail base and connect switch pickups. I intend to use brass washers to avoid corrosion but they have not arrived yet so these will do for now. This is all the wiring these point need to operate on the layout:


IMG_0714.JPGIMG_0716.JPG
 
A step towards my wireless implementation attempt. I have always had trouble soldering to the track even using resistance setup, I was quite easily able to drill and tap an M2 into the rail base and connect switch pickups. I intend to use brass washers to avoid corrosion but they have not arrived yet so these will do for now. This is all the wiring these point need to operate on the layout:


View attachment 313448View attachment 313449
What is the unit on the end of the point motor? Some sort of relay or contacts?
 
What is the unit on the end of the point motor? Some sort of relay or contacts?
Its a potted switch decoder and amp. I can address the switch motor and control it the same as if it were wired back through the more traditional function decoders.
 
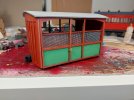
Work continues on the Bug Boxes and Flying Benches.

I did some detailing on the Bug Boxes, adding some mesh to the lower part of the window, and adding 3d printed door handles I designed.

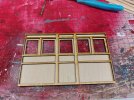
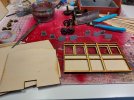
Underneath, the classis has been modified to allow larger wheels to be used, as that should help with road holding. I redesigned the Bug Box, so that the entire body is now wood. This saves about 10 hours of printing and gives a more uniform finish. I initially cut this in 3mm, but I think it looks a bit heavy, so going to try it in 2mm and see which I prefer.

The same chassis improvements have been carried out on the Benches, and a lifetime supply of 68 old plastic wheel sets turned up yesterday, so no shortage of parts to make up the new coaches.

I'm testing out the latest software release for the Simplify 3d slicing software I use. This now has improved surface finish and less scarring and odd surface finishes. First tests look reasonably positive.
20230513_175612.jpg
20230513_175704.jpg20230513_175817.jpg20230513_180453.jpg20230513_181149.jpg
 
Finished up the 3D printed water tower (brickwork from an old PIKO Sonneberg signal box) and it's gone to its home in the garden.

7CfqRnm.jpeg
 
Back
Top