What happened at your workbench today?

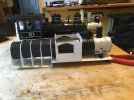
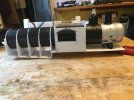
Work on the wooden bug boxes continues.
I cut in both 2mm and 3mm, and decided on the 2mm, as it looks to be a more realistic depth of panelling. 1mm might be even better, so I might well make a 3rd prototype! The 3mm version will become a grounded coach body, so nothing is wasted.

K1dUjKbt-YhY2O-HwfwSN3RJXLIew4oTra5R0jJH9fNCV8vDPGAXVd9QdyhK1q5Fd89-xblxhvMF-TKVicrkwdlYwRxJTVDwNB3-4dbZVYCMUQXNVAsVDNXTdrwi2wl5IVhyEJIaRJHk6MLwqRl-59gXkBqLxUFnHLKcKh9GDjyi7pZcZ0eyiPF9BHRHRB580K-mF0WJQWIhchFxa2WQd_SEpkb6wb0c64aW0prCFcF7YCbiJzBpFtsPKVKR3LP3xNo_S158_AZhhMxkPz2YCkfF3yB8gsn6DtU6XjoVLmTxfEmDuvDLBAoWZnHqP9udEHz7Wgupgadmo7hsB9ylp4qt9QPnVP21DhumjRyFZNseyDIC2q8qGFlZ2FHekAXJN7dkdpwSqeNGgc1MLETYyXAwKUMruz0nWAMDfwzuNYII5jWFJ_QHdoLnFxW0wUmoyUEOnUnOr0-Pb6iIZW57nXRUUpxE0m0PrPgtq_Ro_dmgPyebzVm7mF4JNFjNBjqhKv2m477bl_DZwedtdJtJaq-RccMXjzyV8q1J1w06QDCfeqni4MXB73Xd8glDC-jdb3Lvdrqd3CXaeDSu9Bvso6TrIw8a9g9o6Eb6Fbx3ibwFqchhVCCve66VQ33x8MtbZxH1rDFx6eevhBleDtkKh3bexixF9UmHJxG1Jx69OsXA702lYhRQMWUQS7ERcbWfcehUHWbBsjZJ_vGmiaVYtUqMEmxmPcgRIj_cUH_bT9p_33cvrPN70FltJJEwvoRzappep0Zw6rcMFHyDm2KaLKznwNX8gMEmTf5cLqtfFR8ZwzHxUz-sSct_7hd6yzkvqi1RCmFC6ozgyGncGiX99BS9IhPZu_iUwPEspa13c4QuJ072DMtxXxwSApg2ie4RXWcSguU_WVOvQDJ5MA3MQ3wkcVnPIxwSzxNTEDSgX67lUZxudQ=w1920-h865-s-no


The rake looks quite good, and the difference between the wooden and 3D printed chassis is minimal.

q-JTVk9wR-5H088VmhOBVZt3rM-FX-viZJqWFkgrURDxq0wAUn5pbVlRkhUXFAmDWFEuXSczAKkCDITtX2ni82uOrOhNPWyLAutTCnDTJlomPbdKVqA02MzoawWwD7Ws0rqAiGBn84N-SM9gDZFe3ICGaqJiJy6dD-DHD7PuoukwOjuvVtwu5Nxxj3SVbOzmTV48qAiLKCTtAHOju3-MfzT05VAHC98uJCGYhkt643Al7cAhCDPpGpir0dlBx9yqqutpJPSVCgnaQG3nx8KQwSjJCuCNQYTYzSIqdgzA8k-cCCpZI6tTh2-h0hTXgKBarASmoIPsY3oNH4OZsE_vM-td0oAPZ2dw0EnGT65m7KekG_1vfiw90Pkv9w-kKroX5TtPZ_-OkQV-Syw283cdmiWC7yMsF6Z5Hi73lczzMInFhXhs52xbrzBJo2O2ZJIzXdDWfJx-sMBTajgA2w5DTqtah7iRdSJ7D0Ecl-9YGObgQWauayDV3fFhoGj9-wAwlw2FKS7Wz_nPrSzKJ1kidVexrOGOuT8jedih540P0m8EoeeiTQNdRh9FfSREA8zQP3ilKhphWU9KSSSDTQCSgufy8-bAvYRsYpMzbQhzE4Kdo7bPjxNBUVHWUnD4R1IxYmi-4FTNsMyqqokzXDPdali4Qc6kBLOhJDgbmPuBkAzE-W03oQxqBhVPsrEkWR4gDH2kEsbudYJrIsVTgpshj4AEGjZ-Ch3bP7g2Tj0JQHO6Djf4uBm5L-ukmy1btSTHeVZIoSP0_5BIQRDOrj9U1DJLQvtS386XOIi2ep5LhTLx9ngOHzVazqMGvE9BNpwJ19wItbnTLkIzhvXm6NKhyd6j4qmXZ3lEHhCU75ocobP1oRFgX2tO4dY1bnAkea9jX0VUTWIWg2ZiIUQUR90ApWk1TLieUGbyS-sxTYn0LtxPQAeCzA=w1920-h865-s-no


ihgrH0gDvG6JGlkGuBdISzcbjdET_ZFhNjYUdbOYkv85QmgJj7GydL7Ye62XgGTVvMuF72hYfuPQltPdTNb7byzUb63hyBbM2HFIWF9LCHSIv_bnrWe4cXFZGduFEVDCoahqKMYHAPl5BOM2T_tqgF9n7tQFbM2g0mzxmb6pvBKp4TTETMYIpLK40wLHpxf2PoxcW5DLiYrt8YinaeNx83bqoCbC2Gl3zHwns2ccUNmYHzC-dtMr0hXAxeogflm_C2VEJDEG-RxMrU3OhUPb0NGt6sXuBUxURZIzOepYv0Ads7Ny-q8wVMCTEzZUnacb7XnX8CKshxMJA6AYn2YTjbgnSulB95Iv2_fGdv-SrVXs_xg2FJG5vOI0D03D-XibboA_gwHY0Bb-Kt0R4w3s1wLSL3StPLdh0T85MomKo5jhjcLYE_L8F-dFCoFI4S4dKChljJhJfvAeNB5lnHbp_mtVhpZXrvSreJcB0mRdRdTOhc-0ZFunvZVGeEPztAc8t9fT79hc_HHlgJLzDMB2_6WqchTmo2Cdw1zEyW8OHcj3epNZrToxCYCt1ww_VD80RW956b8kRTxz2JsCYqNdkJtwK3f2xT13Y-hmsgnTNMNdDQVXHDOvYZAHibEoq8nQ7Hap1EXSDtZYEF4oVMYu3A5JjZ9JY3VhlQJNxkXBHNWIzMtuis-KR0_heGZ1u6oFWuOSXP2rxwzSGhJyP5LiRPONlfFU2Esjsppy2fWhJ5zmB3W_LHf8Ih8HM4OLGHGGyJgYlKIBI-aYnsZgDGJ-qEiE2B9jSuigDJJEfGZ-ujdQw2DD1lyPQNu8gXAgbgGQ0JG78HLMpeW5cV1_5ck-lylfBaRd29awJ7UUUfdDXn9Q9abjh3M8vm8_ag_tIebem2zzoHr678PyrcRMaw9vsA0MhM94q_1S441KTzEp4EKzNE-Nkg=w1920-h865-s-no


The chassis have now been modified so that standard larger wheels can be used. I've designed this so that the part is reversible, meaning that if you have good ground clearance around the track, you can have the prototypical body height, or if like me, you have platforms that are closer to the track and would foul the bodies, you can increase ground clearance by about 6mm

Vsva4xj8znnWMvWK2dpdxOWV7hPywjaym2GWqrfSxkx_6Sw6r_N8JKqxEXO5_n8iADRvtRYSnbh7JjV22U3KnmpbsbDfLXWZ7bt5tosm4UfmgXz86MauNFQxFnC3wKedRgnEGvrzCOF_y7MTY1-F-n5iLZv0yUulPxdsfWGw07iayRwwD4bTd13R1cXwiXi_aFbCDsULu-ngUpTa4jeB3-7MEB0imQG8JEXPZCtx6oTUQZYDAlKQoCoTlP5Vw9Y170GPscEUjMesmZRW7bLsMi9srYWHekeBjckLCE6U3bjA2xhCY4PiaiXQ6xS2tdVmfPC0AV49-yXeQ39DvW1-MldLYL1hpcqWHGViRofkKPMKhdAC9-CPT0PMALxRVXfCXgSa6bHqQNDRsshxo3qyazFJiKhJPsDeyJAi--ugugFB6RTRip3SoKQG1YXg0I67Vi7By7Z2eiyy0G2meJAZ1DhGFdeBssQMglr0Ek5RUhSDEYTJDv7OM5uDEVDNmaVxjAsMhq5b1eQj-7pVCVNtp-liNfEw8WRtKilgaryFhkAc4z96tSC5YLd3v2vIvp4EynfpSSKanfohceKqy32XoT0RSqC9wQwJuq1SRetyUlpR3TWudvB7Ci1uMhReDiQC45m3UmTP4VQ_5j_KsNCZKYhz710UFxf1VXV0dU5Ok6qSjOQL_IxcaeuSUBJ9iPSx2xfUO0mn36u1y8XBmoQn2EwFNULBkk1O_2RDhWT8fl7jiL-vpGFBGXtoALy2bY6dubcb7WryHOJtpmnGtofFxcYe6mhd8fr5SFfZiw4GqFzdoNrIsSB4FMCxAHHQzkQMFtdoM42FSK87x7C5EAVQLEwPevatYL5UHvwk1xBP_UYyJmh_2GpSkOJSM5qLiyMdZuQ7G4n3Xs_jDC1vf4EDoWqsHeAFRy2IBUHE4CrqerCtcFP8qw=w1920-h865-s-no

vs5DNcvKY-HDCgKvVLapm2QLjs5SloV-u_uQlQorlgi43nU-Q1Ka67AwOMNKb7wL5mWTq2eE7JnIA8L9VRFuKqotYhsfBkKhswYxVJN67kktIF-_Hee9Wv8-2eo7lTCU4EzdhKB1r4je_-V4hKiBLEMag5iNMzKpfb2Q3rUAoTOOndwKr2CwW2JPH5zIVOMO5n9yWyHvX19G6hXt-sMkFgXlOzXjccIzx09x7jcZ10KYdbDtH7T9uENfIywh0IwzMio_xk0c536G-i6NcRYHw9P6WpLB3LA66vbqHEUilvM8IAdI61dfsPY6_UHTpcqSEcUG6XQTSD03kXlKQ1BfHPkGjMU48s8KU159wBGXfegLKI1O4j0-8Ppy1RzJw_-eUiqOfMzMSAlES3VteQTeJTnaOjKXJlI21Sf3g_7Uo00VM4JmiAvjgzFSShjQ9lSAQNQN882krgPWjN-1qrvMmmxR5xM7BItI8jL98KMwp-sNmJlclQb4kyySomyJfL2eQjQjJtznwilzkq04LeU-9y2AbARTaaA9mylCt7wFvvDsayKR7cfHjuBYZ1-635zWREUgqsSTY_VZcHwtZEHFjKzoKdkgFZddIEhcFb8Ixu7Bygg00Ujj0G8EoEuLZlSsPDEK-KCv6JoLflyVnlDDXFXcDP2T-IvsBNj_eG5kFTZJyTbWqgh4G8pP4qGWRkBPGgSqH8Zfmrf0wrZJKFoSBb9Anp49sUtp6JFXZmRbKrT3KfRUpHnNdPHM3qFZVw0xmd_k1q4OdtPlmTvCcKPKcEKl-4NcL85InepmqXXg_04PbB8OYpkIOZX90Z6QyahmQhxPlmXWsTb_ufLuqaIpV5CUOVzx2ouKi-gSJhcaRLSo95ZUxsgSLQ9fvQbdwMu_BIphEjLuQbC0YssO8vyCwTAoD3XWltZhYqkOpAVKrXS4n9zf3Q=w1920-h865-s-no

umC7aRULqHK-_XGXLkzg2lhBLXCNE4JCyKLGV6IF6TZEMNUuJIpfMtsD1GlKu6aJb7Hcr_xy3p04oGH_dB7aexbGHinedU-y0fksIQ5OtTvFp1upe0ffEbJDVHaiq8-oq6hUOM9Qka4fGeeLF2_0D4ZQT6ZIMtSZdpmXKGl8U7G1gIgTl_j5PpOncLmV2OfE-k-tgceyfZDLx3DIaSmUa9JhZHopy2QLoeHD7d_4-czMC38w7X4tBeEZAlK8HdEb8gEHhQd2IpTfqBnGQwYhVpzLx7dtk08TPzjkW-XXdEo9a0-kt8_MpvrRFtrOXhhQIDzcmQvNwym-9JdUfmpPtV_59ldUwcQKfkJTR8rgRLBmX1AUKA40M6qkbPqY4Db7xELT6HctZX8FKoc9zNSe3aneVXUS4elDrEnf_1jfUnclei4ZeP-WzK-Ajva0LwoKyUnJamM6pUMz8668rym_R_PSska2WSRrdvmnoEjYkOhw3_4729G0RwtGVl6sCfLhogiA1zR0rg6mDwMBmepjz2nif2Qj4O-TJiz8IzqzMXo1m3fa6knU5EuLS24HnEtNtcRVV5EtJF8p0tdMKrZpjf0XpjWT4IvYzKf8sKoJYjrj4yxdvaNgnTWZsyxzKOeF3tRYc_A1xozTHeDwie3JeTXwthZIAp9i-1oSxEYFezhoU-RnJ3679olRZ0BvrzYHZv-J59AcgcGSiL1XMY6HUjS6VY02de-W2kX45pSyXVywlu5I2U_ZJXiHNhNbKGycCaMCPSywfr8q5nbjbGA1APQwJ0S90wy44riGaTeCApklGZNo6RASubpPx2KqhT4IS3F28bU11N7hMb-M6OUBiI2yCTmfU26HxyM7-UsPCjzIy2Ikh8XjAPuMeCRJ6duq0CGhUztPvxYEn1hldskEeTMvVYVZ1e3i-4BRZ13z8FMeym9C_g=w1920-h865-s-no

7KZg79p8IvIzyUFnExeRxP8fQrQrr3vYVupcEgPxGH1x0_LsDpwQZ882cG9zbSLZfiSoO90kIwnivm0rUXIO02xgg9TDQOGdXi40H5AlBPiNCZgtGRkxgiVenJayh_qWVoBJMEfP69JV_BEY_27bh3Z-YXy34p-KY86ODHnQ3OfMrArLU82EPnY95rNaeCWIyf2u-bvMPX_QL2LyrveUAtc05QB_j2_MLIkPsN1PRheOX_iERLwd7AZsHID6bRup9bH90V9Um60c7LDz1R7_fBOMxQbuzWvGvFpNOvm9Q-PDzp333xXrmHNqTdqVEfujow_pMHpEoaOaA7-n209bnO_UxuX2FbVQ74PgG2R3aCX6tcmHVkOdZ94yOYwytqezJ2xk0PxDkr5l74I9AfDZg7he4vIeckk6BTCxCyp4iUoNfe-O4Dw03CYpl86GvvmVLzDz2MuRt73mYef9RNqSmf3egnlNvoxjlTNTHsROcR0ZdtkJXBxKEatF1MezcZtKU4Ov7xNF8eskqtfUnD9kxLWnvr0vCO1_lb1CrbSIZPw9mQ7kLRUp81sFfpAxsMEN5te8Y9cbXm-mDFNhH91q4WIehLO2U69FAfbfE1X4RQZcRlfz42Mo16j5qIVZF0CMMnTU5sqUY4rQEeHciiiItblJzKOuUSlZEw-HYr-TFfxdaEd7BCkJL8W7wZHVI-NUdiIV6mePXtMyisPAd_jrMeKwJUvzXAGGigneVoCckwt8uODEnUWCocaWyG6O-naFCiRhqRGxdx0TNYL6E7wsqW8rkPOQScBHBlAN6ov-_yGBBWhCI_HPiSsgkkvlysdIxn1EEXrdKfGnaHVtkQgT93RG74u-crTCZWx3JyPaLjFM_IyP3mm_GOMaGoIb0lGzcLhIFS9SJ-aRIUrQWDjIVNaFIut_TFL50bcUNn9U34QLHXafZQ=w1920-h865-s-no

The roofs for the the bug boxes are made using a 3D print roof truss. I need to slightly adjust the radius of the end panels, as it's about 2mm out currently. Not an issue if the roofs are fixed in place, but I make them removable, and the gap is more obvious.

Znp1vcJFoLKald03Ylsoh_m9jCPekj_jBMmYJX5iADk7AGFha1qIMQDjdjKYVn5iy7nAMV_j4dqQgrcSr1m2FYzBs-tS_wyrdEki5MPVNPGBw0jUtWOqw-oLOxxFpcyfPn22XeNDGXA6-9giXgxfQ2ig7aGYauwCd46XuqXinh4aiTBgpdvHim56zeVoMSmwgIsShq6QjA17CSqDbmUbZT9A3OtvaO1YUiH8IuCxlULL3GYF_NXcR0LYeRnIDQnNrbHb4XC4yyYw8NyBIhmaeHxJ-WBEGJh7cFEjmfxpTiQ9Ur_KXxLZZtZ-rFjOjtSBiPzv8z9v6Gl-Dw0v8WWHHyQpiO97R_FKXTySWT0C5HyGHboe6_0kxs48iAuo_fcxZNt9nFwsJTcp8ACvda6S0CRiXu00JFcmIqqmt3yiB9nynS1JHkVrA1hV6td4rWYKkDoQ2vtfvjuB8JwOQinqvkxWXtjp0fJbyZVx1hp52rk-QvSeSS0aJQ9JCeqmJol9gOuUVXTydNeb108le_GJVAo4SwIcgzUJMYPNG-F6Uo_G3-ZgzY8f-81sR-O1TzFq9vLxbGUQSXhmqA-EP1uixs-5DJmUXg2XnrctlrBKXVoLeNQhKj-aLFjaKrFiLBXdh0yS-jN4GEq9u9ORRYronEziEg8KrCOI6uC6r0a01zZxHSIdg34ti2hPK5n8t7InzSdSsHseR7EjB2VKmXLVrVELx0XPX8odTgjKDxDFjGcpAPJNq9SsGX2fk4lHq9DDtXlIvS0bp2xa_iIDTi-TUAebm6zAY_XJ7v6rkjNR7Z32kxpqNDa5mlhlVLac2498w4fbiXj3sAXI2yvBrTZTrciYRyc2M7VD0NC1B6rP3bdTLJUEcbxa9EPi-Odse_qE4UVs5y8BfFRk97Yr4j7AJ6zjWFj-4lsVo3IJkBMmigel94dCFw=w1920-h865-s-no


Next on the agenda is some benches, along with some more detailing for the coaches.
 
I understand what the wires to the track are for, but what is the purpose of the red+blue wires that disappear into the black tubing?
They are redundant for my application, they're just for safe keeping really. It is an input to the decoder in case you want to attach a relay trigger to switch the points or similar. I could have just cut these wires off but I like to try and retain the full capability of devices in case my needs change in the future.
 
Last edited:
For various reasons I have not been at my workbench for a while. However as an incentive to get back to it I have ordered a new fancy apron. Hopefully it will arrive tomorrow.
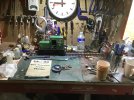
My workbench this morning:-
image.jpg
 
For various reasons I have not been at my workbench for a while. However as an incentive to get back to it I have ordered a new fancy apron. Hopefully it will arrive tomorrow.
My workbench this morning:-
View attachment 313703
Apron or pinny? I wondered if you'd be combining jobs, working as a nippy in the tea room as well :D
 
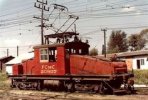
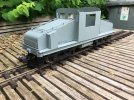
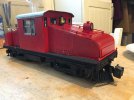
I thought I’d post a few pics of my latest build. It is inspired by the GE locos that ran on the Hershey Railway in Cubs!
It runs on two second hand LGB powered 4 wheel chassis, one from a powered tender.
Most of the new body work and side frames are made up from styrene sheet and sections.
There’s also a fair amount of recovered parts from Bachmann locos that I’ve butchered to build British locos. These include couplings; cow catchers; bell; etc.
The lamp housings are from old Hornby tin plate O gauge locos. The model awaits a pantograph that is on order,and making up a support frame to carry it, to be fixed to the cab roof.
I’m hoping the loco will be completed to appear on my G scale Sugar Mill layout that will appear at the August Shoeburyness Model Rail Exhibition.
Of course it’ll need lettering and numbering.
Below are a few images of the build and prototype inspiration.8B87CFBD-AC2E-411E-849F-98BB9E70622E.jpegA0136D86-B0D5-406F-A9F7-D43EAED590A8.jpegF26BDF2D-A5F1-4A4C-95A3-0993C2A7553F.jpeg
 
This weekend I’ve started work on another build that uses some parts left over from an earlier conversion as well as ultimately generating a whole load more components for the bits box.
The objective is to build a Camel Back loco in approx 1/29 proportions loosely based on the types that operated on th Reading and New Jersey Roads.
The main component in the picture below was the smoke box and first boiler ring from an Aristocraft 0-4-0 that’s chassis lives on under my Baddesley Colliery Garratt.
This locos chassis will come from a second hand Big Hauler bought at a show for £40.EB87F8A2-D352-4274-B4B4-2F2A134B8413.jpeg
 

Attachments

  • 6C593E20-B7BB-4065-94BA-9FA4E9ED6677.jpeg
    6C593E20-B7BB-4065-94BA-9FA4E9ED6677.jpeg
    419 KB · Views: 0
I've been re-addressing my loco fleet on and off during the last week or so following the purchase of a Massoth Programmer.

Loco addresses now correspond with the cab numbers and each item now has its own unique address. Any stock used on Hardyard has an address of less than 22 as this layout is run with a MTS II controll system. Mostly smaller engines like the Stainz, Shoemas and Kof diesels and RhB Tm 2/2 Tractors....
Tis a fun process, we had lots of issues trying to get it right on the Ruschbahn prior to going over to Massoth. I was wanting to change some locomotive numbers to fit things in MTS days but became less of an issue with the larger numbers possible on MTS. But even then there was reluctance to do renumbering with duplicated locomotives. The argument of non too regular visitors never held sway.

For my own line I have renumbered many locomotives to fit the need, check digits can be a bit of a saviour with using the last 2 digits and the on line calculator can help.

With a fleet of even just 5 locomotives a convention of being able to look at the last 2 or 3 digits to find the DCC number is always a big help.
 
Point motor repair.
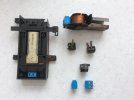
Prompted by recovering a faulty PM from a group members layout, time to fix some of mine as well.
The friends PM had been melted by a faulty single channel point decoder that plugs into the terminals. I had to hacksaw off the end which had been a molten blob. Luckily, the platform that holds the coil was intact, but not the terminals.

On mine, these PM’s had been acquired from various sources, with corroded terminal strips. In my box of bits I have some replacement terminal strips, source now long since forgotten.
Cut the coil wires off, or unsolder if you can. Remove the old strip, fit the new ones, and bend the pins out slightly to retain the terminal strip. Resolder the coil wires on, and test.

All fine so back into the spares box.....
Malcolm

010CBC90-66E8-45EF-BEFA-AEA8B861EBF6.jpeg
 
Point motor repair.
Prompted by recovering a faulty PM from a group members layout, time to fix some of mine as well.
The friends PM had been melted by a faulty single channel point decoder that plugs into the terminals. I had to hacksaw off the end which had been a molten blob. Luckily, the platform that holds the coil was intact, but not the terminals.

On mine, these PM’s had been acquired from various sources, with corroded terminal strips. In my box of bits I have some replacement terminal strips, source now long since forgotten.
Cut the coil wires off, or unsolder if you can. Remove the old strip, fit the new ones, and bend the pins out slightly to retain the terminal strip. Resolder the coil wires on, and test.

All fine so back into the spares box.....
Malcolm

View attachment 314231
I acquired a few faulty PMs which had rusted terminal blocks. Later LGB and obviously lower quality terminals, as my early ones are still going strong after many years.
As I planned to use these on crossovers, switching both points together, I simply removed the rusty terminals and soldered in long wire leads instead. These leads were then wired to the terminal block of a good PM. A LGB 55025 PM decoder output will easily switch 2 PMs if you increase the pulse time CV to 7....
Having suffered a few rusted terminals which won't release the wires, I now put a drop of graphite paste in the holes before wiring and to cover the screw heads after - not sure if it does anything, but perhaps every little helps? It is an uncharacteristic weakness, by LGB standards.
 
Having suffered a few rusted terminals which won't release the wires, I now put a drop of graphite paste in the holes before wiring and to cover the screw heads after - not sure if it does anything, but perhaps every little helps? It is an uncharacteristic weakness, by LGB standards.
I use Dow Corning 732 black mastic to fill the holes.

Easy to remove if required....
 
Something a little different on the bench today:
IMG_20230601_112304.jpg
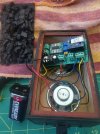
An Acme Engineering creation, which has suffered slightly from being stored in a shed..
Two sound samples (diesel and steam) selected by one switch. Power controlled by the other.

The slide-switches have not liked the slight dampness of the shed, but have been restored with a spot of contact cleaner and vigorous operation.

All the wiring (except those from the battery holder) are single-cored wires. These have hardened, and (I think) the cores have fractured internally? - They work when they are rattled about.

So a clean of the switch-contacts, and a quick rewire in stranded cable, and it will be good to go. :wondering::)

PhilP
 
I'd be very surprised if the wires have fractured just through storage. Have you tried tightening up all the connections - or just removing them and checking for any corrosion?
 
Wires were really stiff and brittle. - Two broke whilst I was fiddling..

Also turned out not to like the battery it had in it. - Which is strange, as it measured 9.83V with no load. :wondering:

All good now, so another job ticked-off the list.

PhilP
 
Back
Top