What happened at your workbench today?

Couple more of the Hartland Locomotive Works tanks put to good use, with few bits of plastic........
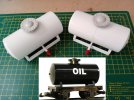
Hartland Locomotive Works Tank.jpg

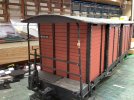
Post Vans, purchased a job lot from a Bricks & Mortar Auction House, a few hours spent stripping down, removing bits to rob Peter to pay Paul and raiding the junk box, two already sold, prospective purchaser for the boxed one, keep the remaining three for own use.
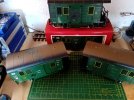
Collection of Post Vans.jpg

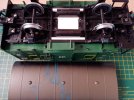
Minor repairs to the worst one of the lot, sound unit and speaker removed and already sold.
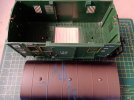
Post van Internal.jpg

Post Van External.jpg


Idea for Christmas!:)
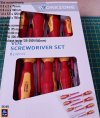
Available from the Centre Aisle..............
ALDI Screwdriver set 6.99.jpg

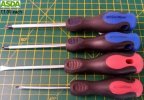
ASDA at Home or main Stores, bargain at a £1.00 each, as will be noticed, well used......
ASDA Screwdrivers.jpg
 
Couple more of the Hartland Locomotive Works tanks put to good use, with few bits of plastic........
View attachment 317434

Post Vans, purchased a job lot from a Bricks & Mortar Auction House, a few hours spent stripping down, removing bits to rob Peter to pay Paul and raiding the junk box, two already sold, prospective purchaser for the boxed one, keep the remaining three for own use.

View attachment 317435

Minor repairs to the worst one of the lot, sound unit and speaker removed and already sold.
View attachment 317438

View attachment 317439


Idea for Christmas!:)
Available from the Centre Aisle..............
View attachment 317443

ASDA at Home or main Stores, bargain at a £1.00 each, as will be noticed, well used......
View attachment 317442
A nice neat bit of work with the tank cars.
 
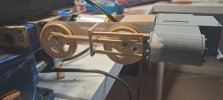
Motion assembled and tested today. After a little fettling, it runs reasonably well. I might need to tweak the length of the coupling rods slightly. They are perhaps 0.5mm too long currently. Blur is from running them at about half power for 20 minutes or so, to see what might fall off!!

20230824_181848.jpg
 
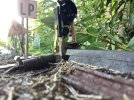
Wednesdays running session revealed a broken signal and LP notice, suspect for damage a large dog on the line but not seen in the act! The bit of grey on the van handrail is where a Tail Lamp holder has come off so this to be attended to today as well. Also testing out the ground signals seen to the rear, these are rather nicely made 3 light jobbies that came with some 0 gauge track. They will likely be offered via the forum when tested.image.jpg
 
Wednesdays running session revealed a broken signal and LP notice, suspect for damage a large dog on the line but not seen in the act! The bit of grey on the van handrail is where a Tail Lamp holder has come off so this to be attended to today as well. Also testing out the ground signals seen to the rear, these are rather nicely made 3 light jobbies that came with some 0 gauge track. They will likely be offered via the forum when tested.View attachment 317484
Don't forget the canopy at the junction station. I saw Poppy eyeing up her route up from the pond on Wednesday but a toot from the railcar delivered the appropriate warning :)
 
Don't forget the canopy at the junction station. I saw Poppy eyeing up her route up from the pond on Wednesday but a toot from the railcar delivered the appropriate warning :)
Hm looks like she had a track inspection while not looking! All repaired now, till next time.
 
Stay in day today waiting for collection of a faulty just still in warranty drill. Sorted the signal, L post and marker holder. For the Signal some brass cut and help in place with 8ba screws, inevitable the connecting wire to the arm did walkabout so a new one and hole done. L board, I fused some 3 mm brass tube in place in the base with the soldering iron, rest just sits in tube. None of the metal painted, will tarnish over winter quite nicely.
IMG_7552.jpeg
Wagon has small bit of brass square soldered in place, painted after pic taken.
IMG_7553.jpeg
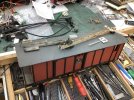
Other jobs upping vehicles to 4 vac pipes, van above done after repairs completed and other vehicles till current supply of vac pipes exhausted.
 
Does anybody have a 20140 O&K Feldbahn loco handy?
16929778963124674454610064722562.jpg
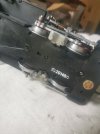
I have the three 'big' screws for the bottom of the motor-block, and the two for the front cover..

I need to know if the five smaller screws holding the cover are the same diameter as those holding the front cover, and how long they are?

I can then hunt some out, and secure the cover.

Many thanks,
PhilP
 
On weather watching for the laundry on the washing line, something to keep me occupied in the shed.........

Voltage Regulators.jpg


Added a few bits to the Massoth Service Board, to make life a tad easier when testing.
Voltage Regulator Service Board.jpg

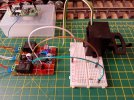
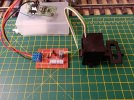
Control board for the LGB DUO Uncouplers, at rest in the UP position.
DUO Coupling Relay Up.jpg

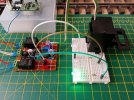
Coupler active in the DN position.
DUO Coupling Relay Dn.jpg

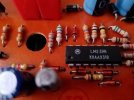
Just for the curious, the IC shown below, controls the DUO Uncouplers when using Analogue Track Power.
LGB DUO PCB.jpg
 
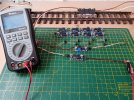
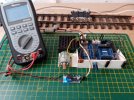
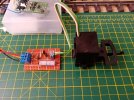
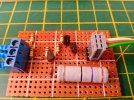
Continuing with the control for the LGB DUO Uncouplers, electronic version with no electromechanical! moving parts, other than the coupler!!
Electronic DUO Coupler UP.jpg

Electronic DUO Coupler DN.jpg

Electronic DUO Coupler PCB.jpg

Have a date with a dishwasher, acquired a large quantity of Playmobil items from Gumtree, which needs sorting, cleaning and placing an order for spare parts.....................
 
Last edited:
Pleasant and unexpected surprise from the Postie earlier, were not due until late September at the earliest.

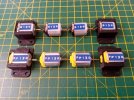
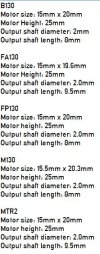
That's next weeks work planned out, the B130 motors are for the Playmobil Crane, same motors as used previously back in 2015.

The FP130's are a uprated version of the FA130's originally fitted in the conversion of the Playmobil 5258 to DCC battery power, as mentioned before, a lad up here is using Tool Batteries for his conversions, the FA130 had a max voltage rating of 12V, where as the FP130 can handle 15V.

B130 & FP130 DC Motors.jpg
 
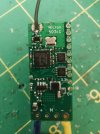
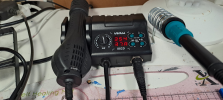
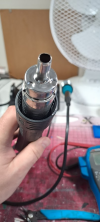
Miniaturisation of circuit boards can present a challenge for repairs. This is my solution, a basic little SMD rework station from ebay, for the princely sum of £47. - YIHUA 882D Soldering Iron Hot Air Soldering Station Rework Desoldering Station 6974443670042 | eBay

The soldering iron is very quick to heat up - about 10 seconds, and is nice and controllable. Easy and cheap to replace the tips as well. The hot air gun is perfect for desoldering components on tightly packed multi-layer boards and also for heat shrink tubing.

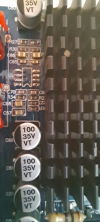
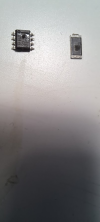
I commend this to the house for anyone doing any sort of small electronic repairs, particularly with surface mount devices. This is a mini 100W amplifier that drives the sub bass speaker in the modelling room. I damaged the input stage when testing another bit of kit, and even though they are only £10 to buy, I thought it more fun to repair! 1 resistor, 1 voltage regulator and an op-amp later and we are back to high fidelity sound :)

1693051636056.png

1693051656356.png1693051683802.png1693051729414.png
 
Pleasant and unexpected surprise from the Postie earlier, were not due until late September at the earliest.

That's next weeks work planned out, the B130 motors are for the Playmobil Crane, same motors as used previously back in 2015.

The FP130's are a uprated version of the FA130's originally fitted in the conversion of the Playmobil 5258 to DCC battery power, as mentioned before, a lad up here is using Tool Batteries for his conversions, the FA130 had a max voltage rating of 12V, where as the FP130 can handle 15V.

View attachment 317545
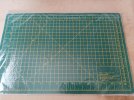
What size are the squares on the modelling board?
 
What size are the squares on the modelling board?
Small individual squares are 12mm x 12mm.

Rest of mat is marked out in either inches or millimetres, these came from Hobbycraft as freebies, in as much as if you register one is rewarded with a £5 voucher on one's birthday!

The Works and The Range are also worth a punt, often they are available on specials, as in cheap!

As for marking out squares, often use graph paper in a laminated pocket, or if anywhere near IKEA, they do or did do a wonderful kitchenware clear glass trivet (with nice rounded and grounded edges) and it is heavy, ideal to hold the graph paper plus gives a solid flat surface to work from.

Cutting Mat.jpg
 
Last edited:
Small individual squares are 12mm 12mm.

Rest of mat is marked out in either inches or millimetres, these came from Hobbycraft as freebies, in as much as if you register one is rewarded with a £5 voucher on one's birthday!

The Works and The Range are also worth a punt, often they are available on specials, as in cheap!

As for marking out squares, often use graph paper in a laminated pocket, or if anywhere near IKEA, they do or did do a wonderful kitchenware clear glass trivet (with nice rounded and grounded edges) and it is heavy, ideal to hold the graph paper plus gives a solid flat surface to work from.

View attachment 317562
I was trying to work out just how tiny the motors are - nice one :)
 
Back
Top