What happened at your workbench today?

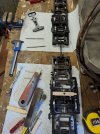
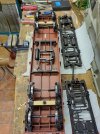
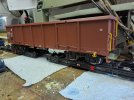
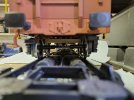
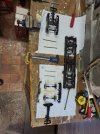
Today's "little " job, regauge the box wagon to fit as a load on the roll wagons, so with a bit of wood for a longer bolster and some chair spring straightening for new axles, job done, will test tomorrow, will need to trim the bottom of the brake blocks so that the scotches fit snug to the wheels, anyway, photos.
20230826_104758.jpg
20230826_130635.jpg
20230826_133234.jpg20230826_134512.jpg
20230826_134527.jpg
 
More work on the Double Fairlie today, rudely interrupted by another request for some 3d printed parts.

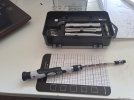
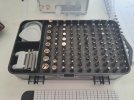
However the additional income has enabled the purchase of a new screwdriver set. For £12 this little beauty has every conceivable bit, an extending handle, some tools perfect for splitting casework and a very useful magnetic map to stop the screws from rolling off the work bench and becoming lost in the carpet. An excellent Amazon purchase!

20230827_125523.jpg20230827_125552.jpg
 
Motor testing........
Testing Motos.jpg

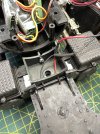
For those curious, yet not quite mad enough to disassemble the Playmobil Diesel to get to the chassis, the innards as converted using the FA130 motors, which has quite happily run around as a DCC (LGB 55021 Decoder) Battery Powered Diesel for the last six or seven years.
Playmobil Diesel Chassis.jpg
 
My workbench has been rather neglected of late, so this morning I sorted out and changed some Binnie buffers for LGB knuckle couplers and fitted the Binnie couplers to some LGB Feldbahn wagons:-IMG_8745.jpegIMG_8746.jpegIMG_8747.jpegIMG_8750.jpegIMG_8751.jpegIMG_8752.jpeg
 
Last edited:
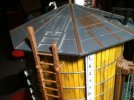
The top section of my Pola water tower ladder was broken off and missing the section containing the top two rungs when I got it second hand. So I found a 3d printer file of the ladder here: Pola water tower ladder G-Scale by randymower
I printed the top half of the ladder and chopped off the needed piece from the 3d print for use. It didn't print perfectly for me, and the paint isn't a perfect match on the new bit either, but even Pola seems to have made a painting error on the roof:
IMG_9927.JPG
 
Finished off the DCC / RC conversion on the LGB 21151 this morning, managed to get it out in the garden for a bit of a run. For some reason the decoder chuff settings have changed without me touching them, how clever! The chuff is very out of sync now. Ordered some more unipolar hall effect sensors as the ones I have in the draw are bipolar, will fit a chuff sensor and be done with it.

1i8kCil.jpg


8xXJMHe.jpg


Managed to find a way to sneak remote couplers onto the 21151, forgot to take a photo - I 3D printed some replacement motor block holders as they had enough space for some micro servos.

qM5n3SZ.jpg


Due to the front end of this loco being held together with the chimney, the coupler is a bit different, and there isn't room for a hook. So for the remote coupler, I have just used a plunger.

f90dhU4.jpg
 
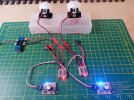
Taking a half baked theory idea from this.......
Servo Tester to ESC.jpg


Somewhat reassuring when the theory actually works in practice. :nerd:

Parts, bits and components to order, circuits to construct, rough sketches to turn to something that the 3D printer can produce, sound files to play with, and as for the Siren, need to find a way to either reduce the volume or muffle it!:)
Massoth 8FS to ESC.jpg
 
Can you be so kind to list all the hardware you selected & installed in your tender ? thank you

Of course, from left to right:

Left Blue PCB - My WiDCC board, see here: WiDCC board - my take on a wireless DCC controller.
In a nutshell - allows control of a DCC decoder with radio control - either an iBUS/SBUS based system OR a nRF24 based system (of my own design).

Top - hidden up in the coal bunker is a 'stay alive' for the WiDCC board - a 22mF (22000uF) capacitor bank. This includes inrush protection via a passive diode / resistor arrangement.

Black PCB - Cytron MD13S motor board. Takes the DCC logic signal from the WiDCC board and amplifies it to the voltage and amperage required for the Decoder. DC power is fed from the WiDCC rectifier, and protected with a fuse.

Centre switch - Switches the decoder input between direct track (for programming / DCC running) / OFF / Wireless DCC. This has a small header board that connects all of the pickups, engine and tender, together. The engine pickup and motor wires are run via cables installed between engine and tender.

Right Blue PCB - ESU LokSound v5 L - my initial idea was to have a Loksound in the back and a Lokpilot in the front - this didn't work out. I have a LokSound v5 XL on the way to replace it - I feel two motors may be a bit much for a LokSound L.


There is also a small LokPilot FX installed in the engine, which drives the smoke unit, lights, couplers, etc, via a DCC signal send to the engine from the tender.
 
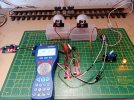
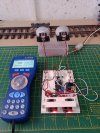
Motor Control setup for the Playmobil Crane, DCC controlled using a Massoth 8FS Function Servo Decoder operating Brushed ESC.

Minor tweaking of the 8FS, works like a dream, excellent control via the Massoth Navigator thumbwheel.

Previously used the 8FS with the Massoth Navigator thumbwheel to control two Servos to operate a converted Model Town Crane.

Using the Massoth 8FS A3 and A4 outputs in the Motor Control configuration, opens up new possibilities, extra items ordered for further tinkering.

Playmobil and Massoth parts have left Germany and are on their way to the Frozen Wastelands of Paradise.

Massoth 8FS Motor Control.jpg
 
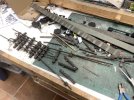
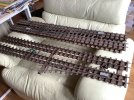
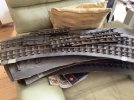
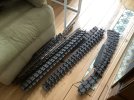
I recently acquired a shed load of old 0 gauge track, made up using white metal chairs, wood sleepers with some brass but mostly steel rail. My plan was to pull it all apart as I like to have the bullhead rail around for sundry projects, but the main buld was to be converted to Gauge 3 track using new sleepers. Hm the best laid plane etc, spend a frustrating half day just pulling one falling apart xing apart. So I have a modest pile of non trashed chairs for various scrap piles on my line, some trashed ones as well. A few lengths of rail but sore fingers. Trouble is when made up using steel pins it is near impossible to pull apart, where brass pins had been used fine but this lot is a mix of all sorts. So now I need to ponder what to do with it all. Stuff on the bench.
IMG_7554.jpeg
Untrashed to ponder track. Some of the trashier bits will be pulled apart but those double track sections and some of the other track look too good to trash while pulling apart.
IMG_7557.jpegIMG_7556.jpegIMG_7555.jpeg
 
I recently acquired a shed load of old 0 gauge track, made up using white metal chairs, wood sleepers with some brass but mostly steel rail. My plan was to pull it all apart as I like to have the bullhead rail around for sundry projects, but the main buld was to be converted to Gauge 3 track using new sleepers. Hm the best laid plane etc, spend a frustrating half day just pulling one falling apart xing apart. So I have a modest pile of non trashed chairs for various scrap piles on my line, some trashed ones as well. A few lengths of rail but sore fingers. Trouble is when made up using steel pins it is near impossible to pull apart, where brass pins had been used fine but this lot is a mix of all sorts. So now I need to ponder what to do with it all. Stuff on the bench.
View attachment 317835
Untrashed to ponder track. Some of the trashier bits will be pulled apart but those double track sections and some of the other track look too good to trash while pulling apart.
View attachment 317832View attachment 317833View attachment 317834
I'm assuming that's code 200 track? I was donated a box of it, and I've rebuilt the turnouts to 45mm for my layout. I'll happily take the turnouts from you to create another crossover for the bottom end of my track. I just use the rails, with Cliff Barker turnout kits for all the sleepers and chairs. It saves a lot of cutting and filing!!
 
My latest Big Hauler bash needed fixing - the front part of the frame over the pilot truck was flopping, probably due to a serious accident in its past life, and so was fouling the truck on gradient transitions. I have given it the equivalent of a little blue pill in the form of 2 extra bits of bracing and a bolt between the cylinder block carrier and main chassis. All is now satisfactorily pert and the loco runs very well, touch wood
big_hauler_fix.jpg
 
I'm assuming that's code 200 track? I was donated a box of it, and I've rebuilt the turnouts to 45mm for my layout. I'll happily take the turnouts from you to create another crossover for the bottom end of my track. I just use the rails, with Cliff Barker turnout kits for all the sleepers and chairs. It saves a lot of cutting and filing!!
Ok we can we do do a deal for some more vac pipes?
 
Internal original Battery Control.
Playmobil Crane Battery Controls.jpg

Battery controls removed, umbilical motor cables for DCC control.
Playmobil Crane DCC Control.jpg

Crane in Action, excellent motor control and smooth controllable speed.
Crane in action.jpg
 
Back
Top