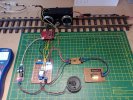
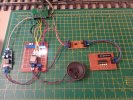
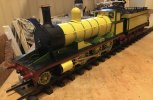
What happened at your workbench today?

Update to this post by curtis curtis ,

Having already translated and compiled an earlier updated set of instructions, a further update incorporating the additional information supplied by curtis curtis

Instructions.JPG

Purely for academic purposes interrogated the original project files downloadable from the LGB website.
Manually edited the mfx file(s) and compiled back into new mdtp project file(s), future idea for use with a MP3 player.

L33350.JPG

L33353.JPG

Converted the original sourced WAV sound files to MP3, tested with the MP3 player project designed for the Playmobil Crane.

WAV to MP3.JPG
Testing a MP3 player designed for use with Playmobil Crane project.

MP3 Player.jpg
 
Last edited:
Continuing the theme, so to speak.

One of the many drawbacks of using the products and services supplied with the the later decoders from LGB/Marklin is that for obvious reasons they are geared towards using the mfx standard and protocols, which often leaves big gaps in acquiring information regarding DCC.

One such area is the ability to produce Idiot Cards, which is a very simple process when using the Massoth Service Tool Program.

But not all is lost, with ingenuity, mouse and keyboard control, voila, the creation of Idiot Cards is possible!

Screenshots below taken from created PDF's from the information gleaned from the mDT/3 software program.

LGB 33350.JPG


LGB 33353.JPG
 
Last edited:
I've just fitted them on the two units of my current railbus project and am itching to try them out. But only once I find out why I have red headlamps showing at both ends :D Someone's got his wires crossed.
Yup, with LEDs you need the anode from one end to the cathode at the other - then all you need to do is adjust it for the correct direction - s'easy ;);)
 
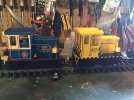
This morning I have been shortening the Porter House Models couplers that I had fitted to the two Piko 25T Switchers:-
image.jpg
 
I cut the couplings in half:
IMG_8880.jpeg

I think that it looks just right on the switcher.
IMG_8878.jpeg
Swithcher and flat car coupled up.
IMG_8882.jpeg
Full length Porter House Models coupler fitted to the flat car.
 
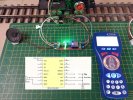
Continuing the expermination with the MP3 Player and LGB 55028 and LGB 55029 decoders.

LGB 55029 MP3 and external interface.jpgLGB 55029 mDT3.JPG

LGB 55028 MP3 and external interface.jpg
LGB 55028 mDT1.JPG
LGB 55028 Decoder Functions.JPG
 
For a change of scenery, and a change in the weather, set up the outdoor workbench, which earned brownie points from 'Herself'

Continuing on from this post,

Fair amount of cutting and trimming, seems the idea may well work after all! :D

Idea for the Fuchs 63 163.jpg
 
Spent today checking over Crib Lane my loco shed layout and setting it up for tomorrows (23/9/23) Enfield Whitewebbs Railway Modellers show. Will have a few locos I’ve not exhibited previously on the layout.4F9B3870-BEC6-410B-B57C-4F34343395DE.jpeg6E410839-4152-4D0D-96F1-A9CE25A6633A.jpeg9B4EE1D8-9197-4AEB-AF8E-79EAFC15D2DC.jpeg
 
I've not been to Whitewebbs for years. I ought to as from what I remember it's a great museum
Yes it’s a great site! There looks to be so much in the museum buildings. There s also a lot of railwayana including what looks like part of the old buildings from Enfield Chase station!7430AE71-74FC-46F3-977B-68B73CF79836.jpegBE583787-4474-4BC5-AB5F-3481A43D65E5.jpeg28BF1DEA-63D6-4F1B-8441-ED1E51B86E76.jpeg04172FA5-6B13-419F-B9F2-007CE3D42FC5.jpeg
 

Attachments

  • EF951F12-B47E-4996-9C4C-8BDFB4F5FF42.jpeg
    EF951F12-B47E-4996-9C4C-8BDFB4F5FF42.jpeg
    531.9 KB · Views: 0
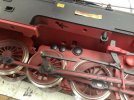
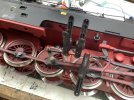
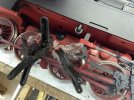
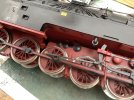
We had a bit of a disaster with my Piko 2-10-2t on Wednesday. Somehow a rod broke and it was lifting the loco off the track sideways.IMG_7608.jpeg
There has already been a repair in this area as can be seen by the nut n bolt on the broken rod and a washer beneath the crank. But that crank is 180 degrees out of sync so had moved and was hitting the footplate above it with the rod diging into the ballast thus lifting the loco off the track. this is a very real issue with the real thing as well and it was quite lucky that when a rod broke on Tornado a year or two back the same never occurred, just the luck of the gods, it shows why Fitness to run and build tests are so exacting on the big train set.

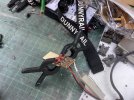
So initial thoughts were some brass cut to size bridging the break and perhaps 14ba nuts n bolts to secure it, but on reflection I think that would have weakened the rod in other places. So I cut some very thin copper as a L shape to join the broken rod together with superglue. You can see the thin copper on the side tank in the above photo. Below you can see it glued but the superglue would not take to the plastic.
IMG_7609.jpeg
So next try Araldite, seen here drying with clingfilm to stop the clips sticking to the rod. This will need an overnight cure so at this stage not sure if it will work.
IMG_7613.jpeg
Whilst mixing the Araldite made up enough for another small job, I have this resistance circuit thingy from Fosworks that can with luck resuscitate a dodgy NiMh Battery by draining all to I think Zero followed by a full charge. 1 of the potential runners on Wednesday would not play due to dodgy battery, a full charge occured in around 10 minutes so clearly something wrong as nothing worked on it today. The circuit made from veroboard had broke, so the wood hopefully will keep it all together. The extreme heat is located in the big white resistance. I never leave this thing to do its wonders alone so if the wood gets hot will be able to unplug the battery.
IMG_7614.jpeg
Finally made a start on cleaning up 3D printed Vac Pipes.
IMG_7615.jpeg
 
Last edited:
We had a bit of a disaster with my Piko 2-10-2t on Wednesday. Somehow a rod broke and it was lifting the loco off the track sideways.View attachment 319166
There has already been a repair in this area as can be seen by the nut n bolt on the broken rod and a washer beneath the crank. But that crank is 180 degrees out of sync so had moved and was hitting the footplate above it with the rod diging into the ballast thus lifting the loco off the track. this is a very real issue with the real thing as well and it was quite lucky that when a rod broke on Tornado a year or two back the same never occurred, just the luck of the gods, it shows why Fitness to run and build tests are so exacting on the big train set.

So initial thoughts were some brass cut to size bridging the break and perhaps 14ba nuts n bolts to secure it, but on reflection I think that would have weakened the rod in other places. So I cut some very thin copper as a L shape to join the broken rod together with superglue. You can see the thin copper on the side tank in the above photo. Below you can see it glued but the superglue would not take to the plastic.
View attachment 319165
So next try Araldite, seen here drying with clingfilm to stop the clips sticking to the rod. This will need an overnight cure so at this stage not sure if it will work.
View attachment 319164
Whilst mixing the Araldite made up enough for another small job, I have this resistance circuit thingy from Fosworks that can with luck resuscitate a dodgy NiMh Battery by draining all to I think Zero followed by a full charge. 1 of the potential runners on Wednesday would not play due to dodgy battery, a full charge occured in around 10 minutes so clearly something wrong as nothing worked on it today. The circuit made from veroboard had broke, so the wood hopefully will keep it all together. The extreme heat is located in the big white resistance. I never leave this thing to do its wonders alone so if the wood gets hot will be able to unplug the battery.
View attachment 319163
Finally made a start on cleaning up 3D printed Vac Pipes.
View attachment 319162
Good luck with the repairs Jon.
 
Good luck with the repairs Jon.
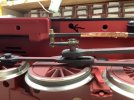
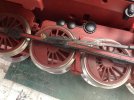
Thanks Paul, went pretty well the Araldite stuck fine but test found another issue, I had put a spring washer onto the crank and this lifted the 6 sided bolt that secures it, testing proved a jam when the crank got level with the rod. So pull apart and now there are 3 nuts spacing the crank from the rod as shown below. two licknuts over keep things in place.IMG_7619.jpeg
As can be seen below, not very pretty but a splodge of black paint should make it look good. Testing on the bench appears to show all is well, but I used some more Araldite to fill in gaps where the brass had not been touching the rod so another drying night before paint.
 

Attachments

  • IMG_7620.jpeg
    IMG_7620.jpeg
    605.5 KB · Views: 0
  • IMG_7617.jpeg
    IMG_7617.jpeg
    601.7 KB · Views: 0
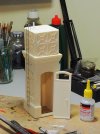
It's been a while since I have been able to do any modelling but I have found time to get back to some. My current project is the construction of the excellent Kippo Models water tower. The detail is beautifully moulded, although there was a fair amount of filing and sanding to clean up the resin castings. As usual I have added my own embellishments to add to the appearance, the main one being the addition of a ladder, fixed to the outside of the tower, giving access to the inspection cover on the tank roof. I used the same wire mesh, cut down, that I used to create the ladders on the Claptowte Railway signals. I also added a wire handle to the tank access hatch.

Due to a happy accident, I have two of these water towers, one will be installed at Gernise End Station, on the Claptowte Railway, the second will be beside the loco stabling sidings at Phidell Yard. I already have two 3D printed water cranes to get the water from the towers to the locos.

dig 231027001.JPG

David
 
It's been a while since I have been able to do any modelling but I have found time to get back to some. My current project is the construction of the excellent Kippo Models water tower. The detail is beautifully moulded, although there was a fair amount of filing and sanding to clean up the resin castings. As usual I have added my own embellishments to add to the appearance, the main one being the addition of a ladder, fixed to the outside of the tower, giving access to the inspection cover on the tank roof. I used the same wire mesh, cut down, that I used to create the ladders on the Claptowte Railway signals. I also added a wire handle to the tank access hatch.

Due to a happy accident, I have two of these water towers, one will be installed at Gernise End Station, on the Claptowte Railway, the second will be beside the loco stabling sidings at Phidell Yard. I already have two 3D printed water cranes to get the water from the towers to the locos.

View attachment 320242

David
That's one hell of cistern for an outdoor toilet, I bet the flush will shift anything :happy: :D
 
Back
Top