Who doesn't remember John Noakes going up Nelson's Column? And the camera man, who apparently had to do it twice!Those clips remind me of the means of access to the roof of St Michael's Abbey, Farnborough. Hoop irons, built into the outside of one of the stone buttresses - no safety cage or anything like that. From the first roof you could walk along, climb a short ladder to the raised roof under the dome, walk up some lead covered steps at the end of the roof abutting the base of the dome, and then get to the ridge, from where we had to provide scaffold access for an architect to clamber into the lantern to find out why water was dripping onto the congregation.
Spectacular view of the Surrey and Hampshire countrysides (Surrey to the north, Hampshire to the south) while sitting on the ridge as the scaffolding company's manager measured up to price the job
While that was post-1974, the safety elves are much more active and you wouldn't be able to do it now
You are using an out of date browser. It may not display this or other websites correctly.
You should upgrade or use an alternative browser.
You should upgrade or use an alternative browser.
What happened at your workbench today?
- Thread starter Henri
- Start date
The Shed
Citizen of the Republic of the North East.
Plodding along, progress on several fronts, tweaked both the original Ender 3 and the newer V3 SE, vast improvement on the quality of the printing in both strength and finish.
Concentrated effort with the study plans for Tinkercad, improvements in designing items progressing at a leisurely pace.
Mulled over providing a simple non technical solution for a friend using the Massoth Track Detection Modules, seems from the conversion earlier this has provided him with a simple working solution.
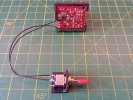
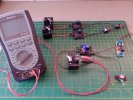
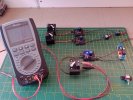
An acquaintance of mine, purchased some Foam Core Boards, and he decided it was not for him, and wondered could I make use of them, pictures below are my first efforts, may well pursue this over the winter months, a small order has been placed for further supplies.
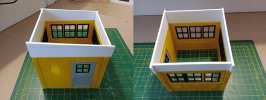
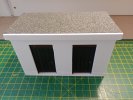
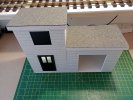
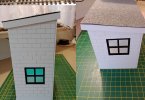
On the PlayMobil Crane, still a work in progress, one hazard of having a Mechanical Engineer for a friend, he tends to come up with superb solutions!
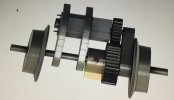
Concentrated effort with the study plans for Tinkercad, improvements in designing items progressing at a leisurely pace.
Mulled over providing a simple non technical solution for a friend using the Massoth Track Detection Modules, seems from the conversion earlier this has provided him with a simple working solution.


An acquaintance of mine, purchased some Foam Core Boards, and he decided it was not for him, and wondered could I make use of them, pictures below are my first efforts, may well pursue this over the winter months, a small order has been placed for further supplies.


On the PlayMobil Crane, still a work in progress, one hazard of having a Mechanical Engineer for a friend, he tends to come up with superb solutions!

Last edited:
viaEstrecha
Spanish metre gauge in G scale (on the cheap)
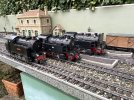
Accidental fleet of 2-6-2Ts, built up this Autumn. Now tinkered with and ready for hibernation.
Left to right, Škoda lookalike as FVM No.20 'Sta Valeria', bashed from old Newqida cheapy with battery and RC, now with LGB motor and motion; track powered analogue LGB 23802 as 99601-4 in HSB livery originally bought as donor loco but just too nice to cannibalise so now rebuilt and refurbished to near-original condition and ready for disposal; and LGB 22801 99601 with DR markings acquired cheaply as a non-runner but fixed to become second donor loco for the Škoda. Now a static model sitting on the redundant Newqida underpinnings and also surplus to requirements. Turned into a bit of a marathon, that project.
In the background, 3 recently obtained GRS kit wagons at last repaired, detailed and Spanified. I need a break now from bashing things with wheels, so I might take a look at something to do with scenery.

Last edited:
viaEstrecha
Spanish metre gauge in G scale (on the cheap)
Couldn't resist this rat's nest bodge one, to contrast with the shots of The Shed's pristine workbench!
Left over from my last loco bash was the Newqida RC board and transmitter and so I decided for fun to have a go at using radio to control a slow action motor, which I have been thinking of using for a rail gate for my fuel siding. Not pretty, but it does seem to work, with the motor taking about 10-15 seconds to open or close. The little flag top left simulates the gate. I'll get me coat...
Left over from my last loco bash was the Newqida RC board and transmitter and so I decided for fun to have a go at using radio to control a slow action motor, which I have been thinking of using for a rail gate for my fuel siding. Not pretty, but it does seem to work, with the motor taking about 10-15 seconds to open or close. The little flag top left simulates the gate. I'll get me coat...
SevenOfDiamonds
Registered
rats nest bodge
The main activity on my workbench is the accumulation of "round tuits". but I can confirm that, this morning, I added a rat's nest of wires inside the roof of my "baby railcar" (expanded Faller Intercity Express) with the aim of adding working headlights (sadly lacking since I built it **) . . . and succeeded!
As I'm not a natural electronics person, I bought a set of Massoth headlight LEDs (8129510) and wired 4 of them onto the Massoth XLS chip mounted in a pocket under the railcar's roof. I have to say, the instructions that came with the LEDs, and with the XLS, were somewhat contradictory (to my untrained eye) but the application of a little logic not only resulted in the lights working, but also lighting in the direction of travel too.
While it was in bits, I reattached some of the internal partitions, and strengthened the bond between the seat squabs and their frames (from a Revell Routemaster bus kit). I now just need to do a bit of repair work to the gold-black-gold lining on the outside before it makes its next planned public appearance, at the West Sussex Garden Railway Show in Henfield on Sunday 3rd December.
** Unbelievably, the date on my "baby railcar in-build" photos suggest that I built it back in 2010. Is 13 years some sort of record for a "round tuit"?
Cheers
David
Last edited:
JimmyB
Now retired - trains and fishing
Yes, I know the feeling, I have a loco, 3 wagons and 2 coaches in 0 Gauge that I bought, and partially finished 10 years ago, fell out with 0 Gauge and have only just got around to completing them, but some time to go.The main activity on my workbench is the accumulation of "round tuits".
David
I'm very much afraid not. It took me nearly 25 years to complete a model boatUnbelievably, the date on my "baby railcar in-build" photos suggest that I built it back in 2010. Is 13 years some sort of record for a "round tuit"?
playmofire
Registered
Are we going to see them?Yes, I know the feeling, I have a loco, 3 wagons and 2 coaches in 0 Gauge that I bought, and partially finished 10 years ago, fell out with 0 Gauge and have only just got around to completing them, but some time to go.
When he gets a rountuit I suppose!Are we going to see them?
JimmyB
Now retired - trains and fishing
Are we going to see them?
Correct !When he gets a rountuit I suppose!
Not sure if you have noticed the latest Fosworks adds, he has introduced a Radio Point Motor system. Not entirely sure of its providence as yet but may be worth a gander.Couldn't resist this rat's nest bodge one, to contrast with the shots of The Shed's pristine workbench!
Left over from my last loco bash was the Newqida RC board and transmitter and so I decided for fun to have a go at using radio to control a slow action motor, which I have been thinking of using for a rail gate for my fuel siding. Not pretty, but it does seem to work, with the motor taking about 10-15 seconds to open or close. The little flag top left simulates the gate. I'll get me coat...
Northsider
Modelling the Northern half of the Isle of Man
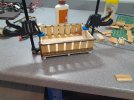
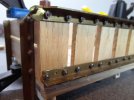
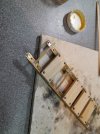
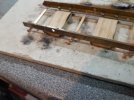
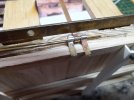
Before I decided that modelling the Groudle Glen railway in 7/8ths was a distraction from the IMR/MNR In 15mil/ft, I started making a couple of the ex-RAF Fauld bomb wagons; Groudle had a few of them in the early days of rebuilding that were used on PW trains. I did a huge amount of ridiculously obsessive work on them, including cutting BA threads on 1/16th rivets to turn them into coach bolts. For reasons unknown to me, I've dusted them off and recommenced work...


Madman
Registered
I'm very much afraid not. It took me nearly 25 years to complete a model boat
That's nothing. It's taken me nearly 76 years to get where I am and I still don't know where that is.....
Ask your wife, she's bound to tell youThat's nothing. It's taken me nearly 76 years to get where I am and I still don't know where that is.....
Northsider
Modelling the Northern half of the Isle of Man
I got to the point of making working hinges for a couple of the IMR open wagons, so it's perhaps no surprise that I've opted to do the same with the bomb wagons: it ought to be possible in such a large scale. Even so, the parts are quite small, with the hinge pin being 0.8mm in diameter. And soldering is not a precise activity; or not in my hands, at least!


The Shed
Citizen of the Republic of the North East.
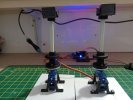
Worked through one of the ideas for the lights on the Playmobil Crane, as there will be spare Servo Ports on the 8FS Decoder, seems like a good idea to use them.
Items designed in Tinkercad, printed out, assembled to see how it would look, and ease of assembly.
Lamps and brackets are available from Playmobil as spare parts.
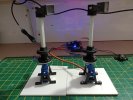
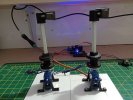
Package arrived yesterday, occupied for the next month or two..............
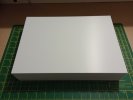
Items designed in Tinkercad, printed out, assembled to see how it would look, and ease of assembly.
Lamps and brackets are available from Playmobil as spare parts.


Package arrived yesterday, occupied for the next month or two..............

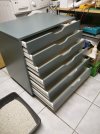
Kitty litter or ballast testing tray?Just finished this:
View attachment 320992
Not 'on my wokbench' but to try and bring some order to the chaos under it!
PhilP
Overnight 'facilities'..Kitty litter or ballast testing tray?
(The cats, not me!)
PhilP

