You are using an out of date browser. It may not display this or other websites correctly.
You should upgrade or use an alternative browser.
You should upgrade or use an alternative browser.
What happened at your workbench today?
- Thread starter Henri
- Start date
Rhinochugger
Retired Oik
Tuffnells went bust - were bought out by Shift.
Just delete the 'f'
Just delete the 'f'
Northsider
Modelling the Northern half of the Isle of Man
The Shed
Citizen of the Republic of the North East.
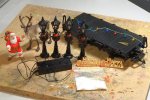
Spent several hours at the workbench for a good friend of mine, he required a few items for the Christmas Window Shop Display he organises in the village he resides in.
Got it into his head, that, this year the display would benefit from viewer and visitor interaction, silly person, recipe for disaster letting the Great Unwashed anywhere near anything remotely electronic!
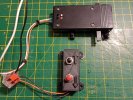
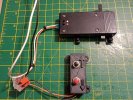
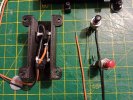
Methinks a price increase is in order, heavens knows how Gaugemaster has the bare faced cheek to charge the exorbitant sum of money for a switch and a couple of diodes!
As below, even had change back from a pound!
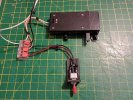
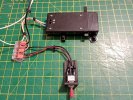
Got it into his head, that, this year the display would benefit from viewer and visitor interaction, silly person, recipe for disaster letting the Great Unwashed anywhere near anything remotely electronic!


Methinks a price increase is in order, heavens knows how Gaugemaster has the bare faced cheek to charge the exorbitant sum of money for a switch and a couple of diodes!
As below, even had change back from a pound!


Last edited:
Northsider
Modelling the Northern half of the Isle of Man
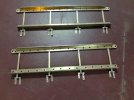
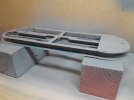
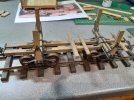
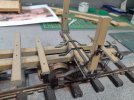
In between spraying the metalwork for the bomb wagon, I found time to clean and repair the Hartford 'Ely-Thomas' log car. A new brake block was bashed from a Cambrian moulding, the rodding was fixed with lo-melt solder and a missing piece of strapping was recreated. The couplings have had whitemetal pins fixed permanently, which is perhaps explained by the description 'ex-display': it was very dusty too -and all the bearing surfaces were dry.


Rhinochugger
Retired Oik
One of those wagons that is almost better running emptyIn between spraying the metalwork for the bomb wagon, I found time to clean and repair the Hartford 'Ely-Thomas' log car. A new brake block was bashed from a Cambrian moulding, the rodding was fixed with lo-melt solder and a missing piece of strapping was recreated. The couplings have had whitemetal pins fixed permanently, which is perhaps explained by the description 'ex-display': it was very dusty too -and all the bearing surfaces were dry.
View attachment 321096
View attachment 321097
DON'T SNEEZE!Can you tell what it is yet ?
View attachment 321134
David
By the way, the white powder in the bag is white glitter, nothing dodgy, it's not to be sniffed at.
PhilP
The Shed
Citizen of the Republic of the North East.
All and sundry, especially those when you get five minutes jobs, completed, and winging their way through the postal service.
Tidy up, clear workbench for the present, bags of bubble wrap, bags of polystyrene snow, jiffy bags, cardboard boxes etc, recycled, well part traded with my local supplies shop for some essential items.
Still just about warm enough to run a train, then it's back to the Foam Core Board, and to keep the two 3D printers busy churning out items.
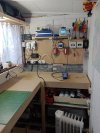
The Playmobil Crane project, temporarily housed in the other shed, awaiting a few items to complete the motorisation, the completed units are due for delivery in person on the 21st of next month, just seen on the left in the picture above the 'Home Brew' speed controller for testing.
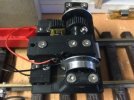
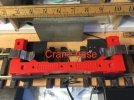
Just a taster in the pictures below, this is how the motorisation looks at present, still a lot more to do, to complete the Crane Project.
Tidy up, clear workbench for the present, bags of bubble wrap, bags of polystyrene snow, jiffy bags, cardboard boxes etc, recycled, well part traded with my local supplies shop for some essential items.
Still just about warm enough to run a train, then it's back to the Foam Core Board, and to keep the two 3D printers busy churning out items.

The Playmobil Crane project, temporarily housed in the other shed, awaiting a few items to complete the motorisation, the completed units are due for delivery in person on the 21st of next month, just seen on the left in the picture above the 'Home Brew' speed controller for testing.
Just a taster in the pictures below, this is how the motorisation looks at present, still a lot more to do, to complete the Crane Project.


Northsider
Modelling the Northern half of the Isle of Man
I haven't seen drawing board clips for years!All and sundry, especially those when you get five minutes jobs, completed, and winging their way through the postal service.
Tidy up, clear workbench for the present, bags of bubble wrap, bags of polystyrene snow, jiffy bags, cardboard boxes etc, recycled, well part traded with my local supplies shop for some essential items.
Still just about warm enough to run a train, then it's back to the Foam Core Board, and to keep the two 3D printers busy churning out items.
View attachment 321150
The Playmobil Crane project, temporarily housed in the other shed, awaiting a few items to complete the motorisation, the completed units are due for delivery in person on the 21st of next month, just seen on the left in the picture above the 'Home Brew' speed controller for testing.
Just a taster in the pictures below, this is how the motorisation looks at present, still a lot more to do, to complete the Crane Project.
View attachment 321151
View attachment 321152
Rhinochugger
Retired Oik
Certainly not used like that - similar things still exist to stop table cloths from blowing away when dining al frescoI haven't seen drawing board clips for years!
Madman
Registered
All and sundry, especially those when you get five minutes jobs, completed, and winging their way through the postal service.
Tidy up, clear workbench for the present, bags of bubble wrap, bags of polystyrene snow, jiffy bags, cardboard boxes etc, recycled, well part traded with my local supplies shop for some essential items.
Still just about warm enough to run a train, then it's back to the Foam Core Board, and to keep the two 3D printers busy churning out items.
View attachment 321150
The Playmobil Crane project, temporarily housed in the other shed, awaiting a few items to complete the motorisation, the completed units are due for delivery in person on the 21st of next month, just seen on the left in the picture above the 'Home Brew' speed controller for testing.
Just a taster in the pictures below, this is how the motorisation looks at present, still a lot more to do, to complete the Crane Project.
View attachment 321151
View attachment 321152
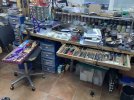
Alot of frightening looking gadgets on that wall.....Are you sure they're meant for playing with your train.....?.....They look like they belong in a hospital setting.....
Flying15
Registered
Looks pretty organised to me! Quite enviousGot turned into a complete shambles after working on my TT120 layout in my dining room, tidy up due today!
View attachment 321167
Thanks David, I was pretty lucky with this house as the room is an add on in an otherwise dead space was created for a home office by the previous occupants. Was immediately lined up as a workshop with no SWMBO to object, though a good lady friend who visited about a couple of months after I moved in was surprised that the only organised room was that workshop. Priorities!I am sort of envious, your work spaces seem to be on an industrial scale, compared to the modest 100 x 80 cm that I have available to turn out my models, taken 30.4.2018.
View attachment 321271
David
Bit of a nightmare with a Brekina VW Drasine..
The 'mazac' chassis is beginning to break-down, and has blown itself apart where the motor is clamped in place..
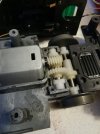
You can also see it is delamination, along the side of the motor..
I managed to drill-through the lower mounting point, and tap 2mm. - Had to go to a M2x10mm cap-head screw.
The upper mount, the thread had pretty much gone, but there is something hard in the 'mazac' and I could not break through with the 1.6mm drill.
Tapped the (blind) hole, and managed to get purchase with a 6mm screw. Had to do the same on the front mounting, as well.
The pickups on the front axle are shot, and I don't have anything suitable to replace them with..
The wheels are horrible, so I might have to fit a power buffer, but was hoping to use a cast-off 55021, but I can't find the resources for connecting to one of these.
PhilP
The 'mazac' chassis is beginning to break-down, and has blown itself apart where the motor is clamped in place..

You can also see it is delamination, along the side of the motor..
I managed to drill-through the lower mounting point, and tap 2mm. - Had to go to a M2x10mm cap-head screw.
The upper mount, the thread had pretty much gone, but there is something hard in the 'mazac' and I could not break through with the 1.6mm drill.
Tapped the (blind) hole, and managed to get purchase with a 6mm screw. Had to do the same on the front mounting, as well.
The pickups on the front axle are shot, and I don't have anything suitable to replace them with..
The wheels are horrible, so I might have to fit a power buffer, but was hoping to use a cast-off 55021, but I can't find the resources for connecting to one of these.
PhilP
The Shed
Citizen of the Republic of the North East.
One horse power Snow clearer along with a large sposh of WD40, back at the workbench in the shed.
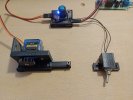
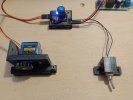
Finally achieved a solution to what has been a frustrating problem, a working gear for a Linear Servo.
No problems printing the Servo Mounting and the Rack, the gear itself caused no end of grief, a chance posting on the German Forum I belong to, a poster there was experiencing the same issues with the gear wheel using the Ender 3, a number of correspondences later and a tad head scratching between the pair of us, viola we now both are able to successfully print out the gear wheel.
I know small success, easily pleased!


That looks really useful..One horse power Snow clearer along with a large sposh of WD40, back at the workbench in the shed.
Finally achieved a solution to what has been a frustrating problem, a working gear for a Linear Servo.
No problems printing the Servo Mounting and the Rack, the gear itself caused no end of grief, a chance posting on the German Forum I belong to, a poster there was experiencing the same issues with the gear wheel using the Ender 3, a number of correspondences later and a tad head scratching between the pair of us, viola we now both are able to successfully print out the gear wheel.
I know small success, easily pleased!
View attachment 321332
View attachment 321333
What is the travel, please?
PhilP

