You are using an out of date browser. It may not display this or other websites correctly.
You should upgrade or use an alternative browser.
You should upgrade or use an alternative browser.
What happened at your workbench today?
- Thread starter Henri
- Start date
casey jones snr
Registered
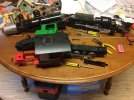
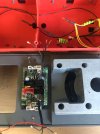
Spent most of the day setting up and installing 6 MD mXion PWD DCC lighting decoders for LGB passenger wagons. These are a relatively straight forward and easy install in the LGB passenger wagons tackled so far. All were similar to the 31521. The decoder replaces the original LGB 5V regulating board using the existing mounting holes. The only conversion that I initially bodged was my Gourmino, 30520. This dining wagon has one set of incandescents in the roof. The table lights are two sets of LEDs. One set for the tables on each side of the diner. I discovered the table lamps were LEDs upon disassembling the wagon's interior fittings 


 to find why the tables on one side were not illuminating. Of course Murphy's fifty-fifty ninety corollary had got me. (For those not familiar with this corollary to Murphy's Law, it states that if you have a 50% chance of getting something right, you'll be wrong 90% of the time.) I had cut the plugs off the two sets of leads thinking the table lamps were incandescents. When I soldered the leads together I had the pluses and minuses crossed. In any case, once that was corrected I now have independent control of the dining car's cabin lighting and table lamps thanks to the PWD's two function outputs.
Tomorrow I'll be attacking my other diner, a LGB 3068. This one DOES have incandescent table lamps. I'll finally get around to replacing one that has brunt out as long as I'm working on it.
This is my first experience with MD mXion decoders. These were fairly inexpensive at around $25 each when shipping is included. I bought 10 of them. I'll let the group know what I think of them once they've run a bit.
Last edited:
Drilling holes and cutting up pins for bolt heads. That 4 little piles represents 1/2 of one side, so another 4 this side then 16 more for the other side and ends. Booooooorrrrrriiiiinnnnngg. But I do a few at a time between other things. 18 will be done in a minute before I start prepping todays slow cook curry then another 18 after curry has been turned on to slow cook all day.
found out why pics get revolved round, if I take a pic on the iPad and change the size it takes the orientation that the pic was taken in from the iPad. However if I leave at full size orientation is correctly uploaded. Weird or not? I expect that iPhone will do the same. So trying to do the right thing for forum memory can seriously screw you up!

found out why pics get revolved round, if I take a pic on the iPad and change the size it takes the orientation that the pic was taken in from the iPad. However if I leave at full size orientation is correctly uploaded. Weird or not? I expect that iPhone will do the same. So trying to do the right thing for forum memory can seriously screw you up!
casey jones snr
Registered
maxi-model
UK/US/ROW steam narrow gauge railways 1:1
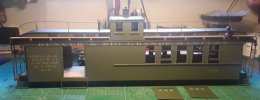
A little more work on the Pagosa the past couple of days - decaling, flat coating and some detailing like rails and walkways done. Next it's time to crack on with the interior. But first a day playing with trains at a local 16mm NGM meet tommorow - all to current Flu - 19 rules. I'm told I have to bring my own pork pies and Victoria sponge cake Max

That's brave talk, just look at the guys guarding itQuick!!
Every one, to the CFR!!!!!!!!!!!!!
I see a bag of flour!

Fred Mills
Registered
I can not provide pictures, but I did hand spike 8 feet of track (Two rails) to 8 feet of trestle deck today, in preparation to install it as a replacement for an old one. The bents will be installed after the deck is in place, along with the appropriate smaller code guard rails, within the 4'8 1/2" gauge.
It sure helped having good 3 point track gauges, and pliers with a notch to hold the spikes.Spiking went very well, and was done in no time at all.
It sure helped having good 3 point track gauges, and pliers with a notch to hold the spikes.Spiking went very well, and was done in no time at all.
Cruel, just cruel
LGB-Sid
Registered
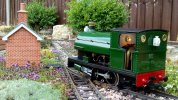
Finally fitted the lights and so it was test run time to see what falls off, just a few more detail bits to sort in the cab yet, and add the power buffer when it gets here, then Stainz conversion no 2 is complete, time to find another one to bash  Name and running number no decided yet, need to wait till the 21st of July (ish) to find out what the next grand child is and called

LGB-Sid
Registered
That was a Stainz?? Excellent build! (did I miss the 'making of' thread...?)
Thanks no build thread as I 3D printed it.
Rhinochugger
Retired Oik
casey jones snr
Registered
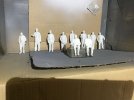
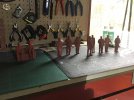
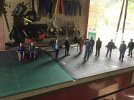
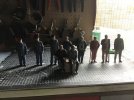
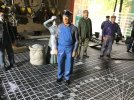
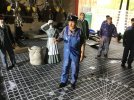
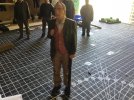
I spent the afternoon preparing more figures fainting:-
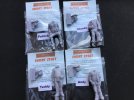
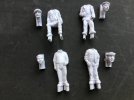
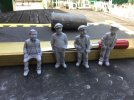
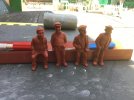
The figures are 16mm and come from “Short Staff” range from Roundhouse Engineering.
The figures were washed in warm soapy water. Then they were separated from the excess resin. The heads are interchangeable. Once assembled I primed them. They have now been set aside for the primer to harden.


The figures are 16mm and come from “Short Staff” range from Roundhouse Engineering.
The figures were washed in warm soapy water. Then they were separated from the excess resin. The heads are interchangeable. Once assembled I primed them. They have now been set aside for the primer to harden.
Last edited:
Real shorties, interesting bunch though I doubt you would want to meet them in an alleyway on a dark night.I spent the afternoon preparing more figures fainting:-
View attachment 268700View attachment 268701View attachment 268702View attachment 268703
The figures are 16mm and come from “Short Staff” range from Roundhouse Engineering.
The figures were washed in warm soapy water. Then they were separated from the excess resin. The heads are interchangeable. Once assembled I primed them. They have now been set aside for the primer to harden.

