What happened at your workbench today?

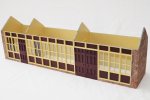
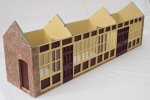
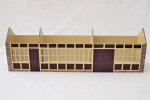
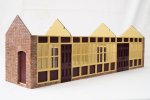
I have been beavering away with painting the four building kits that Father Christmas brought me. Having built and primed the bare shells, my first task was to tackle the brickwork. I wanted to paint all four at the same time for continuity. My intention was to attempt to replicate the appearance of the brick paper that I used on the scratch built items for the Claptowte Railway. For a first attempt at painting brickwork I was pleased with the outcome, I feel that I managed to capture the feel of the brick paper, even thought the paint came out a little darker. The toilet block, station building (by Kippo Models) and the coal office (by GRS) all came out with a very similar appearance. The moulding of the brickwork on the signal box (Thorley Minatures) was not as deep and textured and I was not able to get it to look the same as the other buildings, however, in the end I did obtain a result that I was happy with. It goes without saying that brickwork built at different times, using different bricks, will not appear the same.

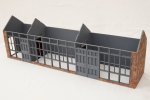
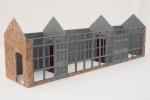
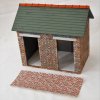
Below is the toilet block, the first building that I started. It is shown with a piece of the brick paper that I was trying to replicate.
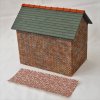
dig 210211001.JPG

dig 210211002.JPG

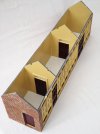
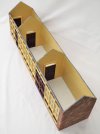
The next photos show the building with the doors, guttering and down pipes, painted and ready to glue on. I am waiting for some paint 'weathered concrete' to arrive, to overpaint the lintels over the doors, before I complete the assembly. Also waiting to be added will be some facia boards on the gable ends. Until the guttering is in place I cannot gauge the size and fit of them.
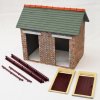
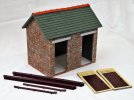
dig 210211003.JPG

dig 210211004.JPG

David
 
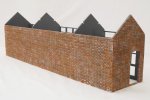
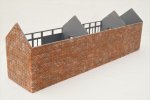
Work on the Claptowte Railway buildings is in abeyance at the moment while I await delivery of the required paints. In the meantime I'll post some pics of the brickwork that I painted on the Kippo Models station building. I did the brickwork at the same time as the toilet block, previously posted, so the appearance is very similar. I did not mention my painting method, the overall grey plastic spray primer is left as the mortar colour. The raised texture of the bricks was painted by beans of a sponge wiped across the surface using different colours and gently dabbing and blending. The odd bit of detail colour was applied with a paintbrush. I bought some sponge wedges used for applying and blending makeup, £6 for forty from Amazon, in white. I cut a wedge in half as half a wedge was big enough, and I only used three wedges to paint all four buildings. As I said with regard to the toilet block, for a first attempt I was very pleased with the result.

dig 210211005.JPG

dig 210211006.JPG

dig 210211007.JPG

dig 210211008.JPG

David
 
Looks great does the brickwork.
 
Work progresses on the Gernies End Station Building for the Claptowye Railway. The the shell of the building has been completed with both the inside and outside having been painted and the the glazing installed. To recap, internal doors have been added where none were present. The only other addition, so far, has been to substitute the thin clear glazing material, supplied with the Kippo Models kit, with 1.5mm polycarbonate sheet for extra strength and rigidity. The clear sheet comes with protective film on both surfaces. I cut across the film on the side that I wanted to paint and removed the protective film where the paint was to be applied. I sprayed the area with grey plastic primer before brush painting the colour. When dry the remaining protective film was removed from both sides. The glazed and painted panels were thus installed in one go.

The next job, before the roof and canopy are installed and painted, will be to install the lamps and wiring for the internal/external lighting.

dig 210216001.JPG

dig 210216002.JPG

dig 210216003.JPG

dig 210216004.JPG

dig 210216005.JPG

dig 210216006.JPG

David
 
Work progresses on the Gernies End Station Building for the Claptowye Railway. The the shell of the building has been completed with both the inside and outside having been painted and the the glazing installed. To recap, internal doors have been added where none were present. The only other addition, so far, has been to substitute the thin clear glazing material, supplied with the Kippo Models kit, with 1.5mm polycarbonate sheet for extra strength and rigidity. The clear sheet comes with protective film on both surfaces. I cut across the film on the side that I wanted to paint and removed the protective film where the paint was to be applied. I sprayed the area with grey plastic primer before brush painting the colour. When dry the remaining protective film was removed from both sides. The glazed and painted panels were thus installed in one go.

The next job, before the roof and canopy are installed and painted, will be to install the lamps and wiring for the internal/external lighting.

View attachment 280762

View attachment 280763

View attachment 280764

View attachment 280765

View attachment 280766

View attachment 280767

David
That looks pretty OK, David :clap::clap::clap:
 
Work progresses on the Gernies End Station Building for the Claptowye Railway. The the shell of the building has been completed with both the inside and outside having been painted and the the glazing installed. To recap, internal doors have been added where none were present. The only other addition, so far, has been to substitute the thin clear glazing material, supplied with the Kippo Models kit, with 1.5mm polycarbonate sheet for extra strength and rigidity. The clear sheet comes with protective film on both surfaces. I cut across the film on the side that I wanted to paint and removed the protective film where the paint was to be applied. I sprayed the area with grey plastic primer before brush painting the colour. When dry the remaining protective film was removed from both sides. The glazed and painted panels were thus installed in one go.

The next job, before the roof and canopy are installed and painted, will be to install the lamps and wiring for the internal/external lighting.

View attachment 280762

View attachment 280763

View attachment 280764

View attachment 280765

View attachment 280766

View attachment 280767

David
David looking good, there is one being built in the March Garden Rail :), not a patch on yours.
 
I've reached the stage of applying Cambrian rivet heads to the hopper strapping. I think I need stronger magnifying lenses :nerd:
Prick 'em with the pointy end of a scalpel and spot them on a little bit of solvent weld already on the strap - when you get good, you can do two for each brush of solvent weld ;););)
 
David looking good, there is one being built in the March Garden Rail :), not a patch on yours.
Oh is it out? In February edition publication date is shown as 11ty March (p46).
 
Installed a 1:160 telephone kiosk on the platform :)

This is almost the complete opposite of the type of modelling that David is doing on the Claptowte Railway. At this scale, if you can hold the bits in order to assemeble them, you're doing well ;);)

DSCF2028.JPG
 
Depends whether the date on the cover is the 'on-sale' or 'off-sale' date..
But they did make a mess of the dates in the February issue..

11th March, will be the April issue availability date. :nerd:
 
Back
Top