What happened at your workbench today?

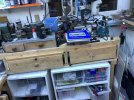
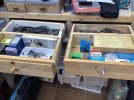
Managed to get my head round doing the other draw today, well started the main work yesterday and just needed to do some final fettling before fitting. A couple of layers of Hardboard were what made it work and they can just be made out to the top left of the right hand draw.

Much better organisation now and some stuff that was littering the workbench nicely stored. In fact the black screwdriver case and another have been fitted into the right hand draw. I have of course lost my location for the Air Brush stand. Sorted with a little bit of 2x1“ timber as shown. Finally a bit of 1x1” timber has been put on top of the left hand draw to stop lathe detritus entry.
6C004F7F-0A5F-40DF-BDB2-6452865093EE.jpeg
F5D8C025-F663-40DA-AA32-753C12F6E73B.jpeg
 
Did some fiddly work on the gravel loader: Cut pieces for deck railings and began to assemble them, and assembled a ladder from 3mm dowel treads and predrilled side rails. Naturally, one of the side rails split when I whacked a glued dowel into its hole, but a squeeze of Titebond in the crack should take care of that. The kit instructions contain no dimensions for these pieces of railing :rolleyes:, so I measured the railing height on my 1:1 front deck (42") and scaled that down to 1:22.5, rounded to the nearest mm. I decided to the ladder would be 24 scale inches wide across the treads, probably wider than most ladders but I wanted room for workers hefting loads (I did some Googling of standards -- minimum 16" was what I found, and I'm sure the Madman or the Rhino could enlighten me from their professional experience). The ladder certainly doesn't meet current H&S requirements :eek: but my railway is from years past and has carefully evaded the attentions of Col. Yolland.
So now I have the ladder put together, I can figure how long the deck railings need to be to allow space for it (and how much scale lumber I need to buy, as the kit doesn't have sufficient to complete the railings as sketched in the plan :oops:).
Fun, fun.
 
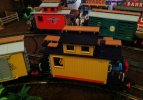
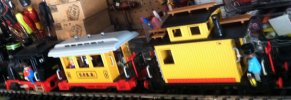
Progress was made on this re-color of a Playmobil caboose which was originally discolored and broken.
IMG_7689.JPG
The UPRR stickers still need to be added to the caboose:
IMG_7690.JPGIMG_7691.JPG

"But when anything is exposed by the light, it becomes visible,"
IMG_7692.JPG
 
Got as far as I can with the gravel loader deck until I can get to the store for more scale lumber, so I started assembling panels for the front wall of the hopper structure. Turns out the 280mm lengths of framework are just fine :whew: -- evidently I'd been measuring a panel piece that actually belongs elsewhere before doing my sums for the wall height. As I noted, the instruction drawings have no dimensions and one sketched panel looks much like another :confused:.
 
Last edited:
Work has ground to a halt on the Gernise End Signal Box while I await delivery of materials required to complete the build. In the meantime I spent some of my Birthday money on a new building. Here is the start of the story.

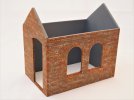
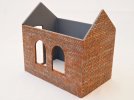
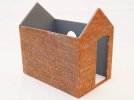
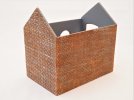
Having previously built a couple of Kippo Models G Scale cast resin buildings, I been impressed by their quality and simplicity of construction and the amount of detail that goes into the kits. Several of the kit parts are modular and appear in more than one building. There are several versions of a basic line side building and I opted for the version with double arched windows in one wall and a door in the gable end wall. I decided to obtain one of these and build it as a Goods Office for Gernise End Station, to complement the various goods handling facilities.

As with similar kits I had to start by cleaning up the component parts to remove any moulding flash. This was achieved by scalpel, files and wet or dry paper. All the parts were then given a good wash to remove any dust or mould release agent.

The wall mouldings are designed so the courses of bricks interlock at the corner joints. A little bit of additional filing can be required to achieve a near perfect fit. I say near perfect as there will still be gaps here and there. Having used superglue to assemble the walls, Kippo Models suggest the use of car body filler pushed into the joins, which can then be sanded and scribed. This is the method that I used on the two previous Kippo models that I have built, the Station Building and the Toilet Block. The car body filler is very smelly to use and I always have difficulty judging the correct amount of hardener to use, thus it takes a long time to set.

For this model I searched for an alternative. Having superglued the walls together and filed down any overhanging or protruding bricks, I used DIY grab adhesive, the type that I have previously used to glue skirting boards to walls. A small amount on the end of a finger can be rubbed into any gaps to obtain a smooth joint. Using a point, the courses can be blended in. Grab adhesive does shrink slightly, so you may need a couple of applications in places. I also ran some grab adhesive along the internal corners for extra strength. It does the job with no mixing and no smell but do remember to wipe your finger before you pick your nose.

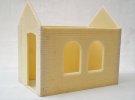
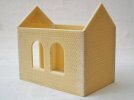
The assembled walls with corner joints filled and filed, ready for a coat of primer.

dig 210315001.JPG

dig 210315002.JPG

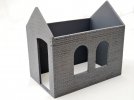
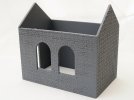
The shell of the building, primed and ready for painting.

dig 210315006.JPG

dig 210315007.JPG

The painting of the brickwork was carried out in the same way that I had painted previous resin kit buildings. The method that I used was to treat the overall spray grey plastic primer as the mortar colour. The raised texture of the bricks was painted by means of a sponge wiped across the raised textured surface of the bricks using different colours and gently dabbing and blending. The odd bit of detail colour was applied with a paintbrush. I bought some white sponge wedges used for applying and blending makeup, £6 for forty from Amazon. I cut a wedge in half as half a wedge was big enough.

dig 210316010.JPG

dig 210316011.JPG

dig 210316012.JPG

dig 210316013.JPG

And so the work continues


David
 
Last edited:
Work has ground to a halt on the Gernise End Signal Box while I await delivery of materials required to complete the build. In the meantime I spent some of my Birthday money on a new building. Here is the start of the story.

Having previously built a couple of Kippo Models G Scale cast resin buildings, I been impressed by their quality and simplicity of construction and the amount of detail that goes into the kits. Several of the kit parts are modular and appear in more than one building. There are several versions of a basic line side building and I opted for the version with double arched windows in one wall and a door in the gable end wall. I decided to obtain one of these and build it as a Goods Office for Gernise End Station, to complement the various goods handling facilities.

As with similar kits I had to start by cleaning up the component parts to remove any moulding flash. This was achieved by scalpel, files and wet or dry paper. All the parts were then given a good wash to remove any dust or mould release agent.

The wall mouldings are designed so the courses of bricks interlock at the corner joints. A little bit of additional filing can be required to achieve a near perfect fit. I say near perfect as there will still be gaps here and there. Having used superglue to assemble the walls, Kippo Models suggest the use of car body filler pushed into the joins, which can then be sanded and scribed. This is the method that I used on the two previous Kippo models that I have built, the Station Building and the Toilet Block. The car body filler is very smelly to use and I always have difficulty judging the correct amount of hardener to use, thus it takes a long time to set.

For this model I searched for an alternative. Having superglued the walls together and filed down any overhanging or protruding bricks, I used DIY grab adhesive, the type that I have previously used to glue skirting boards to walls. A small amount on the end of a finger can be rubbed into any gaps to obtain a smooth joint. Using a point, the courses can be blended in. Grab adhesive does shrink slightly, so you may need a couple of applications in places. I also ran some grab adhesive along the internal corners for extra strength. It does the job with no mixing and no smell but do remember to wipe your finger before you pick your nose.

The assembled walls with corner joints filed and filed, ready for a coat of primer.

View attachment 282369

View attachment 282370

The shell of the building, primed and ready for painting.

View attachment 282371

View attachment 282372

The painting of the brickwork was carried out in the same way that I had painted previous resin kit buildings. The method that I used was to treat the overall spray grey plastic primer as the mortar colour. The raised texture of the bricks was painted by means of a sponge wiped across the raised textured surface of the bricks using different colours and gently dabbing and blending. The odd bit of detail colour was applied with a paintbrush. I bought some white sponge wedges used for applying and blending makeup, £6 for forty from Amazon. I cut a wedge in half as half a wedge was big enough.

View attachment 282373

View attachment 282374

View attachment 282375

View attachment 282376

And so the work continues


David
I like the corner brickwork - do the ends of the wall sections come ready "scribed" rather than blank?
 
I like the corner brickwork - do the ends of the wall sections come ready "scribed" rather than blank?
Mick

As I described above, perhaps not clearly, at the corners the courses of bricks interlace, like bringing your fingers together at right angles and interlacing them. Once glued, any that are sticking out too far (that will be most of them) can be filed level with the rest of the wall. Any gaps can then be filled and before the filler has fully dried, the mortar joints can be scribed into the filler using a point, I used an old dart. I hope that helps.

David
I should have gone to Specsavers - you did describe correctly!
 
Have had an interlude back with 4mm loco building but now back on the big stuff
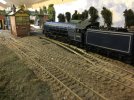
Latest project a 4-8-0 goods loco built around an Annie chassis modelled on Maunsells mid 30s scheme for a freight version of the Lord Nelson class786FC949-944B-4808-A9AF-B98FE0FDE56C.jpeg6E6046BE-F85C-496A-91DB-6EF3397FD263.jpegAB38BEC9-D97B-4B12-971D-15BC017A1FFB.jpeg
 
Had some workshop time today, here’s some photos

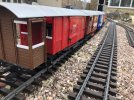
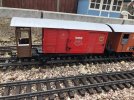
The brake van is based around a newquida van, it’s designed to be Gwr toad brake but inspired by RHB.

it needs a bit more work, but it was just a chance to get it outside and see how it looks.

EA8158D6-2296-4952-9175-6EE80B70C213.jpeg
5DD00ADE-FC76-48B6-8D4F-D99CEC24D6E2.jpeg
 
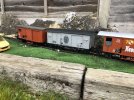
This is the next newquida bash, it started of as a 4 wheel van, the was then lowered in height by 2 planks, to ensure that the vehicle height was similar to the original.

it was fitted onto a shortened newquida bogie chassis


it gives a nicely proportioned vehicle, with good running quality’s due to the bogie chassis

30CEF93E-033C-41BE-BB4D-DC2EF27F9C9D.jpeg
 
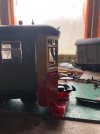
Final project, I’ve started work on a observation or propelling car,
Havent yet decided which,

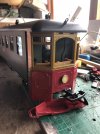
it’s a newquida coach but with the-end of a sylvanian families tram in the process of being attached on


The tram is a near perfect match width wise which makes things a bit

Dan

5EA515FA-9CAB-4064-8A4C-0AAD26A252B1.jpeg74BE94F3-C4A6-4D6D-85D5-B4AD881E7F7A.jpeg
 
Back
Top