What happened at your workbench today?

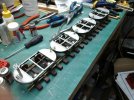
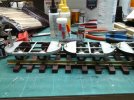
Having found the missing axleboxes for three IP white metal Hudson chassis, I test fitted them with the Dremel-cut axles, filed the axles, fitted, filed, fitted, filed ...
Finally got them to turn freely and epoxied the axleboxes in place.
I bought the chassis years ago intending to mount homemade V-tippers on them, but now that I have eight "Snailbeach" hoppers the tippers might be surplus to requirement -- so maybe a couple of manriders and flats or one-plank opens or bolsters ... so many possibilities.
So now I wait for glue to cure and paint to dry and mail-ordered bolts to arrive ...
 
Well, ignoring the camera angle which distorts things a bit.... assuming the 2 outer axles are the same, then the idler gears must be identical, also assuming the worms on each end of the motor are the same.

What looks different after you account for the camera angle and that it is closer to one axle than the other?

Greg
 
I've used Piko wheels and gears on one of my scratch builds. One thing I did find on the plain spacer was that there was a little bit of flash on the very edge that meant it was colliding with the bearings I added to the axle.

It might not be the whole story, but if there is something similar going on with yours Sid, the flash could be catching on the edges of the slot in the motor block any starting the binding?
Thanks will check when the new Gears get here as its a take apart to put them in, so ideal time to look.

Well, ignoring the camera angle which distorts things a bit.... assuming the 2 outer axles are the same, then the idler gears must be identical, also assuming the worms on each end of the motor are the same.

What looks different after you account for the camera angle and that it is closer to one axle than the other?

Greg

The Camera on a Motorola G8 is next to useless it distorts everything :)
 
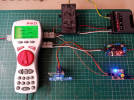
Little while back (post #1,455 page 73), tinkering with a Servo Tester to a Decoder, just as an after thought, would a Switch Decoder be able to operate in the same fashion, yep, found yet another use for a Switch Decoder.

LGB 55025 Switch Decoder to a Servo.png


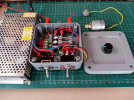
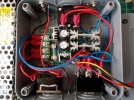
Upgrading the MK II Analogue Controllers to the MK III version, the MK II controller boards have been repurposed for conversions of Track Cleaning Loco's.

The MK II's have given sterling and almost uninterrupted service for the last 5 years (only down time for the usual yearly one day obligatory and mandatory testing as a legal requirement for the Public Liability Insurance).

Young persons are not renowned for their finesse, the original switches took one hell of a battering over this period!

Controller External.png

Controller Internal.png


The original MK I version, still in operation today, for use with the Shuttle, must getting on for 6 years or more!
MK I Controller Board.PNG


MK II Controller Board, two still in permanent operation on the layout, six now fitted to Track Cleaning Loco's, two more to do!

MK II Controller Board.png


MK III Controller Board, passed testing, two now in full operation on the layout, plus two as spares.
MK III Controller Board.png
 
Last edited:
The rake of IP Hudson white metal chassis is ready to roll.
20210727_165556.jpg
I didn't like the gap when I tried Brandbright three-link couplings, so I bent my own single links to hold the rake together.

20210727_165636.jpg
Just have to finish painting them and then decide what bodies to install. I'm thinking of a manrider bench for a PW crew on the brake wagon and use the the others as tool/material wagons.
 
Hello together
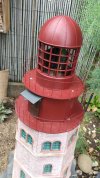
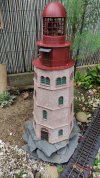
Some time ago I asked what could be done with the, in my eyes, ugly water tower. This is what came out of it. A lighthouse - and I think it's a beautiful one. The red-brown part is made of polystyrene. It is supposed to represent steel. The railings are made of rabbit fence. The upper part with the lamp is made of 7 parts in a 3d printer. The lamp is an LED. Around it turns a mirror that was made from a police trowel for children. Driven by a gear motor with approx. 3 revolutions per minute.
Now I still need a name for the lighthouse and the stopping point of the railway...
L2.jpgL1.jpg
 
No lighthouses, or Virginia Woolf, but I brought my gravel loader in from the shed where it has been sitting for six weeks or so since I rattle-canned a primer coat onto it: good and dry by now :D.
I intend to leave the "steelwork" in primer red (pretty much BR bauxite) and find a beigish colour for the panelling, rather than the black and light grey depicted on the kit box. Today, I found a bottle of white acrylic craft paint and gave the balcony railings a couple of coats. And, as usual, got paint where I didn't want it :oops:: however, I found that burnt sienna is a very close match to the primer red, so the errant white spots have been disappeared.
I have a few more pieces of this kit to trim and fit in place. I was thinking up various "improvements", all complex and time-consuming, but now I've decided to just finish the thing with the supplied plywood, well covered with paint. I will probably overlay the ply roof sections with aluminum sheet to keep the weather out of the seams.
 
Last edited:
Phew!
That is alright.. - T'was the R5 points..

They are destined for shed/garden, and are not 'more trains', so are allowed..
:giggle::giggle::giggle:
 
Evening,
A bit of work on the old work bench progressed today,
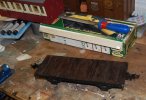
The conversion of a Accucraft IOM 4 wheel pairs chassis to a flat truck/ runner was finished and painted.
DSC_0106.JPG

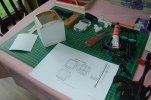
and a start was made on making the first of 2 containers, this one is an A type, the next will be a BD
DSC_0107.JPG
 
Last edited:
Back
Top