What happened at your workbench today?

Received the Revolution from GAP and had a play :inlove:
 
Evening,
A bit of work on the old work bench progressed today,
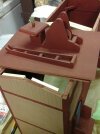
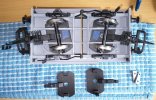
The conversion of a Accucraft IOM 4 wheel pairs chassis to a flat truck/ runner was finished and painted.
View attachment 288367

and a start was made on making the first of 2 containers, this one is an A type, the next will be a BD
View attachment 288366
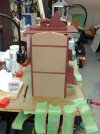
I look forward to seeing the finished Manntainer outshopped in a splendour of yellow livery... :eek:

And you've got a four-wheeled coach body to use as a summerhouse! :)
 
Perfect day to get out back and rattlecan plywood roof and hopper panels for the gravel loader. Also spritzed the main parts fot the yard crane.
20210731_154133.jpg
I found craft paint of a shade that goes nicely with the primer red of the framework and started colouring the panels.

20210731_154202.jpg
I rather fancy the red, but I may overcoat the crane in some shade of green -- army drab, perhap, from the surplus stores.
 
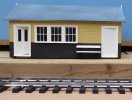
Finished painting signal box, again. For some reason the paint strips of down to the plastic, despite scrubbing with everything possible. 20210801_101003.jpgA quick spray with sealant and new windows, and it can go back out side
 
This week the 3D printers have been turned off all week o_O I had the idea if I stopped drawing things and printing them I might get some of the others finished :D Finally got round to adding the extended swivel bases I printed awhile back to the remaining printed wagons, so the hook stands out from the buffers an extra 3mm so I wont get buffer lock on R1 points, as I occasionally do sometimes , easier and more cost effective over changing all the points :) Wish I had made all the buffers spring loaded now :think:

wagon.jpg


The Blue tape is just so I know which wagons / coaches etc are running with the extension
 
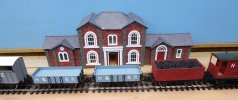
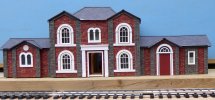
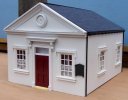
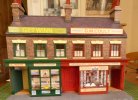
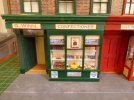
As you like work in progress pics here are some of the Hull Barnsley and North Eastern Heritage Railway. It is a fictional preservation line based in the Beverley Road area of Hull, near my home. I started working with laser cut 1/24 scale MDF brickwork and wagon bodies but now use Foamex. I don't score the brickwork as it looks great, but is v time consuming. I now have bricks and tiles printed onto Foamex then use it to build houses etc. It's like 00 brick paper effect but bigger.
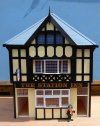
I also use Jacksons 1/24 windows where possible or scratch build if they don't suit what I'm doing. Some of the buildings like the Chapel, Stepney Station and the Station Inn are still there although often altered so I can photograph and measure them. The ones that have gone are recreated using old photos. My style is Toytown as this is basically a themed giant toy train set. It will be displayed with information boards with "proper" photos and text describing the history of railways and docks in Hull.
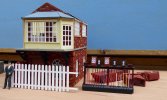
A closer look will show I need to add chimneys, wagon loads etc. and assemble the signal box. I have some loco conversions in hand but will probably run some Thomas stock "as is" to interest younger viewers. I also have some 1/24 figures and vehicles in the early stages of painting up. This section of the railway is based on the Stepney area and is the NER dock line and Hornsea/ Withernsea route.
Further up Beverley Road is the H&B "topline" a high level line running on an embankment and bridges to avoid more level crossings. My stuff for this is mostly in the planning stage. If anyone in the Hull area is interested in helping me set up the displays of this get in touch and I will give you some more info. Steve M.
P1000411 (2).JPGP1000412 (2).JPGP1000415 (2).JPGP1000418 (2).JPGP1000419 (2).JPGP1000420 (2).JPGP1000421 (2).JPGP1000423 (2).JPGP1010597 (2).JPGP1010598.JPG
 
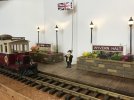
An on going project for some months (or longer :)), I bought the signs from SLR, but unsure how to fix them I had inspiration from Garden Rail (December 2019 # 304)
I bought some resin sheet stone wall from the auction site, and built the walls and the lamps picked up from the same site, battery box built in to the base, and "oasis" as filler inside, held in place with 2 part resin. The coping "pattern" took a while to find, but the hardest find were plants of the right size, ended up with 1:12 dolls house items, some look a better size than others.
In the end it all came our well.

IMG_1189.JPEG
 
Did a spot more painting on the white metal Hudson chassis. Wheels and axles are now a respectable Testor's rust colour, with black on parts of the rest -- the parts that I wasn't holding onto.
 
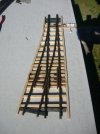
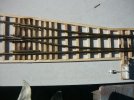
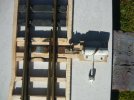
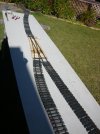
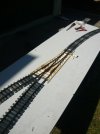
Finished making my first set of points (Mk1) they are a #5 set i.e. there is a 1 inch convergence 5 inches from the frog point.
Bit of a learning curve building them e.g. burned some sleepers when soldering.
They test OK with a bogie pushed through by hand so it now on to "user trials" using some locos and wagons to tweak any errors before being put into service.

They differ from other points in that there is no pivot for the blades they just bend about 5-10mm
Points Mk1.JPG

Frog
Points Mk1 Top View.JPG

Throwbar
Points Mk1 Throwbar and Lever.JPG

User trial setup
Points Mk1 User Trial Setup.JPG
Points Mk1 User Trial Setup (1).JPG
 
As you like work in progress pics here are some of the Hull Barnsley and North Eastern Heritage Railway. It is a fictional preservation line based in the Beverley Road area of Hull, near my home. I started working with laser cut 1/24 scale MDF brickwork and wagon bodies but now use Foamex. I don't score the brickwork as it looks great, but is v time consuming. I now have bricks and tiles printed onto Foamex then use it to build houses etc. It's like 00 brick paper effect but bigger.
I also use Jacksons 1/24 windows where possible or scratch build if they don't suit what I'm doing. Some of the buildings like the Chapel, Stepney Station and the Station Inn are still there although often altered so I can photograph and measure them. The ones that have gone are recreated using old photos. My style is Toytown as this is basically a themed giant toy train set. It will be displayed with information boards with "proper" photos and text describing the history of railways and docks in Hull.
A closer look will show I need to add chimneys, wagon loads etc. and assemble the signal box. I have some loco conversions in hand but will probably run some Thomas stock "as is" to interest younger viewers. I also have some 1/24 figures and vehicles in the early stages of painting up. This section of the railway is based on the Stepney area and is the NER dock line and Hornsea/ Withernsea route.
Further up Beverley Road is the H&B "topline" a high level line running on an embankment and bridges to avoid more level crossings. My stuff for this is mostly in the planning stage. If anyone in the Hull area is interested in helping me set up the displays of this get in touch and I will give you some more info. Steve M.
View attachment 288624View attachment 288625View attachment 288626View attachment 288627View attachment 288628View attachment 288629View attachment 288630View attachment 288631View attachment 288632View attachment 288633
I love the Andy Capp figure, where did you get him?
 
I love the Andy Capp figure, where did you get him?
A guy was selling them on Ebay. They were a bit pricey but I wanted one as the cartoonists brother in law, Lance Barrett ran a chip shop round the corner from us when we lived on Alliance Ave. in Hull many moons ago. I think they were made by Schleich which is quite strange. He had quite a few it may be worth a look if you want one.
 
Finished making my first set of points (Mk1) they are a #5 set i.e. there is a 1 inch convergence 5 inches from the frog point.
Bit of a learning curve building them e.g. burned some sleepers when soldering.
They test OK with a bogie pushed through by hand so it now on to "user trials" using some locos and wagons to tweak any errors before being put into service.

They differ from other points in that there is no pivot for the blades they just bend about 5-10mm
View attachment 288786

Frog
View attachment 288783

Throwbar
View attachment 288782

User trial setup
View attachment 288785
View attachment 288784
Testing so far has highlighted only one issue and that is one stock rail is lower vertically than the frog causing a slight bump so far no derailments have occurred both forward and reverse at high and low speed and I can live with that as it fits in with the theme of a budget conscious railway.
As this is the Mk1 attempt more attention will be paid to rail heights in the next iterations.

I used my Bachmann Connie as a tester because it is my most troublesome loco when it comes to points (it will not tolerate R1 points at all) and a Stainz which was nit troubled at all as I expected.

Following the plans I have if I want a different size convergence it is just a matter of making a frog where the distance out from the point equals 1 inch i.e. a #6 is 1 inch at a distance of 6 inches or conversely a #3 is 1 inch at 3inches from the frog point.

The amount of tension required to move the point blades is negligible and they lend themselves to either a point throw or servo operation. This is "prototypical" of some sugar cane railways.

Overall I am happy with my first attempt at point building and will most likely put it into service.
 
Back
Top