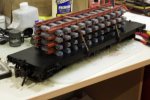
What happened at your workbench today?

Well, not at that price, at Abesbooks it's now £5330.66!
Gasp! The price of this Book is rising faster than the price of Gold!

From the conversations over the last few days, IF I behave myself!!!, a later edition MAY appear for my forthcoming Birthday.....
 
Gasp! The price of this Book is rising faster than the price of Gold!

From the conversations over the last few days, IF I behave myself!!!, a later edition MAY appear for my forthcoming Birthday.....
No, not a later edition, an earlier edition is what you need.
 
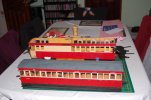
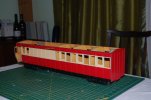
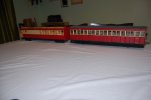
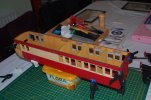
primer and cream applied today and test assembly, whilst the base coats I used where the ones I used for the HSB coaches, (Fiat Swift Red and Rover Rattan Beige) they seam to be close enough for the top coat? will have to see it in a better light.
DSC_0245.JPG
DSC_0244.JPG
 
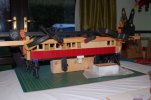
More work on the DJB half brake, body now glued together with the aid of lots of clamps :eek:
DSC_0253.JPG
DSC_0255.JPG
DSC_0256.JPG
 
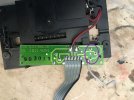
Did some more pantograph problem trouble-shooting on my Massoth XLS chipped vintage LGB Ge 4/4 III. (See posts here Why so much electronics for a DC Locomotive? for the lead up.) First off, I'm now very proficient at opening up this loco:(. I decided to try something I should have thought of when I first had the loco open - swapping the pantograph plugs to see if the issues I were having with the rear pan were related to the pantograph drive itself. Note the rear pan would go up but could not be lowered either digitally or with a change of direction on analog power. Turns out there was also a problem with rear pan's drive unit in addition to the decoder programming problem mentioned in the other thread. I removed the pan drive for inspection. The motor ran in both directions when powered directly. While fiddling with the circuit board holding the end-of-travel micro-switches I was able to get the drive to operate in both directions. Closer inspection revealed this:
Ge4-4 III - 1 (3).jpeg
One of the micro-switches was not soldered in place! The switch posts were just making rubbing contact with the solder pads. I got the soldering iron out, fixed this then re-installed the pantograph drive. Both pantographs now work like they are supposed to when the loco is run on analog DC. The front pan goes down and the rear pan goes up based on the direction of travel.

I still have an issue with digital operation. Both pans go up when first powered up. This is as expected based on page 10 of the instruction manual. I can lower and raise the front (Cab I) pan digitally. This is connected to the XLS decoder A1 output. The rear pan (over Cab II) is supposed to be connected to the A2 output. This needs further investigation. (Swapping the pan plugs now changes which pan I can control digitally so the pan drives are no longer an issue.) I'll have to open the loco one more time to check the six wire harness between the XLS and the control board. Oh well - some real progress was made in any case.
 
Last edited:
Today I decided to practise what I preach. A couple of weeks ago I commented on the forum that red firebox lighting wasn't prototypical. I noticed that my LGB RhB 2-6-0 "Rhatia" had a red light in its firebox so out with the soldering iron and it now sports two yellow leds in place of the original one red and one orange.
 
I still have an issue with digital operation. Both pans go up when first powered up. This is as expected based on page 10 of the instruction manual. I can lower and raise the front (Cab I) pan digitally. This is connected to the XLS decoder A1 output. The rear pan (over Cab II) is supposed to be connected to the A2 output.
Upon inspection it is pretty clear why the A2 output does not operate the rear pantograph on my LGB Ge 4/4 III! Nothing is connected to the decoder A2 output! This early generation of LGB digital locos use serial pulses of A1 to control functions. I changed the setting for F12, the pan function key for this loco, to switching from momentary on my central staton. This lets me pulse A1 with taps of the pantograph (F12) key. Two taps (two A1 pulses) will raise or lower the front pantograph. Three taps (three A1 pulses) raises or lowers the rear pan. This is just as described for the MTS Train Mouse on page 10 of the instructions. I now have full digital (if archaic) control of both pantographs and a fully digitally functioning early generation LGB Ge 4/4 III ! :party::party::party: It's been quite a learning experience.

As an aside, the reason the front pan worked and the rear would not is that I had the CS setting for the pan function key set to momentary for this loco. Pressing the key once actually pulsed A1 twice, on when I pressed it, off when released. No matter how many times it was pressed and released it gave an even number of A1 pulses. A note on the Massoth Sound Project for these locos - I think it was developed for a later generation of Ge 4/4 III. It needed some tweeking of the function key settings to work with my early 70642 (6 white dot digital sticker) Ge 4/4 III.

Another aside, my experience may have relevance for serial control of the early LGB sound modules as recently discussed on another thread.
 
Last edited:
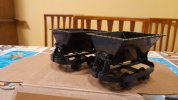
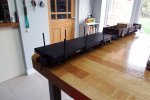
OK, three wagons from my mate Half Arsed Hal Farsed now completed - just waiting for the logs to dry a bit before I pickle 'em in preservative :):):):)

Actually, the first one's a bit blurry, and that was taken before chablis-o-clock :confused:

DSCF2299.JPG


DSCF2297.JPG
 

Attachments

  • DSCF2300.JPG
    DSCF2300.JPG
    328.5 KB · Views: 0
OK, three wagons from my mate Half Arsed Hal Farsed now completed - just waiting for the logs to dry a bit before I pickle 'em in preservative :):):):)

Actually, the first one's a bit blurry, and that was taken before chablis-o-clock :confused:

View attachment 294094
very nice, however, would they have looked better with the fixed fish plate removed :mask: :mask::mask::mask:
 
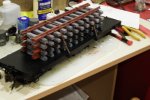
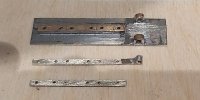
Quite a good day today, made a wee jig to help in the fabrication of the iron work for a wagon drop side, an outer hinge with a pivot and a plain short one for the inside of the wagon, just another 31 pairs to make.

20220110_221254.jpg

David
 
Last edited:
Assembling the bashed Bachmann and tested out the firebox effect. Sorry about the video - nigh-on impossible to get an iPhone on the footplate! Coals lit from beneath with dull red and bright yellow LEDs, and from above with a flickering orange. Hoping it passes the Neil Robinson orangeness test :D Not so interesting factlet - the screw cover from an outdoor socket box is just the right size and shape to serve as a firebox door.

 
Assembling the bashed Bachmann and tested out the firebox effect. Sorry about the video - nigh-on impossible to get an iPhone on the footplate! Coals lit from beneath with dull red and bright yellow LEDs, and from above with a flickering orange. Hoping it passes the Neil Robinson orangeness test :D Not so interesting factlet - the screw cover from an outdoor socket box is just the right size and shape to serve as a firebox door.

Very effective, I used an Arduino for a similar effect to fit in a light to replace a candle.
 
Very effective, I used an Arduino for a similar effect to fit in a light to replace a candle.
You're too clever, by half! I've only just learned how to use a soldering iron :D:D
 
You're too clever, by half! I've only just learned how to use a soldering iron :D:D
Hm not really, Arduino is somewhat tricky to get your head around but I bought a kit that allows me to set things up with small jumper wires and tag blocks. The setup for creating the Candle effect was got including the code from You Tube. If you get chance for a visit and train play this year will show you the setup.
 
Back
Top