What happened at your workbench today?

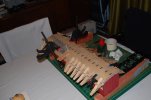
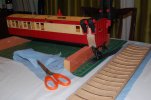
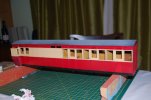
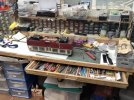
Roof done, good job we didn't need to put any washing out! now on with fix the guards duckets.
DSC_0258.JPG
DSC_0262.JPG
 
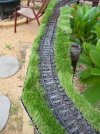
Not exactly the workbench but out on the layout bench.

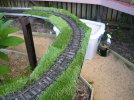
I have started ballasting and adding "grass" to the Cane Line.
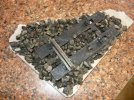
I put the trial piece out in the weather in the middle of last year (2021) to see how it would standup after sun rain heat and cold it has not deteriorated at all.
The ballast is 7mm blue metal a type of rock used in concrete and by the fill size railways.
To hold it together I used 50/50 outdoor PVA and water with a few drops of washing up liquid as a wetting agent.
I sprayed the glue on which left holes between the ballast for water drainage, the ballast sits on shade cloth to stop it falling through the holes in the cable tray base.
Ballast trial.JPG
Ballast Trial

Cane line ballast and turf.JPG

Cane line ballast and turf 1.JPG
Completed section of track
 
Last edited:
Not exactly the workbench but out on the layout bench.

I have started ballasting and adding "grass" to the Cane Line.
I put the trial piece out in the weather in the middle of last year (2021) to see how it would standup after sun rain heat and cold it has not deteriorated at all.
The ballast is 7mm blue metal a type of rock used in concrete and by the fill size railways.
To hold it together I used 50/50 outdoor PVA and water with a few drops of washing up liquid as a wetting agent.
I sprayed the glue on which left holes between the ballast for water drainage, the ballast sits on shade cloth to stop it falling through the holes in the cable tray base.
View attachment 294201
Ballast Trial

View attachment 294205

View attachment 294204
Completed section of track
Grass is growing well :p:p
 
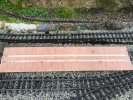
For sometime I have struggled getting my "Annie" to the railway and back, especially as I like to keep it coupled. So along comes the basic carry device, a piece of wood with two tracks routered out 45 mm apart, note the two hole on the centre line was for a piece of wood to be screwed underneath to hold the item in place whilst at work with the router.

Annie-Carry-01.jpg

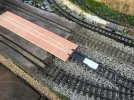
The next job is to be able to "drive" Annie" off and on the carrier. Enter a short length of Bachmann plastic track. Two small indents to hold the track on the carrier (above on the left), and some tapering of the track.

Annie-Carry-02.jpg
This meant loosing sleepers and the tracks parting. So when the wheels transition of the plastic track plasticard supports the flanges, and the narrower plasticard in the centre (40 mm wide) keep the wheels on track until the wheels are firmly on the railway.

Annie-Carry-03.jpg

The nest issue was to hold this transition track in place, and ideally I would have fixed it to the carrier, but opted to use the rail-track to hold it in place, so a small block to fit between the sleepers was glued underneath.

Annie-Carry-04.jpg

A Trial run, a few bench tests had been carried out, but now for the real test, notice my new supervisor.

Annie-Carry-06.jpg

Does it work!!!

Annie-Carry-07.jpg

It was run (battery power) off and on a couple of times, carried out slowly but a great success, even ran it on forwards without issue.
One last thing (for now) don't want it running off the end.

Annie-Carry-08.jpg
Just need to manufacture the carry handles.
 
For sometime I have struggled getting my "Annie" to the railway and back, especially as I like to keep it coupled. So along comes the basic carry device, a piece of wood with two tracks routered out 45 mm apart, note the two hole on the centre line was for a piece of wood to be screwed underneath to hold the item in place whilst at work with the router.

View attachment 294250

The next job is to be able to "drive" Annie" off and on the carrier. Enter a short length of Bachmann plastic track. Two small indents to hold the track on the carrier (above on the left), and some tapering of the track.

View attachment 294251
This meant loosing sleepers and the tracks parting. So when the wheels transition of the plastic track plasticard supports the flanges, and the narrower plasticard in the centre (40 mm wide) keep the wheels on track until the wheels are firmly on the railway.

View attachment 294252

The nest issue was to hold this transition track in place, and ideally I would have fixed it to the carrier, but opted to use the rail-track to hold it in place, so a small block to fit between the sleepers was glued underneath.

View attachment 294253

A Trial run, a few bench tests had been carried out, but now for the real test, notice my new supervisor.

View attachment 294254

Does it work!!!

View attachment 294255

It was run (battery power) off and on a couple of times, carried out slowly but a great success, even ran it on forwards without issue.
One last thing (for now) don't want it running off the end.

View attachment 294256
Just need to manufacture the carry handles.
A very well thought out idea. Coincidentally, there has just been a discussion on router produced "tracks" on the HRCA forum.

I wouldn't like to tangle with your new superior.
 
Neatly done as ever Jimmy, yes the supervisor looks like he is saying “what do you think you are doing on my walkway”?

At this moment I am as ever in the midst of a few jobs. Having completed my Kamel Batteries the other day I thought I would get on with the Combino Tram again, but changed my mind to attacking the Swift16 Railcar batterysoundification. This has resulted in some serious hacking to stuff bits in place. Seen here on the workbench, orders in for some more bits to get this moving forwards.
D4EBC96B-3AB7-4C7E-8A91-EE00C6625B9B.jpeg
 
For sometime I have struggled getting my "Annie" to the railway and back, especially as I like to keep it coupled. So along comes the basic carry device, a piece of wood with two tracks routered out 45 mm apart, note the two hole on the centre line was for a piece of wood to be screwed underneath to hold the item in place whilst at work with the router.


Just need to manufacture the carry handles.
Love it! Coincidentally, I've been facing the exact same issue this week and had resorted to a temporary solution of 2ft of track on a piece of laminate, but I can see that being converted to your clever solution in due course :)
 
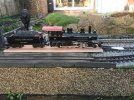
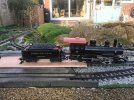
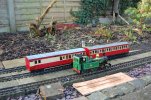
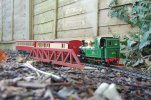
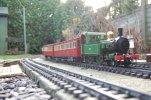
Not so much the workbench, but testing non the less. fitted the chopper coupling last night and with the aid of a few washers settled on the ride height, so out side, set fire to a loco and see what happens, strangely, nothing, no derailments, no uncoupling...... I must have done something wrong :think: :giggle:
anyway the pics.
Just noticed in the first pic, the wood base that comes with Accucraft locos JimmyB ;)
DSC_0271.JPG
DSC_0273.JPG
DSC_0276.JPG
 
Not so much the workbench, but testing non the less. fitted the chopper coupling last night and with the aid of a few washers settled on the ride height, so out side, set fire to a loco and see what happens, strangely, nothing, no derailments, no uncoupling...... I must have done something wrong :think: :giggle:
anyway the pics.
Just noticed in the first pic, the wood base that comes with Accucraft locos JimmyB ;)
View attachment 294304
View attachment 294305
View attachment 294306
Those DJB bogies run like a dream; with a 'small F' and half-brake you have the makings of almost every train that ever ran on the IOM!
 
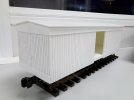
Another box car started,bachmann chassis and trucks with a custom body,the build so far,IMG_20220103_050534.jpg
 
Back
Top