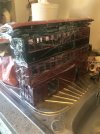
What happened at your workbench today?

That is a USAT F3, and I had issues with mine on R1 curves, did you have to do any mods?
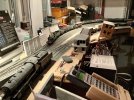
No..
But, it is not new (or mine).
The trucks seem to have a lot of play, but also seem to be intact, so I don't think they have been altered.

Came to me, with a Massoth XLS (sound and Motor) decoder, and heavily 'messed-with' front lighting board. - Everything 'on' all the time.

It now has battery RC, MyLocoSound, directional lighting.
Lighting, including the switchable 'rear headlight' (and the sound) can be controlled by the original switches.
Power switch, and charging socket, are on the rear face of the tank, under the loco.

PhilP
 
Had a visitor to the railway workshop last night a 00 DCC SECR Wainwright D class loco that comes with a traction tyre on the front leading wheel. There is one of these locomotives in the NRM at York. A spare sans traction tyre is wheel-set is also included so some keyhole surgery was carried out to replace said wheel-set. Quite a scary process with 4 tiny weeny scres to remove to release the coupling rids, fortunately they do provide a couple of spares - not required I am happy to say. Certainly improved the running as pickup on the extra pair of drivers made a big difference. Seen here hauling a short coal train on my 00 Coal Mine Railway. Sound was very good as well, allegedly 2 speakers in the beast, 1 in the tender the other in the loco.3A1AA302-0903-40E5-A23B-27D9F032CE9B.jpeg9266889B-6ECE-4752-B23D-78762A1C53C3.jpeg
 
20220123_164743.jpg
Finally managed to finish my Binnie Skips20220123_164837.jpg
Very sort rake.....but I'm still collecting! When we're allowed back into shows, I generally but a couple (I've several 32mm ones as well)
 
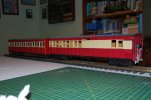
More work on the half brake,
Duckets finished, hand brake and vacuum pipes fitted and lining out (trim line) between the red and cream done, it's getting there :)

DSC_0281.JPG

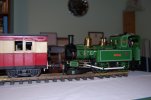
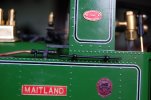
Also so the troublesome number 5 (the second), has now been renumbered and named 11 Maitland, 5 was filed off the chimney, also name and builders plates fitted, Rods painted white for the Ailsa period and injector feed pipe reshaped, the safety valve bonnet was the brass one "borrowed" from No 13 in the 70's & 80's. I took the one off the loco to paint and in a nice surprise found it was brass already :) so just had to strip off the paint, job done! with a bit more running, it now should behave it's self ;)
DSC_0283.JPG

A close up of the Diane Carney plates

DSC_0285.JPG
 
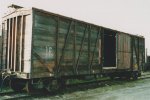
I thought i would start something simple like a soviet box car.......nope, not simple:
ACR-from-Blair-012.jpg
this is the idea

20220124_182119.jpg
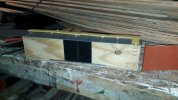
Needs paint and more steel beams., and i dont agree on the aluminium on the roof: to thin, i thik the epdm is the right thickness.

20220124_181941.jpg
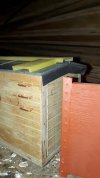
Need to drill a lot of more holes, but the alu strip gives it a nice touch(right one in red, final tint?) was experimental.


20220124_182102.jpg
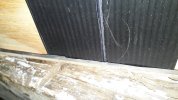
Should be a single door? on a 40ft boxcar

With best regards Igor
 
I thought i would start something simple like a soviet box car.......nope, not simple:
View attachment 294476
this is the idea

View attachment 294475
Needs paint and more steel beams., and i dont agree on the aluminium on the roof: to thin, i thik the epdm is the right thickness.

View attachment 294474
Need to drill a lot of more holes, but the alu strip gives it a nice touch(right one in red, final tint?) was experimental.


View attachment 294473
Should be a single door? on a 40ft boxcar

With best regards Igor
Nicely done Igor, but I would have gone for much thinner ply. Just right to match the end strapping would have been sufficiently strong enough. If you did have worries about warping in the middle a few bits of squared wood of suitable size would strengthen things up. You may need lots of these for your big locomotives so thinner ply will be more economical in the long run.
 
I thought i would start something simple like a soviet box car.

With best regards Igor
I see you are getting ahead of the game, the way things are shaping up in Ukraine, we will all be modelling soviet box cars before long.

David
 
Nicely done Igor, but I would have gone for much thinner ply
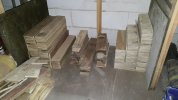
Thank you for the compliment, but the ply is for free from my work, below a picture of "waste" from the last week! alone.
Ofcourse i cut it "ready for use", on the left you see for 50 foot flat car and probably for covered hoppers, but i still have to dig into to that what they had in the soviet before 1950.
One thing is for sure they ordered a lot Canadian boxcars.
On the right is for 40 foot Canadian box cars.(25 cars total)
In the middle the parts that will be cut up for "head plates" and such.
At the end of this week that section will be full of those "parts" for 40 and 50 foot cars.

20220125_180449.jpg

Just right to match the end strapping would have been sufficiently strong enough.
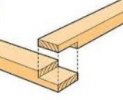
I am not sure that i understand this correctly?
My planning is to cut at the head of a part 5x5mm away(the ply is 10mm thick) so those corner parts will snug together like a old fashion half wood connection.
ee7399053a6c5d90831997840276bb46.jpg

My strapping is my alu strip i glued on the wood?


f you did have worries about warping in the middle a few bits of squared wood of suitable size would strengthen things up.
:cool: :cool: :cool:I already did this :rofl: :rofl: :rofl:, again: somehow you have some real carpeting skills!

You may need lots of these for your big locomotives so thinner ply will be more economical in the long run.
This subject i did not give a single thought....Nor experiment.
I know by experimenting that one(1) of those yellow dc motors can pull with out start up help 2 cars with each 3 bricks on each car, 6 bricks(standard dutch size: "waal formaat or strenge pers") 1 kilo/2 pound per brick dry weight.
I did not add more bricks per car cous i was afraid to destroy a car.
And my terrier loco also had 2 bricks on top of him to give him some traction on those four wheels.
But 25 cars is a different story, thanks for the heads up and future mistakes.
I really did not give this any thought, only thought about traction for the loco.

I see you are getting ahead of the game
Yes, I am pretty reluctant to get myself going on the aa20 again yes.....what was the reason again it made one(!) promo run and then ended on a scrap yard?
I give up on proto typical...it is not possible with the aa20, or face turnouts and curves with a 10 meter minimum radii, or bigger

the way things are shaping up in Ukraine
Yes...even the S.A.S. our korps mariniers and the navy seals are present!!! and so much more( i have still some contacts in the military).

we will all be modelling soviet box cars before long.
Sorry to disappoint you, Soviet is never coming back, but the old folks have there own reasons to want communism back, just like in Poland with the wall.

Let Russia and the EU fight over our gas supplies and some food farming in Ukraina, lets get back to the working bench( my pension/vacation home is in Poland 50km away from the border with Ukrania, we saw the military build up)

So, 45mm representing 5' gauge (or 1520 mm). Yet another scale in the G confusion.
Cant argue with this!
Correct! if i would done it really true to scale i would have made my gauge 3mm bigger = ~48mm.
Indeed i scale it all to 45mm gauge, 1 at 33/34? instead of 1 at 32.

With best regards Igor
 
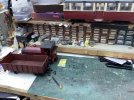
Not strictly on the bench - having already made a land grab for the dining table, I've now made a play for the utility room and so am even more popular. Bits of Bachmann coaches wrapped loosely in cling film after coating with alcohol - seems to work very nicely to loosen the graphics and is rather more economical than dipping.
IMG_3250 (Medium).jpg
 
Today I replaced the handrail knobs on my LGB Rhb Rhatia. The originals were moulded with the handrails and proved too fragile.
I managed to file the remains of the original knobs from the handrails without damaging the rails. Thanks to a tip from ebay Mike I found ideal replacements from Walsall Model Industries ( Short Handrail Knobs | Gauge 3 Items | Walsall Model Industries ).
The original plastic handrails fitted a treat and a touch of matt black paint on the brass knobs finished the job. Whilst I'd got the paint brush to hand I also painted the silver coloured pin head on the smokebox door retaining clip matt black.
 
Been doing some lettering for sundry recent and older projects. Stupidly I forgot tye numbers for the Railcar even though I noted what they were to be in my little notebook of things to do. Will have to wait for next session of lettering whenever that may be. Also on the bench sundry pipes for the latest wagon that has now been converted, painted and weathered. Oh and yes it has a wagon card (yellow) for operating sessions.DA1D19E8-7C54-4640-A520-DE18FAA535AE.jpeg
 
What is happening at my 3D printer is two cowcatchers for my tram loco, this time in black filament (I printed one out in white a few days back, which proved to fit and will be kept as a spare).
 
What is happening at my 3D printer is two cowcatchers for my tram loco, this time in black filament (I printed one out in white a few days back, which proved to fit and will be kept as a spare).
Are they scratch built ;)
 
Evening.
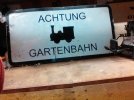
I just finished a bit of recycling. A Give Way sign had been replaced and the old one dumped in a hedge. Waste not want not say I. I flattened it out, ordered some cheap waterproof vinyl lettering and painted over an engine template cut out of Fablon, with Hammerite. Job done. It's cheaper than one from Herr Heyn.
IMG_20220127_193847.jpg
 
Back
Top