What happened at your workbench today?

Not my workbench or even a bench, but I helped my friend resuport part of his railway that got damaged in the recent storms. Below you can see the damage, the plan was to replace the 2 brick pillars with wooden posts. Thankfully the line was not connected to the fence at any point, this is the prime example why you should never ever do that. In this case the damage caused was due to the fence posts rotting at ground level and the fence flapping literally in the wind like a piece of cardboard thus knocking over the posts.

View attachment 296535
The plan was to replace the brick pists now thet the fence has been replaced. However the second one had been moved to get the line somewhat right so he only wanted one new post. So a hole was dug, a metpost with post from one of the rotted at ground level suitably used after cutting to length. Some broken bricks and a bag of postcrete made things right. I was worried aboit the other brick pillar so have put some bricks round it and a bag of postcrete hoping thet it will stay secure, it all felt pretty stable before that despite the angle of dangle as it were. A bodge but hey it is his railway.
View attachment 296536
Whilst on site it would have been churlish not to run a train or two, I took my Triang Big Big Hymec with new bogies, MLS sound and Fosworks RC for a run. Bit on the slow side but very tolerant of no track power. You can see the repaired bit of line leading to Shed1 to the right. He has 2 Sheds for stock storage.
View attachment 296534
Seen below with one of his DCC 2 rail Sound Choppers. Thie Chopper found a couple of dodgy points, after 2 micro switches that supply power to the frogs replaced all was good and ready for a new season of train running. Incidentally the white line is a measure of distance in scale 1/4 miles.
View attachment 296533
Good to see that you were able to salvage the line. What is the material that he is using for decking and the platforms? Doesn't look like roofing felt.
 
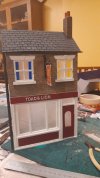
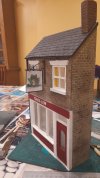
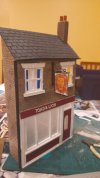
I've last finished my half relief pub. All ready to fend for it's in the garden20220321_194744.jpg20220321_194733.jpg20220321_194739.jpg
A quick nod to my favourite telly show, no doubt someone will know it!
 
Good to see that you were able to salvage the line. What is the material that he is using for decking and the platforms? Doesn't look like roofing felt.
It is recycled plastic called Eco Board, tricky to find but similar to other types of recycled plastic but being grey not so much of a problem with expansion. Though it does have expansion issues nothing like so effected by expansion as Filcris products. It is available in 8x4 feet sheets so very usable on curves etc. The complete line was changed over from Filcris to Eco Board a few years back. The thin stuff on the edges is Filcris thin stuff bought for that purpose and you can see how it moves about in the heat. At night that edge will be dead straight.
 
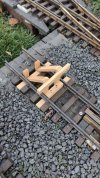
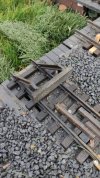
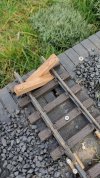
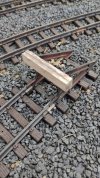
I did a little tinkering. I did not like the LGB buffer stops made of plastic. So I built some myself. Each one is different.
IMG_20220326_155942.jpg
IMG_20220326_155948.jpgIMG_20220326_155957.jpgIMG_20220326_160007.jpg
 
Started the conversion of my Steeplecab to Battery RC, I now have all the parts I need, just need some bad whether so I have an excuse to be inside. :)
 
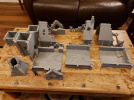
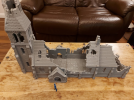
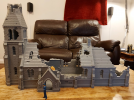
Printing is complete on the ruined church. 9 print runs to get the 12 pieces finished. Print times between 8 & 20 hours. About 2.2Kgs of filament all in all. No failed prints and all fits together very well :) Loosely assembled for the photos, it will be built into larger sections prior to painting and mounted onto a piece of board for easy positioning around the garden. I'm quite please with how this one has come out.

1648324008319.png 1648324183428.png1648324025724.png
 
Quite a lot over the last few weeks.

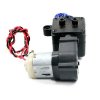
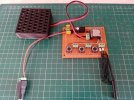
First up, modified and simplified the control circuitry for use with a modified Servo Tester.

Can be used a with Multi Function decoder activated by a Function Key, or, by a Accessory Decoder.

DCC Servo Tester  Control.jpg

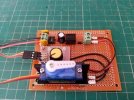
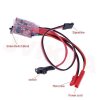
Part and parcel was a design for a Servo Switch (details at a later stage, see Post #1,886 ), to convert the Servo Signal Pulse to a 5V TTL Digital Logic 1 (ON) or 0 (OFF), to work with either the above modified Servo Tester, or to work with a DCC Servo Decoder, being used to operate a Servo Motor controller to power the motor from a Tank Smoke Unit, the Servo Switch to turn the Heating element ON or OFF.

ESC Connections.jpg

Tank Smoke Unit.jpg

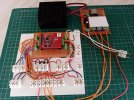
Another project as part of the above Servo projects and part of a continuation of Massoth DCC Automatic Control, was to have the ability to use sound, using a readily available and requiring minimum control electronics for a MP3 player.

First version to understand the basics, either with Push Buttons or Reed Switches for activation.
MP3 Player Push Button Reed Switch Control.jpg

MP3 player, for use with either Function Key control from a Multi Function Decoder, or using a Accessory Decoder, either activated via a Navigator Handset, or Automated via Massoths inbuilt Automatic Switch Routines for Automation.

MP3 Player DCC Control.jpg
 
Last edited:
Not so much what happened on the work bench today as what appeared on the bench.
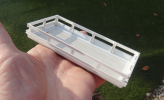
My brother unbeknown to me purchase for himself an occre Soller tram kit, what you see in the photo is what arrived.

I am classing it as lacking some finesse. Construction to this stage was apparently done using PVA wood glue, so thoughts are that a bit of vinegar will allow me to strip things down and start again.

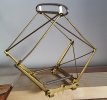
The one thing of particular interest in the box is a working pantograph origin of which my brother can't recall, any suggestions from the group?
 

Attachments

  • 20220328_165542.jpg
    20220328_165542.jpg
    277.7 KB · Views: 0
  • 20220328_170338.jpg
    20220328_170338.jpg
    317.5 KB · Views: 0
Not so much what happened on the work bench today as what appeared on the bench.
My brother unbeknown to me purchase for himself an occre Soller tram kit, what you see in the photo is what arrived.

I am classing it as lacking some finesse. Construction to this stage was apparently done using PVA wood glue, so thoughts are that a bit of vinegar will allow me to strip things down and start again.

The one thing of particular interest in the box is a working pantograph origin of which my brother can't recall, any suggestions from the group?
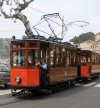
Challenging - rather you than me! Is it a model of this one (the pantograph looks right)?

soller_no2_28May07 (Medium).jpg
 
Very nice pantograph. I assume it's not part of the kit??

Occre are very good at dispatching missing parts, so if you find you are short of anything, they can probably help.
 
The one thing of particular interest in the box is a working pantograph origin of which my brother can't recall, any suggestions from the group?
If you're asking about the model pantograph it looks like the one LGB sometimes used on the 2030 E1 series locos. Made by Sommerfeldt Spurweite G

Edit (those pictures are distracting - they play visual tricks like the cube that changes orientation each time you look at it!)
 
Last edited:
I am classing it as lacking some finesse. Construction to this stage was apparently done using PVA wood glue, so thoughts are that a bit of vinegar will allow me to strip things down and start again.

A little unsure about your PVA comment, currently building the OcCre Streetcar, and the instructions say use "white glue" and having bought the OcCre white glue it is PVA glue.
 
Not so much what happened on the work bench today as what appeared on the bench.
My brother unbeknown to me purchase for himself an occre Soller tram kit, what you see in the photo is what arrived.

I am classing it as lacking some finesse. Construction to this stage was apparently done using PVA wood glue, so thoughts are that a bit of vinegar will allow me to strip things down and start again.

The one thing of particular interest in the box is a working pantograph origin of which my brother can't recall, any suggestions from the group?
Not sure if the vinegar trick will work. I once stripped an 0 gauge layout that had track and ballast laid using PVA. My wall paper stripped did the job nicely, but a big but be very careful as many of the parts are ply and could delaminate. But it will work where planking has been used.
 
Not sure if the vinegar trick will work. I once stripped an 0 gauge layout that had track and ballast laid using PVA. My wall paper stripped did the job nicely, but a big but be very careful as many of the parts are ply and could delaminate. But it will work where planking has been used.
The whole thing definitely needs stripping right back to the beginning, I'll try the vinegar idea first, I'm not sure which forum I read this but others have had success so I'll give it go.

Apart from seeing if I can seperate the parts already fitted I should really put this in a box for another day and finish a few other wee projects first, either that or get a much bigger bench
Had no luck, finding a source for drawings, I did find an old thread with a chap's experience of building one: Tranvía de Sóller
 
Back
Top