What happened at your workbench today?

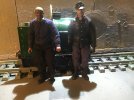
Printing is complete on the ruined church. 9 print runs to get the 12 pieces finished. Print times between 8 & 20 hours. About 2.2Kgs of filament all in all. No failed prints and all fits together very well :) Loosely assembled for the photos, it will be built into larger sections prior to painting and mounted onto a piece of board for easy positioning around the garden. I'm quite please with how this one has come out.

View attachment 296706 View attachment 296708View attachment 296707

May one ask the back-story to this poor ruin? It is not like anything I've ever seen here in UK - it's more like something from a war-zone.
 
The whole thing definitely needs stripping right back to the beginning, I'll try the vinegar idea first, I'm not sure which forum I read this but others have had success so I'll give it go.

Apart from seeing if I can seperate the parts already fitted I should really put this in a box for another day and finish a few other wee projects first, either that or get a much bigger bench
Have you looked at these:


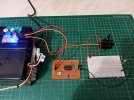
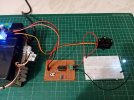
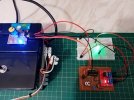
Continuing on from Post #1,868, Servo Switch tested and working with a LED, now able to move on to the next stages.

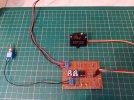
LED OFF, (Note position of Servo Arm).
Servo Switch LED OFF.jpg


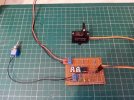
LED ON, (Note position of Servo Arm).
Servo Switch LED ON.jpg
 
May one ask the back-story to this poor ruin? It is not like anything I've ever seen here in UK - it's more like something from a war-zone.
Yes, I'm going for a post apocalyptic scene! It's so we can grow plants through the ruins and dot around a few zombies and fantasy figures.

I'm also creating a more traditional station in another area, so I'll a different photographic background.

I build the railway to entertain and provoke discussion, and a few zombies and artistic ruins will certainly assist with this!!
Peter Jones did the same thing with concrete buildings, he used Broccoli in his which he boasted that he could bore about growing for scenic uses, ok so not forever but does have its uses in food as well.
 
Tinkering with the Servo Tester and Servo Switch as is, or in it's modified format, experimentation with the seven basic logic gates: AND, OR, XOR, NOT, NAND, NOR, and XNOR.

Either using resistors, transistors and diodes, or TTL and CMOS IC's.

Electronics more as less sorted, convert the scribblings and rough diagrams into a readable format, next stage will be to get the mechanical bits to work!

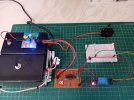
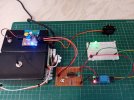
Repurposed redundant modules for use, Relay and a MOSFET.

Servo Switch Relay OFF.jpg

Servo Switch Relay ON.jpg

Servo Switch and MOSFET.jpg
 
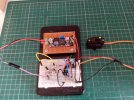
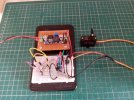
Yet another adoption of an idea to control a Servo, this idea has been kicking around since the Year 2000, was always problematic to implement and control a Servo, change of mindset and collection of newer components, viola working, a direct replacement for the modified Servo Tester.

As set up on a Breadboard, next task will be to transfer the whole caboodle to a PCB.

Home Brew Servo Control OFF.jpg

Home Brew Servo Control ON.jpg

Once redesigned and the PCB layout organised will then replace the modified Servo Tester as in this configuration.

DCC Servo Tester  Control.jpg
 
Yet another adoption of an idea to control a Servo, this idea has been kicking around since the Year 2000, was always problematic to implement and control a Servo, change of mindset and collection of newer components, viola working, a direct replacement for the modified Servo Tester.

As set up on a Breadboard, next task will be to transfer the whole caboodle to a PCB.

View attachment 296883

View attachment 296884

Once redesigned and the PCB layout organised will then replace the modified Servo Tester as in this configuration.

View attachment 296885
Wow lots of "stuff", but what does it do ;)
 
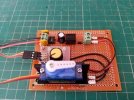
Converted the rat's nest from post #1,891, to something that can be referenced to and replicated.

Servo control via the On/Off switch.
Home Brew Servo Control OFF PCB.jpg

Home Brew Servo Control ON PCB.jpg
 
I have moved the 3D printer to my basement workbench with the intention of starting some long print jobs without having to listen to it night and day.
So here I go with a station shelter project: 24 hours for the roof, 24 hours for the walls,
-----------
Some hours later:
OK, it's not working :oops:. Brand-new filament won't stick to the bed. I had levelled the bed and applied fresh glue stick, which worked with other stl files.
I've ripped off the blue tape and will apply a new layer, then level again and try a file that worked before.
And the computer is telling me the SDHC card has a problem and to scan it; the scan says the card is good, but the warning keeps coming up :mad:. Oh well, new ones don't cost much these days.
 
Last edited:
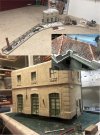
Cleaned the bench today, to mark the change in modelling priority to refurbishing my sad scenery. To complement the total rebuild of the platforms, Montsià station is first in the queue for some sprucing up. I'm quite pleased with how the foamboard stuff stands up to the weather - the platforms lasted a dozen or so years before needing reconstruction and the station building has done well after about 7 years, mostly outdoors. In the main, cleaning, repainting window frames and replacing graphics needs to be done on the building itself, although the roof will need a bit more work to replace the areas of bathmat 'tiles' which have curled up and fossilised.

I think there are many months of similar DIY yet to come.

montsia_refurb.jpg
 
Back
Top