You are using an out of date browser. It may not display this or other websites correctly.
You should upgrade or use an alternative browser.
You should upgrade or use an alternative browser.
What happened at your workbench today?
- Thread starter Henri
- Start date
Chris Vernell
45.29 N, 75.75 W
A lump hammer is a marvellous thing if you have oneAh-ha!
I see 'Operation Lump Hammer' is underway..

Chris Vernell
45.29 N, 75.75 W
One of the things I enjoy about this thread is seeing Henri's name under the title and being reminded of the excellent projects he's been up to.
Thanks, Henri.
Thanks, Henri.
Chris Vernell
45.29 N, 75.75 W
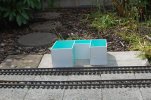
I think (cross fingers, touch wood, beseech Dame Fortune, etc.) the 3D printer is back in action.
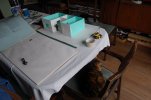
Printed an outhouse -- all mod con, my railway -- with the ends of filament reels that I knew worked, and now I am embarking on a 24-hour job to make a shelter for the branch terminus with the new reel of filament that wasn't co-operating when I first loaded it a week ago.
First layer looked as though it might come unstuck from the bed, but the second and third layers seem to be going down properly.
Pray for me
Henri
refuses to grow up
That is very kind! Thank you so much sir!One of the things I enjoy about this thread is seeing Henri's name under the title and being reminded of the excellent projects he's been up to.
Thanks, Henri.
Chris Vernell
45.29 N, 75.75 W
After three false starts, I managed to get the terminus shelter printing correctly and it has been running all night with some hours yet to go.
So far, so good -- gremlins please be busy elsewhere.
So far, so good
3 minutes of fame
3d printing, electronics and trams
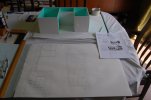
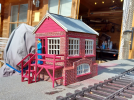
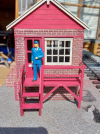
The first part of the station is complete - a small signal box to a slightly amended design some might recognise...
The brick structure is 3D printed, with the rest made up from laser cut ply. Painted in acrylic and sealed with some matte varnish to keep the worst of the weather off it. (Not that it will be left outside for any sort of period!)
Interior still to do, a lever frame is printing at the moment and I will add to that a floor, furniture and shelf.
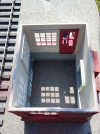
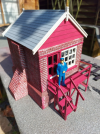
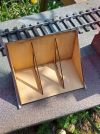


viaEstrecha
Spanish metre gauge in G scale (on the cheap)
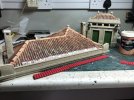
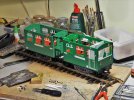
More of the same today, though a case of modelling imitating the real world, as I wait for news from the insurance roofing contractor regarding repairs to my abode after Storm Eustice - I knew that would be fun, as we have horrid French tiles which have not been available in the UK for 25 years. Much easier, though in G Scale world - cut out old duff tiles and stick on some patches of sponge rubber bathmat. I'm hoping this method works, as the loco shed has some much bigger roof repairs needed.

That is a very effective solution as promising as Jamie’s work.More of the same today, though a case of modelling imitating the real world, as I wait for news from the insurance roofing contractor regarding repairs to my abode after Storm Eustice - I knew that would be fun, as we have horrid French tiles which have not been available in the UK for 25 years. Much easier, though in G Scale world - cut out old duff tiles and stick on some patches of sponge rubber bathmat. I'm hoping this method works, as the loco shed has some much bigger roof repairs needed.
View attachment 297301
David1226
Registered
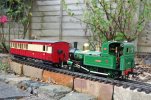
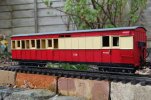
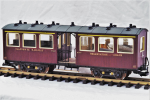
My latest project is coming along nicely. It is destined to be coach No 16, an Auto-trailer all third class, for the Claptowte Railway. It is a project that I have had in mind for many years but other projects have come first. It is based on two LGB Toy Train 4-wheel coaches mounted nose to nose on bogies. The modifications are all well tried and tested on previous conversions, obviously the driving cab is a new innovation. Having said that, a lot of work has gone into this project, while none of the modifications are complicated, there are a lot of them. The underframe and coach bodies are just about complete, just the roof to construct. There will be a lot of painting needed to complete the model. There will be coach No 17, its twin, that will be a first/third Auto-trailer, this will be the last passenger coach built for the Claptowte Railway, as there are no plans for any more passenger stock, although, of course, never say never again. The pair running either end of Claptowte Railway steam locomotive No 3 'Yvonne'. For the time being, I think work in the garden is going to have to come first.
David

David
Last edited:
Fezwig
Just a man in the middle of a complicated plan.
playmofire
Registered
Interesting. How are you planning to make the roof?My latest project is coming along nicely. It is destined to be coach No 16, an Auto-trailer all third class, for the Claptowte Railway. It is a project that I have had in mind for many years but other projects have come first. It is based on two LGB Toy Train 4-wheel coaches mounted nose to nose on bogies. The modifications are all well tried and tested on previous conversions, obviously the driving cab is a new innovation. Having said that, a lot of work has gone into this project, while none of the modifications are complicated, there are a lot of them. The underframe and coach bodies are just about complete, just the roof to construct. There will be a lot of painting needed to complete the model. There will be coach No 17, its twin, that will be a first/third Auto-trailer, this will be the last passenger coach built for the Claptowte Railway, as there are no plans for any more passenger stock, although, of course, never say never again. The pair running either end of Claptowte Railway steam locomotive No 3 'Yvonne'. For the time being, I think work in the garden is going to have to come first.
View attachment 297312
David
David1226
Registered
The original roofs, each shortened by 4mm, glued end on, reinforced underneath by a plasticard sheet. A rib glued across the top, to match the originals, to hide the join. There will have to be a number of holes drilled to take GRS lamp tops and ventilators, etc. Basically a copy of the roof of coach No 15, the observation coach.Interesting. How are you planning to make the roof?
David
Technocrat
Mostly Retired?
Fezwig
Just a man in the middle of a complicated plan.
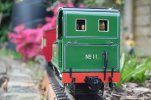
After fitting the Cale with batteries a few weeks ago, with batteries in the boiler and control gear in one side tank, but the charging socket and on/off switch just loose in the smoke box, so after a bit of a think, I came up with a plan.
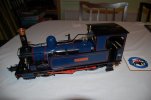
I decided to look at putting them in the tool box, so after dismantling, I could see that it was attached from below by 2 bolts, once undone, the top was gently sawn off, it was soldered on and just need the ends sawing to loosen
Between the bolt holes where 2 larger holes which I opened up to fit the switch and socket, also the wire that forms the hasp needs trimming in the box.
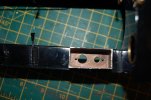
Holes to match where drilled in the top of the side tank, the bolts can be discarded (they are in the way anyway) as the switch/socket will clamp it all back in place.
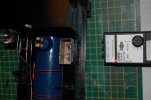
A bit of plasticard was cut to fit snugly in the box and glued to the underside of the tool box lid.
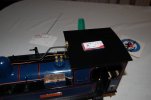
Job done just a little note on the underside to remind me of on/off, mainly for battery charging!!

I decided to look at putting them in the tool box, so after dismantling, I could see that it was attached from below by 2 bolts, once undone, the top was gently sawn off, it was soldered on and just need the ends sawing to loosen

Between the bolt holes where 2 larger holes which I opened up to fit the switch and socket, also the wire that forms the hasp needs trimming in the box.

Holes to match where drilled in the top of the side tank, the bolts can be discarded (they are in the way anyway) as the switch/socket will clamp it all back in place.

A bit of plasticard was cut to fit snugly in the box and glued to the underside of the tool box lid.

Job done just a little note on the underside to remind me of on/off, mainly for battery charging!!
Rhinochugger
Retired Oik
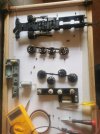
So where was the short?I had a short between motor and track in an Aristocraft C16..
View attachment 298763
This meant a complete tear-down, of the motion and block..
There's a thick neoprene (or something) gasket between the two halves - and the halves are not the same size; one is slightly thicker than the other.
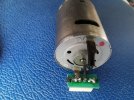
The only place for a short is probably the motor terminals, as I don't think it matters electrically if you put the axles in the wrong way round.

