What happened at your workbench today?

3D printing does look like it could be a game-changer, for difficult to source parts
Yes indeed, I have printed a variety of items for G scale railways.

But modern technology such as computer drawing (2D and 3D) and computer machining etc remove the need for craftsman skills.

When I was an apprentice I would have been expected to make a con rod from a blank steel bar using only hand tools! - I'm too lazy now with a 3D printer to even consider it!

Alan
 
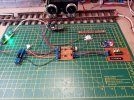
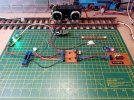
Probably the last of the innovations from the workbench, more or less created everything required for the foreseeable future for Automation and Animation.

Just a couple of pictures to show the evolution of controlling the Fz1 shunting lights and Zg1 A lights, from the earliest incarnation of using a pair of DPDT Relays, to the latest with a pair of transistors and four resistors.

Signal Zg 1 A lights.jpg


Signal Fz 1 shunting lights.jpg


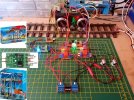
Another blast from the past from GRAIL 2015, had a request on 'How the Playmobil Crane was DCC controlled', just for interest the entire display was operated remotley using stand alone WiFi, Raspberry Pi and a converted Router to act as a Repeater, operated via a Mobile Phone, forerunner to DCC++ and DCC++EX. All the equipment disposed of long ago to various interested individuals.

Have located another earlier Crane, Playmobil have changed the design to a newer version, something to keep me occupied during the the wet Autumn months.

G Rail 2015.jpg
 
Last edited:
But modern technology such as computer drawing (2D and 3D) and computer machining etc remove the need for craftsman skills.
The way I see it, is that it's just a different sort of craftsmanship. The same as the electronic wizardry on this thread, or photography. New skills for a changing world.
 
Probably the last of the innovations from the workbench, more or less created everything required for the foreseeable future for Automation and Animation.

Just a couple of pictures to show the evolution of controlling the Fz1 shunting lights and Zg1 A lights, from the earliest incarnation of using a pair of DPDT Relays, to the latest with a pair of transistors and four resistors.

View attachment 315940


View attachment 315941


Another blast from the past from GRAIL 2015, had a request on 'How the Playmobil Crane was DCC controlled', just for interest the entire display was operated remotley using stand alone WiFi, Raspberry Pi and a converted Router to act as a Repeater, operated via a Mobile Phone, forerunner to DCC++ and DCC++EX. All the equipment disposed of long ago to various interested individuals.

Have located another earlier Crane, Playmobil have changed the design to a newer version, something to keep me occupied during the the wet Autumn months.

View attachment 315942
Grail 2015....the one that got away from me.
I HAD to work that day, no getting out of it. I was supervising a large event.
I didn’t have to do anything as all worked well...which was annoying as Stafford showground was 60 minutes away.

I would have been very interested to have seen this exhibit.

But if Ihad gone to Grail, the law of 50d would have applied, things would have gone wrong, and my absence would have been noted.

Doesn’t apply any more, as work is a no no

Malcolm
 
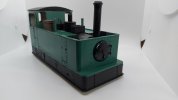
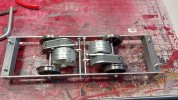
Today was finishing up a couple of projects. First is a 3D printed Glyn Valley loco. This is fitted with a couple of Appletree Railway motor gearboxes, with a custom CNC machined aluminium chassis that I knocked up on one of those 3018 mini CNC machines from Amazon. The loco performs very well, with plenty of power and a good turn of speed when required. It's fitted with radio control and a 7.4V battery pack, so it's reigned in a littled from the full 9V motor capability.

20230716_161617.jpg20230716_151521.jpg

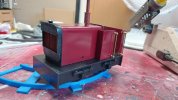
Next up to finish was a little IP Engineering Mary kit I bought last weekend. An easy enough build, but I am not convinced about some aspects of the construction, so may well be adding some more bracing to improve the strength of the cab in particular. Pictured on some Locoremote 3D printed track - and yes, it will negotiate the 5" radius curves!!

Some more detailing and painting to do, but they are finished enough to test. Couplings will be my magnetic ones, once the printer is free...

20230716_174556.jpg20230716_174613.jpg

Next project is this:
20230715_193828.jpg
 
Today was finishing up a couple of projects. First is a 3D printed Glyn Valley loco. This is fitted with a couple of Appletree Railway motor gearboxes, with a custom CNC machined aluminium chassis that I knocked up on one of those 3018 mini CNC machines from Amazon. The loco performs very well, with plenty of power and a good turn of speed when required. It's fitted with radio control and a 7.4V battery pack, so it's reigned in a littled from the full 9V motor capability.

View attachment 315964View attachment 315965

Next up to finish was a little IP Engineering Mary kit I bought last weekend. An easy enough build, but I am not convinced about some aspects of the construction, so may well be adding some more bracing to improve the strength of the cab in particular. Pictured on some Locoremote 3D printed track - and yes, it will negotiate the 5" radius curves!!

Some more detailing and painting to do, but they are finished enough to test. Couplings will be my magnetic ones, once the printer is free...

View attachment 315966View attachment 315967

Next project is this:
View attachment 315968
I like the GVT loco, and the mechanism, but wondered whether there was a reason for not making it an 0-4-2?

I realise that the skirts hide most of that sort of detail from the eye, but my problem is a wheel fetish :nerd::nerd:
 
I like the GVT loco, and the mechanism, but wondered whether there was a reason for not making it an 0-4-2?

I realise that the skirts hide most of that sort of detail from the eye, but my problem is a wheel fetish :nerd::nerd:
An extremely valid point, and one I pondered while designing the chassis.

The issue is that I have 2'6 radius curves, and by moving the driving wheels further forward, it increases the swing of the rear of the loco, along with the coupling etc. Similar to what's seen on some of the American outline tender locos, where the cab hangs over far too much to look anything like realistic.

As the wheels cannot be seen, I accepted the revised wheelbase layout as an acceptable compromise.
Yep, gotcha - I like the thinking :):)
 
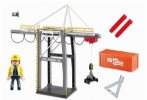
Crane purchased, £25.00 delivered.
Playmobil 5254 Crane.jpg

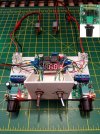
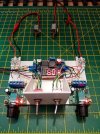
Previous post #2471 was for a DCC controlled version, components purchased to produce a condensed and smaller footprint, a few doodles on squared graph paper to finalise the finished layout.

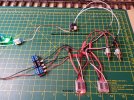
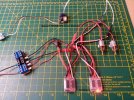
Manual controller constructed for testing purposes, the two switches, one for Raise & Lower of the hook, and the other for directional travel Left & Right, incorporating a speed controller for a touch of finesse.

Playmobil Crane Manual Control Raise & Right.jpg

Playmobil Crane Manual Control Lower & Left.jpg
 
Crane purchased, £25.00 delivered.
View attachment 316069

Previous post #2471 was for a DCC controlled version, components purchased to produce a condensed and smaller footprint, a few doodles on squared graph paper to finalise the finished layout.

Manual controller constructed for testing purposes, the two switches, one for Raise & Lower of the hook, and the other for directional travel Left & Right, incorporating a speed controller for a touch of finesse.

View attachment 316070

View attachment 316071
Nice.Another option would be to use a basic 2 channel radio control and couple of hacked servos. By taking out the control board replacing the variable resistor with a pair of 680 Ohm resistors, it gives you a powerful and reliable digital proportional speed control with centre off. I have a Stephenson's Rocket which uses precisely this for the main speed control.
 
By taking out the control board replacing the variable resistor with a pair of 680 Ohm resistors, it gives you a powerful and reliable digital proportional speed control with centre off.
Useful tip, filed away for future tinkering.

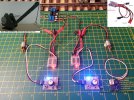
Last but not least, as below, have previous form so to speak with the Massoth 8152501* 8FS Servo Decoder and Servo Control for the Model Town Crane.
* discontinued and replaced by the Massoth 815260 10FX Function Decoder.

Not much else can be done, until as and when the various bits and pieces arrive, no great urgency, will get done as and when.

Servo Tester Control.jpg
 
Useful tip, filed away for future tinkering.

Last but not least, as below, have previous form so to speak with the Massoth 8152501* 8FS Servo Decoder and Servo Control for the Model Town Crane.
* discontinued and replaced by the Massoth 815260 10FX Function Decoder.

Not much else can be done, until as and when the various bits and pieces arrive, no great urgency, will get done as and when.

View attachment 316087
I do quite like those little ESCs. I've fitted them to my trams, and I find the speed control quite acceptable when running on a 7.4V pack into 9V or 12V motors. I did find however that with a lower rated motor - 6V, that the starting voltage was too high, so it didn't have much in the way of low speed control.
 
This won't be quite as simple as it could have been..
IMG_20230719_100645.jpg
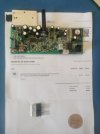
The broken transistor, is part of the power supply arrangement..
The replacements which have been sent are Darlington-pair transistors - a different animal.

As I do not even know the board was/is working, I will trace the circuit enough to inject DC, and make sure it does work, before ordering a replacement transistor..

PhilP
 
This won't be quite as simple as it could have been..
The broken transistor, is part of the power supply arrangement..
The replacements which have been sent are Darlington-pair transistors - a different animal.
It does make me wonder, WHY I bother sometimes!:banghead:

BD711.JPG
 
Last edited:
I do quite like those little ESCs. I've fitted them to my trams, and I find the speed control quite acceptable when running on a 7.4V pack into 9V or 12V motors. I did find however that with a lower rated motor - 6V, that the starting voltage was too high, so it didn't have much in the way of low speed control.

Noted for further investigation, ordered several variations of the FA 130 motor for experimentation.

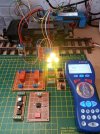
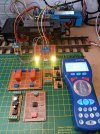
For the curious or the not so curious, the Massoth 8152501 8FS Servo Decoder has the ability with the addition of the ESC, for directional and speed control from the circular control wheel on the Navigator.

Massoth 8152501 8FS Servo Decoder A3.jpg

Massoth 8152501 8FS Servo Decoder A4.jpg
 
Back
Top