What happened at your workbench today?

Very nice but it need a sparkler in its rear!

I'm ahead of you. I have another rocket where I inserted fibre optic strands. I also installed LEDs at the base of the strands, powered by a 9 volt battery. The LEDs flash. It works but could be brighter. I may try a 12 volt battery instead. Pictures to come.

The only other idea I could come up with would be sparklers. But that would be a one time event and an endless supply of sparklers.

I'm open to ideas.
 
The EVO-X has been put aside for the moment, but will find a home on the layout in due course.

Turning to the EVO-S, which is somewhat sparse on features compared to the EVO-X, although it does provide a wealth of opportunities for tinkering with.

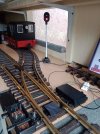
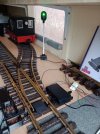
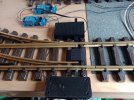
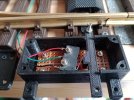
Working solution to provide a method for Signal control, yet another hashed about 3D design, nothing more than a Micro Switch and few nuts and bolt's, economical to produce, bit of a faff the first one out of the blocks, subsequent one's will become easier.

EVO-S Micro Switch for Signals.jpg

EVO-S Micro Switch for Red Signal.jpg

EVO-S Micro Switch for Green Signal.jpg
 
I'm ahead of you. I have another rocket where I inserted fibre optic strands. I also installed LEDs at the base of the strands, powered by a 9 volt battery. The LEDs flash. It works but could be brighter. I may try a 12 volt battery instead. Pictures to come.

The only other idea I could come up with would be sparklers. But that would be a one time event and an endless supply of sparklers.

I'm open to ideas.
Another option might be to insert some kind of Elgoo or Arduino circuitry, I have created a Candle light using LED’s with a small power supply. Not come across a sparkler effect but this may be an option with the Arduino/Elgoo being able to do the sounds as well.
 
What can I say? I tend to plan way in advance...
Planning in advance is admirable, using the festive word is, unfortunately frowned upon. The use of asterisks, denoting blanks, is the commonly accepted way of circumnavigating the obstacle :emo::emo:

I assume these delights are for C*******s 2030 :nerd::nerd:
 
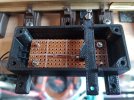
Continuing with the EVO-S, tad more tinkering, further pondering will have to wait awhile.

EVO-S Reed Switch.jpg

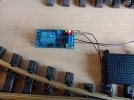
EVO-S Reed Switch to Relay.jpg
 
Continuing on from the previous post, with ingenuity, common sense and the aid of a Multi Meter!, the EVO-S with a few ad hoc items, can imitate the EVO -X, save for the ITC/IR Interface which I have no use for.

As below, two Relays to reverse the EVO-S, useful for when the train cut opens the turnout, the turnout can be automatically switched back to the desired preferred position via a time value set on the Relay Module.

EVO-S to Relays.jpg


To trigger, either by the simple method of a Reed Switch, positioned at least in length of the longest train away from the turnout and activated by a magnet under the Loco.

Or as previously discussed and described further back in this thread, the use of a Massoth Train Detection Module in stand alone mode, this item is not Massoth dependent!

Of course if using the full blown Massoth Switch and Drive methodology, simple as falling of a log to operate.

Anyways things to do, Signals to make, shed load of OO gauge items to attend to, remainder of this month is fully booked, important date for your diaries if you reside in the North East, is the 28th July at Eric Upton's house in Scarborough regarding the future of the G Scale Society Area Group's.

Regardless of the outcome, a trip to Sheffield is on the cards, rapidly running out of will power and space!
 
Continuing on from the previous post, with ingenuity, common sense and the aid of a Multi Meter!, the EVO-S with a few ad hoc items, can imitate the EVO -X, save for the ITC/IR Interface which I have no use for.

As below, two Relays to reverse the EVO-S, useful for when the train cut opens the turnout, the turnout can be automatically switched back to the desired preferred position via a time value set on the Relay Module.

View attachment 330034


To trigger, either by the simple method of a Reed Switch, positioned at least in length of the longest train away from the turnout and activated by a magnet under the Loco.

Or as previously discussed and described further back in this thread, the use of a Massoth Train Detection Module in stand alone mode, this item is not Massoth dependent!

Of course if using the full blown Massoth Switch and Drive methodology, simple as falling of a log to operate.

Anyways things to do, Signals to make, shed load of OO gauge items to attend to, remainder of this month is fully booked, important date for your diaries if you reside in the North East, is the 28th July at Eric Upton's house in Scarborough regarding the future of the G Scale Society Area Group's.

Regardless of the outcome, a trip to Sheffield is on the cards, rapidly running out of will power and space!
Steady on there - common sense? Are you sure you're on the right forum :emo::emo:
 
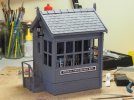
With all the wet weather recently, I have found time to progress the construction of the signal box for Phidell Yard, on the Claptowte Railway. I have now made the missing name board, and all the parts are primed ready for painting. If there is any more wet weather, between now and out departure to the US, in two weeks time (come on now, what's the chance of that), I might even be able to make a start on the painting.

dig 240709001.JPG

David
 
And..... Breathe!
IMG_20240715_112213.jpgNow I can put the kettle on, and make some coffee..

The 0.45mm solder can go away, as well.
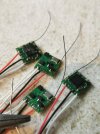
Even with binocular magnifier, you have to be rested, and in the right frame of mind, to solder this sort of thing.

PhilP
 
I stirred some glue, dabbed it on the offending parts after suitable preparation with acetone (the blade of a small screwdriver being my weapon of choice for this sort of thing) - am now waiting for something to dry, well not actually, as it's a chemical reaction, waiting for it to go off :think::think: maybe a photo later ;)
 
LGB ‘stubby’ 240 loco with worn intermediate gears.
The LGB gears for the mogul look very similar.....I’ll give this a try. The white gears are by Piko, and look ever so similar!
Top is the worn set, the worm wheel has stripped
Middle is the Piko
Bottom is the mogul set.

Malcolm

4E85BEB8-421D-4514-B6FB-56054EB10B59.jpeg I
 
FAIL!!

The gear assembly is the same length and fits on the lay shaft and
in the chassis nicely
The worm wheel is the right size
But the spur gear that drives onto the axle mounted gear is too large.....
Original is 13mm dia, mogul set is 15mm die

Replacement gearsets for these ‘stubbies’ have not been available for some time.
With use of a lathe, it may be possible to mount the undamaged spur part of the original gear onto a new worm wheel section......leaving the new part unmodified, and mounting the cut off spur onto the free side. The original spur will mesh with nothing

Now to find someone with a lathe.....I think one of our group members has one....

Malcolm
 
Back
Top