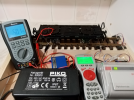
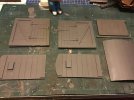
What happened at your workbench today?

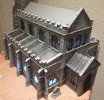
Bit more Church complete I sprayed some of it with Rust-Oleum Spray paint but it looked wrong, Sandstone texture looked very naff next to the grey ruined castle already on my layout, so it went back to grey and painted using my usual way, so some more work to do still on the paintwork. Started making the lead roofs today that was fun , but I ran out of Lead :( I like Lead roofs there might be more of them once I think what other building used them :) Printed one Gravestone, decided I will add a few but only very old looking ones and well weathered ones, so its impossible to read the text on the stones, which I think will be more in keeping. Waiting on more Lead and the lights for the inside to come , this one won't need any foundations to keep it in place :rofl:

roof.jpg

 
Not really today, but over the last couple of weeks.

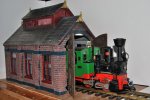
I have been building a Modeltown Engine Shed, however there were a few issues, from bowed castings, unclear detail, and joints that did not have the detail line up (I appreciate a poor workman blames his tools :)), but looking a casey jones snr casey jones snr latest offerings, I did a little investigation, and this Engine Shed is not in Modeltown's catalogue, so I can only assume that this is an early offering before their output was at their current quality level. Based on the "10 foot" rule, I think it will suffice.

DSC_0001.jpg
 
It was a very quick transaction. I bought the model on Thursday evening. Today DHL delivered it to our workshop. Although I'm not allowed to open it until tomorrow, I couldn't wait. So I unpacked the package. It's a really great job.

I still had a couple of used ball bearing axles and put them into the axle holders that were already prepared. The tram rolled smoothly over the R1 curves. I also had a pantograph. Now I just wanted to play. I got the little electric locomotive and installed a temporary coupling and pulled the train over our test tracks. Perfect run, forwards and backwards. Regardless of whether it is pushed or pulled. Now I need a motor unit. I have two LGB units of American trams here, but these are too high. Let's see what can be found there.

I'm excited like a little kid about this purchase that will add some sparkle to my tomorrow.
View attachment 276207

View attachment 276208View attachment 276209

View attachment 276210

View attachment 276211

View attachment 276212
Well, that has to be the ultimate test. The perceived wisdom is that a reverse curve is a recipe for derailment without a short straight in between the two radii. So, if that tram runs through it OK in R1, then that's pretty good :clap: :clap: :clap: :clap: :clap:
 
Not really today, but over the last couple of weeks.

I have been building a Modeltown Engine Shed, however there were a few issues, from bowed castings, unclear detail, and joints that did not have the detail line up (I appreciate a poor workman blames his tools :)), but looking a casey jones snr casey jones snr latest offerings, I did a little investigation, and this Engine Shed is not in Modeltown's catalogue, so I can only assume that this is an early offering before their output was at their current quality level. Based on the "10 foot" rule, I think it will suffice.

View attachment 276267
Looks ideal to me, the more rustic the better, suits the Stainz very well
 
Hi Jimmy, Your engine shed does have a certain "rustic" charm. I like it! You might add a little blue-green patina to the brass accents at the roof peaks to simulate some weathering.
 
Well, that has to be the ultimate test. The perceived wisdom is that a reverse curve is a recipe for derailment without a short straight in between the two radii. So, if that tram runs through it OK in R1, then that's pretty good :clap: :clap: :clap: :clap: :clap:
But it runs perfect. Today I start to put the motorunit in it. It is not ready yet. May be tomorrow. It needs a new connection for the middle section.
 
Last edited:
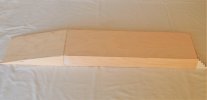
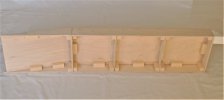
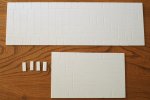
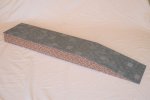
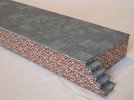
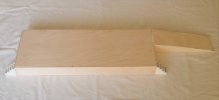
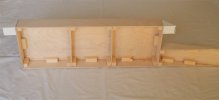
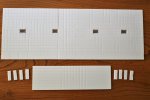
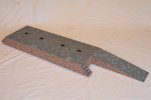
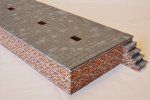
Up until now I have been working on my next two projects in tandem as the construction method and materials has been the same. I am building a goods loading dock and a cattle loading dock for Gernise End station on the Claptowte Railway. I have had a broad outline of the look and dimensions of these structures for some time but have been dithering over the construction materials. Having taken the bull by the horns with the platform for mounting the yard crane (link to that model Claptowte Railway - Yard Crane - G Scale Central ) I decided to use the same materials, the carcase being 3.0mm plywood reinforced with short lengths of square section strip wood, with a 3.0mm plasticard top which is scribed with flagstones/tiles. As with most of my models I work to a broad outline and firm up on the detail as I go along.

The Goods Loading Dock

dig 201112001.JPG

dig 201112002.JPG

dig 201112003.JPG

dig 201117001.JPG

dig 201117003.JPG

The Cattle Loading Dock

dig 201112005.JPG

dig 201112006.JPG

dig 201112007.JPG

dig 201117004.JPG

dig 201117005.JPG

dig 201117007.JPG

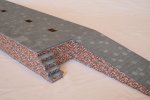
The brickwork is embossed, textured brick paper. From this point on there will be a divergence in construction. The goods dock will have some sections of picket fence where appropriate and a pair of street lamps. The cattle loading dock will need a lot more work with post and rail cattle pens, gates, street lamps, water troughs and various other embellishments. With the work involver I will crack on with the goods dock first as it will involve less work to complete.

David
 
Last edited:

Modellstraßenbahn Tram 2000 VBZ Zürich Spur G (Gartenbahn)​

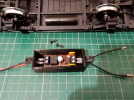
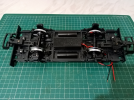
For my birthday I was able to purchase an unfinished scratch build Zurich tram of the type VBZ Tram 2000. The panes of the windows, axles and pantographs were missing. In addition, the car still has to be equipped with lighting electronics. That means interior lighting, headlights, taillights and direction indicators. After the car had arrived, I immediately installed ball bearing axles and made my first attempts to push it. Then a small electric locomotive was fitted with a provisional coupling as a train locomotive and then the test was driven through the loop in our workshop. R1 is not a problem. The car even drives perfectly on the S-curve. I was able to install a motor and temporarily connect it to the housing. First test drives with it went very well. A further construction of the vehicle will take place in the Christmas holidays 2020.
 
Last edited:
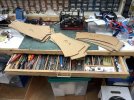
Cutting up templates for points Nd curves to see what things will look like in. Y loft a railway. Prefer to see an outline that can be messed about with rather than using pen and paper once I had got the space available. Yes I know that there are software planning systems, but not without cost and few for the Mac.
 
Cutting up templates for points Nd curves to see what things will look like in. Y loft a railway. Prefer to see an outline that can be messed about with rather than using pen and paper once I had got the space available. Yes I know that there are software planning systems, but not without cost and few for the Mac.
Jon, though not a functional as other tools this is free and being web based should work on any platform:

Trax Editor
 
Jon, though not a functional as other tools this is free and being web based should work on any platform:

Trax Editor
Thanks Jimmy will give it a try, in the meantime was posting on a different iPad. Here is my bench with loads of cutouts, more are in the loft checking out the fiddle yard layouts. Had a quick look at it, though free they want your credit card number. Do not do that as it is a bit of a trap to get you to sign up for other options. Will keep with my Card Templates and just pen and paper to rough things out. Has served me well in my long past history with Track Planning.
AB151778-248E-4667-9B60-917C9A764BF8.jpeg
 
Last edited:

Modellstraßenbahn Tram 2000 VBZ Zürich Spur G (Gartenbahn)​

For my birthday I was able to purchase an unfinished kit of a Zurich tram of the type VBZ Tram 2000. The panes of the windows, axles and pantographs were missing. In addition, the car still has to be equipped with lighting electronics. That means interior lighting, headlights, taillights and direction indicators. After the car had arrived, I immediately installed ball bearing axles and made my first attempts to push it. Then a small electric locomotive was fitted with a provisional coupling as a train locomotive and then the test was driven through the loop in our workshop. R1 is not a problem. The car even drives perfectly on the S-curve. I was able to install a motor and temporarily connect it to the housing. First test drives with it went very well. A further construction of the vehicle will take place in the Christmas holidays 2020.
Very nice model. It even sounds like a tram!
 
Have to admit when I signed up I do not recall the requirement for credit card details !!
Yup that is what they wanted today, perhaps they have got to the stage where they need mire money!
 
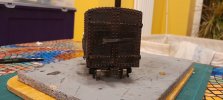
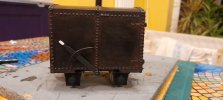
I made a start on a couple of boxcars and a brake van :-
1CCA3B01-C132-4C0E-8F7A-917D6D1BE3B6.jpeg

Box car all laid out ready for removing excess resin.
 
Back
Top