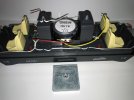
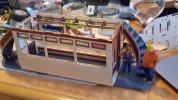
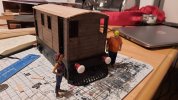
What happened at your workbench today?

Dunno - R3 is 4ft radius and I've never gone less than that
Hm from my Explore the world of LGB Page 44, Rad centre to centre and outer figures.
R1 600-645 just under 24” to just over 25”
R2 778-823 just under 31” to just over 32.5”
R3 1198-1243 just over 47” to just under 49”
so hope that clears things up some.
 
What are the feet & inch dimensions of an R2? My small F handles a 4ft radius curve with prototypical bogie centres...
I think as Jon says R2 is just under 3 foot, I only have 3 pieces, but Mona and the Accucraft Pairs go round at a steady speed. at some point, they will be removed, but that involves moving the path, which in turn involves ( He hopes) a new shed;)
 
Very little on the workbench but been busy scanning Black and White pics plus some colour ones, mostly IoW but a couple of Duchess ones. One of the Duchess ones was one that I had completely forgotten I had taken in 1964 from where I used to live in Wembley. As it was in the Slow Line I suspect it may have been some kind of sporting event. Yes I took interest in sport in those days, but only sport held at Wembley that would involve lots of specials. We had some great visiting steam at those kind of events in thems days.
0373FAD1-6A91-4F3C-80CF-0E564216E6F9.jpeg
 
I have been reprogramming some of my locos on the Navigator. Just over half of them done along with the picture on the hand held. 12F62C7B-52B9-4C1D-AE47-A7182E8E0429.jpeg
 
I have been reprogramming some of my locos on the Navigator. Just over half of them done along with the picture on the hand held. View attachment 278552
Not sure how much knowledge you have with the Navi, posting pics is quicker when you have multiples locs of the same type that you have. Just notevthe picture number and you can input that when you get to the one existing. Saves searching through all the pictures.
 
Not sure how much knowledge you have with the Navi, posting pics is quicker when you have multiples locs of the same type that you have. Just notevthe picture number and you can input that when you get to the one existing. Saves searching through all the pictures.

On the case Jon. naming the similar locos is sometimes tricky when they look the same with no differentiating number on. A subtle dot in a particular colour on the cab roof will suffice in
those eventualities.


IMG_5303.JPG
 
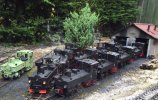
Well the test went Ok, Dimmocks curve was successfully negotiated in the company of an Acccucraft "pairs" :) Mantianer anyone?
DSC_0073.JPG

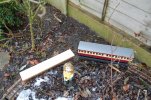
With that done, back inside to warm up and start putting on the beading to replace the overlay that was a bit on the large side and slightly wrong, photo shows the supplied overlay at the top and my effort with plasitcard strips below
DSC_0074.JPG
 
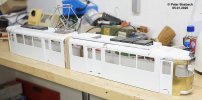
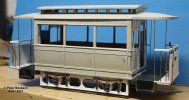
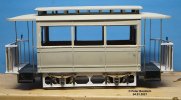
A small update of the two cars that I'm currently building on my own. My friend had to go to the hospital, gallstones.
The railings are made of brass and should be black. I am waiting for a delivery so that I can burnish brass parts.
The Düwag articulated trolley has received a test with a motor and a middle bogie. I still have to work a lot with the file.
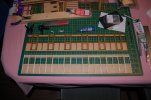
Today I bathed in plastic shavings. I had to do a lot of milling for the resistor covers. The resistors are made from resistors. They will later be painted white. This is just a sample.

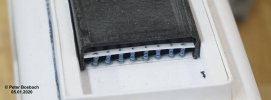
Ok, the pictures are a bit older, but today I made the resistors. isolators On the photo you can see the prototype. In a slightly modified form, I built 40 resistors into the rows today.
Peter
77595-modell-hagen-74-07.01.2021.jpg
77597-modell-hagen-74-07.01.2021.jpg
77587-modell-wsw-429-04.01.2021.jpg77588-modell-wsw-429-04.01.2021.jpg
 
Last edited:
Well the test went Ok, Dimmocks curve was successfully negotiated in the company of an Acccucraft "pairs" :) Mantianer anyone?
View attachment 278558

With that done, back inside to warm up and start putting on the beading to replace the overlay that was a bit on the large side and slightly wrong, photo shows the supplied overlay at the top and my effort with plasitcard strips below
View attachment 278559
I wish I'd done this with mine, but we were stuck in LD1 and I wanted to crack on. As such it is a product of its time, and when it whistles past at a scale 30mph why, you hardly notice. I tell myself...
 
A small update of the two cars that I'm currently building on my own. My friend had to go to the hospital, gallstones.
The railings are made of brass and should be black. I am waiting for a delivery so that I can burnish brass parts.
The Düwag articulated trolley has received a test with a motor and a middle bogie. I still have to work a lot with the file.
Today I bathed in plastic shavings. I had to do a lot of milling for the resistor covers. The resistors are made from resistors. They will later be painted white. This is just a sample.

Ok, the pictures are a bit older, but today I made the resistors. On the photo you can see the prototype. In a slightly modified form, I built 40 resistors into the rows today.
Peter
View attachment 278564
View attachment 278565
View attachment 278561View attachment 278562
I like the lower tram
 
A small update of the two cars that I'm currently building on my own. My friend had to go to the hospital, gallstones.
The railings are made of brass and should be black. I am waiting for a delivery so that I can burnish brass parts.
The Düwag articulated trolley has received a test with a motor and a middle bogie. I still have to work a lot with the file.
Today I bathed in plastic shavings. I had to do a lot of milling for the resistor covers. The resistors are made from resistors. They will later be painted white. This is just a sample.

Ok, the pictures are a bit older, but today I made the resistors. On the photo you can see the prototype. In a slightly modified form, I built 40 resistors into the rows today.
Peter
View attachment 278564
View attachment 278565
View attachment 278561View attachment 278562
I guess your finger is getting better then; that's good.

Not being au fait with electrical things, are the resistors the little springy looking things? And you are making 40 of them? Wow! Outstanding devotion to detail.
 
I guess your finger is getting better then; that's good.

Not being au fait with electrical things, are the resistors the little springy looking things? And you are making 40 of them? Wow! Outstanding devotion to detail.
I think they're actually resistors
 
I guess your finger is getting better then; that's good.

Not being au fait with electrical things, are the resistors the little springy looking things? And you are making 40 of them? Wow! Outstanding devotion to detail.
Thanks, my finger getting better, Can't touch it with hard surfaces snd ehrn it id cold outside it hurts a little bit.

And... your are right. What I had made are the old porcelan isolators, The resisotrs looking like you discript them. That was my mistake.
Thanks again for your help. I'm using resistors, because they have a simular shape.
 
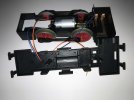
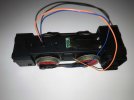
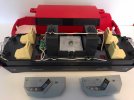
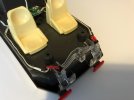
Yesterday and today progressed the work to convert my Playmobil 4010 fro 27 mHz tp 2.4 gHz.

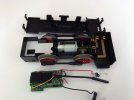
With the bogies removed the electronics were stripped out:
4010-3.jpg


Next wired ready for the motor to take the new ESC power:
4010-5.jpg


Now all put back together, the old power out to the LEDs will become the power to the Rx:
4010-6.jpg


Next work on the body, stripped down ready to go:
4010-1.jpg


The original LEDs removed and the LGB 2-wire push-in grain of wheat lamp sockets fitted and 3 mm duo red/white LEDs fitted, this will allow directional lighting when fed from the motor.
4010-4.jpg


And finally a little surgery and speaker in place, holes in the chassis still needed, and re-location to the weight, but a reasonable days work :)4010-2.jpg
 
Dangs Jimmy, your work on the lights means that I may now have to pull my Railcar (converted from one of these) apart to fit them back in!
 
I spent the day sorting the curved ends on my Occre London tram and doing some redesigns on the Y60 prototype to get it a bit closer to the real thing: 20210108_103752.jpg20210108_173542.jpg
 
Back
Top