David1226
Registered
Are we to assume, having got the toilet block to a functional state, you are moving on to a 'Big Job'?

Phil
You should be deturd from such suggestions.
David
Are we to assume, having got the toilet block to a functional state, you are moving on to a 'Big Job'?

Are we to assume, having got the toilet block to a functional state, you are moving on to a 'Big Job'?

You would be soooooo disappointed if we hadn'twhich prompted the outburst of lavatorial humour,
Well he didn't want to lingerAre we to assume, having got the toilet block to a functional state, you are moving on to a 'Big Job'?

Y6 you say...Made a start on a Steam Tram, Y6 to be specific. It will run on Gauge 3 track as I have been lusting after this size for a while though the scale is pretty much G Scale IE you can use the figures and buildings.
View attachment 278876
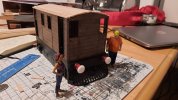
A nice set of buffers.
Yup a Y6 unlike your superb J70. However the differences are small but noticeable, sadly I did not look too closely at yours earlier before I made my boob comment. Vive la différence.
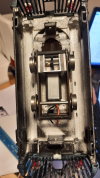
To be fair mine is a quick lash up of a 3D design off Thingiverse with some additional detailing and a wooden roof. It's sitting on a little pug 4 wheel chassis, so technically it's closer to a Y6!! I've basically built it as a more robust vehicle than my trams so that I can send it around and clear the clutter off the track prior to running the more expensive to fix stuff...Yup a Y6 unlike your superb J70. However the differences are small but noticeable, sadly I did not look too closely at yours earlier before I made my boob comment. Vive la différence.
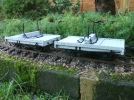
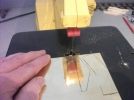
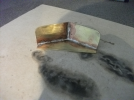
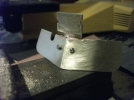
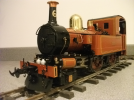
They are made by Ed More, who is a member of the IOM15mil group and trades as EMA Heritage."a pair of IOM 'L' wagons..."
My apologies if you have previously mentioned the pedigree of these kits, but whose kits are they, please?
That looks perfect: a good surface to work on, natural light and plenty of storageHello, one square meter for a new uncomer. it's quite enough for a 1/20 yard!
View attachment 279008.
They are mentioned in the latest issue of Garden RailThey are made by Ed More, who is a member of the IOM15mil group and trades as EMA Heritage.
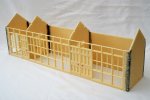
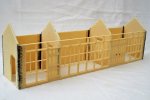
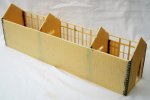
paint brick first!!!!!!!!!!!!!!!!!!!!!!!!!!!!than paint roof...............than add roof.....you dont want to f**** up this master piece, if you dont do it my way, we will have a couple of beers and a talk and i walk him home and you can rebuild....e next process will be to give the structure a spray of grey plastic primer but, at the moment I am undecided as to how to proceed further. I cannot decide if I should paint the brickwork first, or add the roof. I am erring towards the roof, as that could also be primed before any painting takes place.
