What happened at your workbench today?

I had one of those. It's not that difficult, the hardest part is the top rear part over the stairs, I just couldn't get it to sit right, in fact most of the completed models of it I've seen never look quite right there. I think you need to position that piece before gluing the stairs
Thanks for the tip;),I think its one to take your time on,plenty of pre build painting to do?The spare engine in the kit may be headed for a custom crate and a flat car load:D
 
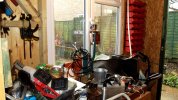
New workshop taking shape, Over 50% of the insulation and internal cladding completed.
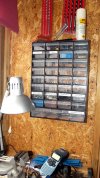
Just about to nip out to Aldi for another couple of their multidrawer cabinets (Currently under a tenner.)
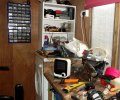
Who knew I had so many tiny parts... Currently still mostly in various Chinese food containers for transport. Who knew I'd had so many take-aways..!
On the plus side, I've found 'almost' enough parts to build up a Hartland Woody. :) (When I get the time...)
Aldi muti-drawer unit.JPGtotal chaos (1).JPGtotal chaos (2).JPG
Paul.
 
Last edited:
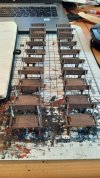
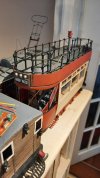
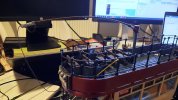
Yesterday in-between work - which does have a habit of getting in the way, I made up the seats for the tram, as well as fitting and painting the hand rails. I got the latter done during a conference call that could definitely of been an email...

20210128_112010.jpg16118330542352022296933249812190.jpg
 
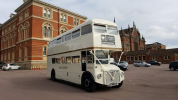
The Revel 1/24 Routemaster kit.Its been on top of the wardrobe in the spare room for at least 3 years and I thought it may be a good lock down time waster,so I opened the box to see what was going on and to check if I had the paints to complete it, yes I have so just might make a start on this pile of parts;) I have looked on utube at the builds done and a challenging kit to say the least and I noticed while checking it all out a few parts are out of shape but shouldn`t be too much of a problem to get back to normal,I think as its been in store for so long;).View attachment 279663View attachment 279664
A white Routemaster - that's novel :oops:
 
Well, as the saying goes, there's a prototype for everything...

View attachment 279688
Hmmm, OK, pass the bucket, I'm not sure :sick:

As a lad, my father and I caught a bus in London, and when we were sat downstairs, my father said to me, 'This is the bus of the future.'

It didn't look or sound any different to me, as the interior was the same colour and trim as the RTs. Years later, when I did a Google about the routes used by the prototypes, I realised that it would, indeed, have been RM1 :nod::nod:

Many moons later, when I was again working in London, I rode on one of the Boris buses - the new Routemaster and, just because I could, I went down the rear stairs onto the rear platform - and suddenly I was aged 10 again - the colour of the rear vestibule, the shape, the smell, all brought it back - except of course the doors. As a youngster, I could jump off the platform as the bus was drawing to a stop - no safety elves to shout at you then :shake::shake::shake: If you fell over doing it, you learnt how to do it properly next time :cool:
 
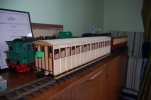
Today I have removed all the clamps and pegs and I is well pleased with the results......Smug mode:cool:

DSC_0078.JPG
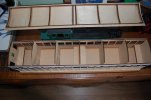
I made a frame and recessed it inside, notching the bulkheads, glued the first skin of the roof to it and adding the roof hoops to brace it whilst the body was upside down, I forgot to mention that I covered the bulkheads and sides/ends with masking tape just in case of the glue spreading, so as you can see the roof is removable.
DSC_0080.JPG
just a few seats to fit, safety chains and a coat or 2 of paint, Thanks again to Northsider of this parish for help and a few bits :clap:
 
Hmmm, OK, pass the bucket, I'm not sure :sick:

As a lad, my father and I caught a bus in London, and when we were sat downstairs, my father said to me, 'This is the bus of the future.'

It didn't look or sound any different to me, as the interior was the same colour and trim as the RTs. Years later, when I did a Google about the routes used by the prototypes, I realised that it would, indeed, have been RM1 :nod::nod:

Many moons later, when I was again working in London, I rode on one of the Boris buses - the new Routemaster and, just because I could, I went down the rear stairs onto the rear platform - and suddenly I was aged 10 again - the colour of the rear vestibule, the shape, the smell, all brought it back - except of course the doors. As a youngster, I could jump off the platform as the bus was drawing to a stop - no safety elves to shout at you then :shake::shake::shake: If you fell over doing it, you learnt how to do it properly next time :cool:
Yes, I've also ridden on RM1, as it was running at one of the Acton Depot open days a few years back.

I've also driven a Bristol Lowdecker with manual crash gearbox and manual steering. That was an experience!!
 
The Revel 1/24 Routemaster kit.Its been on top of the wardrobe in the spare room for at least 3 years and I thought it may be a good lock down time waster,so I opened the box to see what was going on and to check if I had the paints to complete it, yes I have so just might make a start on this pile of parts;) I have looked on utube at the builds done and a challenging kit to say the least and I noticed while checking it all out a few parts are out of shape but shouldn`t be too much of a problem to get back to normal,I think as its been in store for so long;).View attachment 279663View attachment 279664
Shortly after I moved to the nits I noticed one of those kits in a now closed shop at a good discount. Nearly bought it to use the Top Deck as a a Railcar Donor. Reckon it would have worked and it was destined to run in the Ruschbahn, sadly Andy died around the time so it was never bought and the Railcar will never emerge.
 
Yes, I've also ridden on RM1, as it was running at one of the Acton Depot open days a few years back.

I've also driven a Bristol Lowdecker with manual crash gearbox and manual steering. That was an experience!!
I travelled to school on 2 buses,RT and RM,one route on one type and one on the other,then LT withdrew these and put those horrible rear engine front loaders in their place!!!.Before I had a car way back when I visited my uncle in Southend on Sea catching Eastern National route 251 from Wood Green to the Seaway in Southend,about 3 hrs on a Bristol Loddekka,and of course 3hrs back,Great machine,normally sat in the single front seat upstairs as going from end to end.The depot in Wood Green was used for filming On The Buses as a useless bit of information.;)
 
Shortly after I moved to the nits I noticed one of those kits in a now closed shop at a good discount. Nearly bought it to use the Top Deck as a a Railcar Donor. Reckon it would have worked and it was destined to run in the Ruschbahn, sadly Andy died around the time so it was never bought and the Railcar will never emerge.
That would have been an interesting build Jon,I don`t know if it still about in the shops but mine was £39 and a good price for such a comprehensive kit,no idea how much it is now.
 
That would have been an interesting build Jon,I don`t know if it still about in the shops but mine was £39 and a good price for such a comprehensive kit,no idea how much it is now.
Memory says that the one I saw was £24 or thereabouts so would have been a good buy.
 
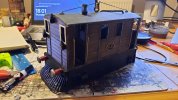
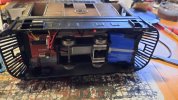
This is my now completed J70 tram. Built using 3d printed parts, a wooden planked roof and motorised with a little 4 wheel chassis and basic radio control, it flies around the track at a great rate of knots. Quite happy with how it's turned out!
20210128_180221.jpg16118571563811226248632037401035.jpg
 
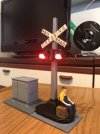
This is a ‘Railroad crossing ‘ signal that was given to me by my son in law in Miami from his railway, when he was a child. I have replaced the two bulbs with 10mm LED’s, the grey power box is a 3D print, modified and sized to suit. This contains a 9v battery and a small board with a ‘flip- flop ‘ circuit on it, couple of transistors and a few other components so that the LED’s flash. The man on the crate is also 3D printed, holes were drilled in the base of the box to cover the 3 terminals on the base of the signal.
Dave
5152D4D3-37C6-4C17-9D19-A94D90CF8D78.jpeg
 
I finished off the trolley pole this evening. It's made of brass wire wrapped in brown string to give it the insulated look. Just needs some paint on the trolley wheel itself now.20210128_195351.jpg
 
This is a ‘Railroad crossing ‘ signal that was given to me by my son in law in Miami from his railway, when he was a child. I have replaced the two bulbs with 10mm LED’s, the grey power box is a 3D print, modified and sized to suit. This contains a 9v battery and a small board with a ‘flip- flop ‘ circuit on it, couple of transistors and a few other components so that the LED’s flash. The man on the crate is also 3D printed, holes were drilled in the base of the box to cover the 3 terminals on the base of the signal.
Dave
View attachment 279704
Dave, what are the dimensions of the cabinet please? - Do you think it big enough to take a small servo?

PhilP.
 
Showing my age.,.
I trying to work out the Artist and Title...

Of the 7" 'single' in the background... Before I realised it was a box of filament! :wondering::rolleyes:
 
Back
Top