You are using an out of date browser. It may not display this or other websites correctly.
You should upgrade or use an alternative browser.
You should upgrade or use an alternative browser.
What happened at your workbench today?
- Thread starter Henri
- Start date
DafyddElvy
1:22.5 & 15mm Scale Trams, , NG Steam Railways
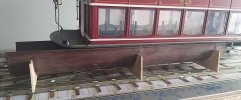
I have been pondering over how to make a cradle for my trams for a wee while now, and then when not thinking about the cradle a ding moment, the gutter for the garden hut I have spare, I wonder if a tram would sit down side up in the channel, 3 pieces of scrap window blinds with an arc cut in to them and stuck on with PVA, hey voila I have a cradle.
The simplest things can bring us joy and make us happy.
The simplest things can bring us joy and make us happy.
Attachments
Brilliant, have been thinking of a cradle for my G1 and G0 stuff for a while. Have a solution now but I will use a bit of squared guttering that I have. For those of you that do not have some convenient spare guttering and wish to copy this superb idea, a bit of Skip watching is in order.I have been pondering over how to make a cradle for my trams for a wee while now, and then when not thinking about the cradle a ding moment, the gutter for the garden hut I have spare, I wonder if a tram would sit down side up in the channel, 3 pieces of scrap window blinds with an arc cut in to them and stuck on with PVA, hey voila I have a cradle.
The simplest things can bring us joy and make us happy.
DafyddElvy
1:22.5 & 15mm Scale Trams, , NG Steam Railways
I suspect the best part for me was yet another use for the wood window blinds my wife said I should have skipped a few years ago.Brilliant, have been thinking of a cradle for my G1 and G0 stuff for a while. Have a solution now but I will use a bit of squared guttering that I have. For those of you that do not have some convenient spare guttering and wish to copy this superb idea, a bit of Skip watching is in order.
MaybachMD
Registered
Everything comes in handy one day. The eternal circle, in the skip, taken out for re-purposing. A large proportion of my line is made from rescued materials. Of course had you followed your wife’s advice and put them in a skip Jon might have found them and made a cradle for his stuff.
David1226
Registered
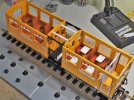
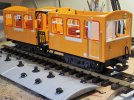
A couple of gratuitous pic of the latest coaching creation for the Claptowte Railway, the First/Third Auto-trailer No17, to partner the all Third Auto-trailer No16. Although I finished the construction over a week ago, I cannot start the painting until the family have left to return to the US, time with them is too precious. The First Class compartment is the one with the tables added. I have decided that there will be one more coaching project after this and to that end I have made a start acquiring the necessary parts. That will free up the 4-wheel Director's Coach to be independently attached to any rake on an ad hoc basis, as originally attended, or even run on its own.
David


David
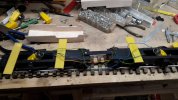
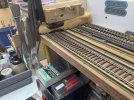
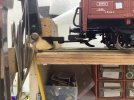
For quite a while my irke has been tested when trying to add couplers to scratch built or modified locomotives and rolling stock. The general way has been to get a wagon from the nearest shed and use that. However this sometimes involves trips out in the rain or sometimes a dark evenings to an unlit shed. Tedious. Not sure how or when the lightbulb moment came, but come it did. Just mount an LGB type coupling on the piece of wood at one end. So that is what I have done today. I have not used an expensive LGB coupling but a surplus one of another make that was lying around in a bag. So long as the top of the hook on the vehicle that was used as a jig to place matches the bottom of the coupling it all will be fine.
Now ready for when I next need to do that height check.
Now ready for when I next need to do that height check.


justme igor
Registered
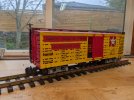
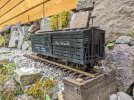
The transformation is so complete that it is difficult to believe that the donor was a cheep Bachman job.Finally completed what was supposed to be a "light" rework of a Bachmann stockcar I had acquired for cheap:
From this:
View attachment 299630
To this:
View attachment 299631
I'm going to try and write up a build log at some point. I got tons O' pictures of modifications and the stuff I 3D Printed.
Northsider
Modelling the Northern half of the Isle of Man
justme igor
Registered
Windym87
Registered
As I’m only just getting back into G gauge I’m taking things slow.
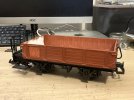
However the garish and probably incorrect DR yellow open wagon has cried out for some attention.
First a spray with Halfords white primer, the hand painted in a dark rust colour.
Happy so far with it but may try Halfords Red Oxide for another wagon I have in a garish colour and see what the result is.
Mark
However the garish and probably incorrect DR yellow open wagon has cried out for some attention.
First a spray with Halfords white primer, the hand painted in a dark rust colour.
Happy so far with it but may try Halfords Red Oxide for another wagon I have in a garish colour and see what the result is.

Mark
The red oxide works much better than you may think and covers nicely being an undercoat. I sprayed mine thus then laboriously applied masking tape to the wood bits (after a week of drying) to spray the metal work black halfords again Matt. Well worth the effort.As I’m only just getting back into G gauge I’m taking things slow.
However the garish and probably incorrect DR yellow open wagon has cried out for some attention.
First a spray with Halfords white primer, the hand painted in a dark rust colour.
Happy so far with it but may try Halfords Red Oxide for another wagon I have in a garish colour and see what the result is.
View attachment 299888
Mark
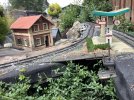
One of my Signals inherited from the Ruschbahn finally gave in the other day. Andy had built the circular bits using plastic lids from old Film Cassette cans. Fortunately some years back I got batch of brass circles in a box of this n that. Some of my other signals have already been replaced and again by a stroke of good luck I had pre drilled the centre of the circles and sprayed them up ready for the day when I did the previous 2 trashed ones. Below you can see how the plastic has got weak to the touch.
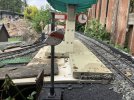
And after being replaced, the one to the left in the distance may be due soon and another couple elsewhere are still hanging on. This is likely as they are in shade most of the time so the plastic will not have degraded so much.
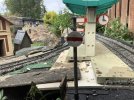
That Station Platform is long se prettying up work.

And after being replaced, the one to the left in the distance may be due soon and another couple elsewhere are still hanging on. This is likely as they are in shade most of the time so the plastic will not have degraded so much.

That Station Platform is long se prettying up work.
playmofire
Registered
Well, this didn't happen today and didn't happen at my workbench, but I'll record it here anyway.
The items below arrived on 30th May from Matt (3 minutes of fame) as part of my experiments on a new roof for my fleet of LGB Toy Train box cars.
I haven't had time yet to do anything other than think and these thoughts and what happens will be recorded in due course here.
The items below arrived on 30th May from Matt (3 minutes of fame) as part of my experiments on a new roof for my fleet of LGB Toy Train box cars.
I haven't had time yet to do anything other than think and these thoughts and what happens will be recorded in due course here.
David1226
Registered
That's a job you need to apply yourself to.Well, this didn't happen today and didn't happen at my workbench, but I'll record it here anyway.
The items below arrived on 30th May from Matt (3 minutes of fame) as part of my experiments on a new roof for my fleet of LGB Toy Train box cars.
I haven't had time yet to do anything other than think and these thoughts and what happens will be recorded in due course here.
David
playmofire
Registered
I have a layout to sort out for the Kirkbean Playmobil Exhibition at the end of July and then, in theory, I have time to marshall my thoughts and see what is best.That's a job you need to apply yourself to.
David
Chris Vernell
45.29 N, 75.75 W
My workbench is being drizzled on. Not to worry, it's tarped.

