What have you been printing.

Cake tends to taste better?,
 
I am paying attention, one day I may even get round to having a go at 3D Printing. After all I finally got round to trying out Deltang and LiPo’s.
 
I am paying attention, one day I may even get round to having a go at 3D Printing. After all I finally got round to trying out Deltang and LiPo’s.
Took me a while to take the plunge - but certainly not regretting it. I'm already writing to Santa for an improved model

Rik
 
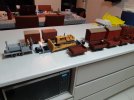
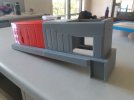
My latest project has been to replicate the open wagons which I constructed from my own resin castings. I was interested in how a 3D printed version might compare. The originals used Hartland Loco Works mini-series wagon chassis which, at the time, could be picked up for less than £10 each. They have now ceased production and so I have produced my own version which uses the same dimensions but has more appropriate W-iron leaf spring suspension than the HLW version. Still a bit more tweaking to be done - the internal planking disappears because, I am reliably informed, of the 'elephant's foot effect' so I need to compensate for that. But, I'm quite pleased with the outcome. All drawn in TinkerCAD BTW.
IMG_1208.JPG

IMG_1213.JPG

IMG_1214.JPG

IMG_1215.JPG


Rik
 
My latest project has been to replicate the open wagons which I constructed from my own resin castings. I was interested in how a 3D printed version might compare. The originals used Hartland Loco Works mini-series wagon chassis which, at the time, could be picked up for less than £10 each. They have now ceased production and so I have produced my own version which uses the same dimensions but has more appropriate W-iron leaf spring suspension than the HLW version. Still a bit more tweaking to be done - the internal planking disappears because, I am reliably informed, of the 'elephant's foot effect' so I need to compensate for that. But, I'm quite pleased with the outcome. All drawn in TinkerCAD BTW.
Rik
Rik, you could print the sides thinner and stick them together. though after watching the vid (which I found interesting (sad eh)) there seems numerous was of alleviating the elephants foot, for your wagons I would think the chamfer would be easiest,
 
Looks good Rik, very good for a first attempt taking instruction from something made from a totally different process. The W irons look really good and the ability to add brake gear straight from the printers really improves the look of the HLW chassis.

How long did the total print take compared casting one from resin? Did you print it all as one solid piece, or as a 'kit' like with the resin original?
 
How long did the total print take compared casting one from resin? Did you print it all as one solid piece, or as a 'kit' like with the resin original?
Hi Ricky
No, I've printed the parts separately, as with the original 'kit'.

The base took the longest to print (around 12 hours). The solebars each take around 4 hours, each side is just over four hours and each end around 3 hours - so total print time is circa 34 hours. That's not counting how long it took to draw the parts in TinkerCAD

Not sure how long it took to resin cast each wagon. Of course, I was only casting the sides and ends (not the base or solebars). The resin took about 15 minutes to reach the stage where it could be removed from the mould. I cast one end and one side at a time - so around an hour to cast each body (the resin needs time to harden) compared with 14 hours to 3D print the body. Probably, the construction of the masters for the mould and then the casting of the mould probably took slightly longer than it did to make the drawings. So, overall, resin casting is quicker in time - but messier (and smellier) and more expensive.

I much prefer 3D printing. The finish is better, the process more satisfying and I am able to tweak the drawings between each print if I decide to change something or add more detail. Once the printer has been set off and running, I can happily get on with something else. In fact, it's quite therapeutic having the printer whirring quietly in the background - almost like having a fellow modeller in the workshop.

Rik
PS - No, I haven't given my printers names (yet!)
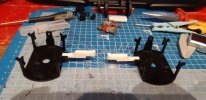
 
Found on the printing site thingyverse,
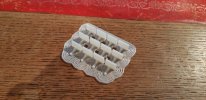
Today it's a flickering firebox, upscale the file as it was tiny.. Mines 40mm x 20mmx 20mm..have flashing leds already.. SoIMG_20201027_134558.jpg
 
Last edited:
All of my stock is 3D printed so I wont go too far back but this is the last month and a bits work. (Give or take the vans are a bit older!)

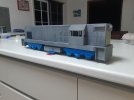
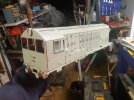
Latest work has been getting the Clyde G8 diesel to a usable standard so I can start detailing and figuring out secondary details. This one will be built as a model of the BHP DE classes that originally worked in Whyalla South Australia. Its 1:24 and is 580mm long. The second one is already 80% there physically with the cab section on the printer as we speak. This one will be based on Fyansford D1. Bought to replace the companies infamous "Australian Standard Garratt" hauling limestone out of the pit it survives today (although now on broad gauge) with a heritage group here in Melbourne. They'll ride on Piko 218 blocks from G-bits with deltang RC and one may end up getting sound if I can find a decoder that'll play nice with the RC and has proper 567 EMD V8 noises :clap:


122196517_404308344069263_6570399818441519828_n.jpg

122463691_353845539229236_7378158170524011729_n.jpg122484304_2799295770353352_3036383563964419447_n.jpg
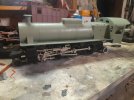
The steam locomotive is a work in progress Tasmanian Government railways MA class and the other diesel in primer is one of Ikernans TGR X class diesels off thingiverse that I've scaled up. I absolutely love the X's, they were the first mainline diesel locomotive in Australia and English Electric nailed it first time around with there being little modification from as built as far as I'm aware. Some were rewired to work better on heavy freight trains with other classes of loco but other then that they remain fairly as built
122462519_3453976788027927_3649135164887302528_n.jpg122662686_387504522622545_382489867034445076_n.jpg


. This one will be X20 and once its progressed into the proper painting stage ill start printing X3. These locos will have the same specs as the G8/DE/T classes.
 
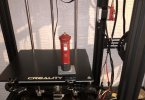
Hi - So I took the plunge about 3 weeks ago and after printing the owl and tool holder and a few other basic novelties I managed to print this Victorian Post Box from a 3d image I found somewhere on t'internet.

Interestingly, it's reproduced the original rustic appearance. The Gold finial at the top was originally on a short spindle which of course broke off never to be seen again. However, a quick trip to Thingiverse to locate an acorn which I scaled down to 3mm width and 2 minutes later I had a replacement finial. Like many others I'm on a steep learning curve and I need to develop my painting skills......

PB 5.jpg
 
Hi Ricky
No, I've printed the parts separately, as with the original 'kit'.

The base took the longest to print (around 12 hours). The solebars each take around 4 hours, each side is just over four hours and each end around 3 hours - so total print time is circa 34 hours. That's not counting how long it took to draw the parts in TinkerCAD

Not sure how long it took to resin cast each wagon. Of course, I was only casting the sides and ends (not the base or solebars). The resin took about 15 minutes to reach the stage where it could be removed from the mould. I cast one end and one side at a time - so around an hour to cast each body (the resin needs time to harden) compared with 14 hours to 3D print the body. Probably, the construction of the masters for the mould and then the casting of the mould probably took slightly longer than it did to make the drawings. So, overall, resin casting is quicker in time - but messier (and smellier) and more expensive.

I much prefer 3D printing. The finish is better, the process more satisfying and I am able to tweak the drawings between each print if I decide to change something or add more detail. Once the printer has been set off and running, I can happily get on with something else. In fact, it's quite therapeutic having the printer whirring quietly in the background - almost like having a fellow modeller in the workshop.

Rik
PS - No, I haven't given my printers names (yet!)
How about Sadie as in Happy Sadie my printing lady?
 
I don’t possess a 3D printer, but I have commissioned a number of items from Jason at The 3D Print Shop:A0283E17-39FC-44CD-8708-00CB2B68146A.jpeg
Ropeway Skip alongside a 16mm figure.
189D2D28-3264-47A7-BFD0-09A239BB0C93.jpeg
Skips on the ropeway.086993DB-B1F0-4F68-BA98-E54C7511EB18.jpeg
 
After the alpacas and the key rings I had a go at my first railway items.

I bought a job lot of bashed LGB and Toy Train wagons off of eBay. One had the coupling arms cut off and replaced with centre buffers. So I printed some repair pieces to fit into the plastic section left on the swiveling wheel mount and screw into LGB couplings. Each one is 48 x 5 x 12mm. Both were printed together and took 20 minutes.

201026.jpg

After that I tried to see what was the smallest detail I could get out of my current set up. I drew up some coach steps with two rivets of 1mm diameter on the front. the walls were 1mm thick and the step 1.2mm. I'm currently using a 0.4mm nozzle and got down to a 0.1mm layer height. After a little bit of sanding I'm quite pleased with how they've turned out. It took 40 minutes to print the 12 together. Individually they are 10 x 10 x 8mm.

201027 (1).jpg

As I go on I think I will buy a varied set of nozzles for the printer. Most sets I've seen come with various sizes between 0.2mm and 0.8mm. The smaller nozzles should allow me to print higher resolutions with smaller details. Larger nozzles mean that printing can be completed quicker on large items where detail might not be as important The larger material deposit also means that the resulting printing print should be stronger. I could see it being useful for chassis or possibly gearboxes.
 
I drew plans for this locomotive body and had Jason at the 3D Print Shop print it for me:-
10820F59-2B69-477C-A6D5-6EF8B0DFE57A.jpeg

The body is attached to a Roundhouse chassis.
 
My latest effort....

Drawn in TinkerCAD and printed off.
IMG_1246.JPG

IMG_1245.JPG

IMG_1244.JPG

The roof (and floor) are plasticard as it seemed daft to 3D print large expanses of undetailed sheet plastic. The wheels are Lilliput metal spoked as I'm not entirely sure about the efficacy of 3D printing wheels (waddyafink?). There's still a bit of tidying-up to do and, of course, it needs painting, but I think it gives a feel for the early Southwold Railway van on which it is based.

Rik
 
Back
Top