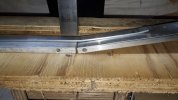
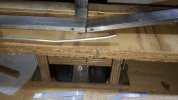
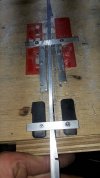
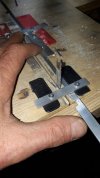
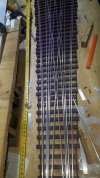
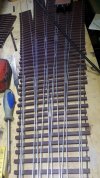
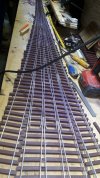
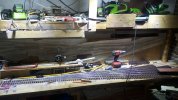
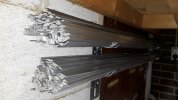
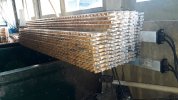
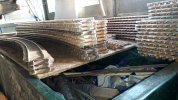
Track making/making tracks: the good, the bad and the ugly, advice and thoughts wanted, explanation is giving(incl mistakes)

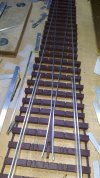
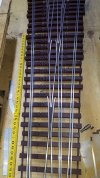
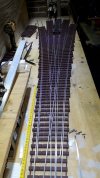
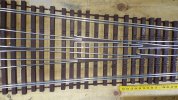
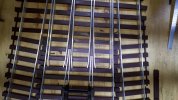
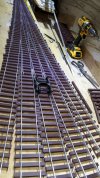
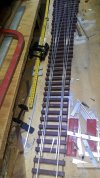
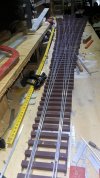
progress on the 5way....
I toke my arbore press into the shed to make it myself easy:
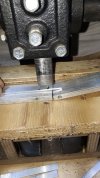
20210605_185518.jpg
20210605_185608.jpg
20210605_185623.jpg

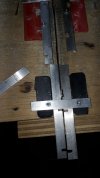
I "reconfigured"my jigsaw stand for the long points, jeezzz they are really a pain in my...let keep it polite...
20210605_185948.jpg
20210605_184820.jpg
20210605_185010.jpg

Must still work on this principal with the jig saw, it is not really to my satisfaction yet.

20210605_185643.jpg
20210605_185726.jpg
20210606_191645.jpg20210606_191507.jpg20210606_191627.jpg20210606_191604.jpg20210606_191529.jpg

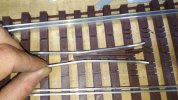
The boogie you see is my testing boogie, it is exact 44mm (all my boogies are 44mm btw) from flange to flange and the gauge is 45mm,.
So i have 0.5mm clearance between each flange and rail times 32 = to big to get it prototypical correct = 1.6 cm = 0.6 cm in proto to big :cool:

Smooth running so far.
So i changed the frogs for the 6th time (look at my other projects) for better looking/appearance better running better building and more firm
Next week i hope i have the time to create the points/switch blades.
Yes this is one sweet but tough cookie with a bonus on learning experience.
Practice makes better.

Some stats:
1.5 kilo abs.
~70 hours printing
And so far 17.50 meters of aluminium strip is in it.

Thanks for reading, with best regards Igor
 
Whether it works, or not, that is a work of art!
:):clap::clap::clap:

Of course, you do realise that you are quite mad (insane)?
:p;)

PhilP.
 
What is the width of your flangeways? I'm concerned your frogs will not last long, not only because they are plastic, but your flangeways are much wider than prototype.
You need both the flangeways on the stock rails (called guard rails), and the flangeways on the wing rails to be consistent, and I think narrower, but will await your measurements.

Again, just to avoid confusion of terms;
switch1.gif


frog1.gif
 
Some update:
20210617_201857.jpg
20210617_201923.jpg
20210617_201904.jpg
20210617_201911.jpg
20210617_201936.jpg
20210617_201957.jpg
Thing is too big for one picture, around 2 meter 50...
Still need to sand the points and the make the trowbars...
Here is the one and only original:
5 way switch real life at the lourdes yard where the pilgrims trains were stocked.jpg
Credits goes to "franco"
 
It really is a thing of beauty. Fantastic work!
 
Revisit some track work with some thoughts:
A 3d printer is clearly the winner when the gloves are off with wood working.
But abs filament and live steam, i dont think that goes well if the loco is stationary.
Abs will get soft around 120C and will melt at 190C, the steam loco will radiate how much heat from the bottom side?

Have to experiment on this one.

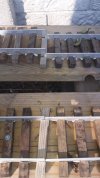
In the mean time the tracks with the wooden sleepers(Azobe wood has several pluses) and with putty, are doing great, better than i thought.
They are outside in 4 seasons by now, the putty is getting harder and more difficult to get the sleepers off the aluminium track(probably after a week the putty reached its final hardness)

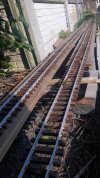
I put up two test tracks:
#1 with only screws at the beginning and one at the end.
#2 with screws every beginning and end of a piece of track.
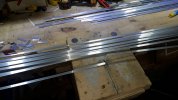
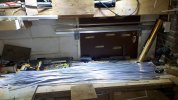
As you can see on the pictures #2 is not dead strait anymore.
#1 is well... overlapping
Both are 12 meters in length.

I connected them when it was 10C outside with a 1mm! gap between every section of 1meter25.
Clearly this was not enough and i need bigger gaps between the sections...
So much for google and his temperature expending charts......

20210627_184533.jpg
It was fairly warm today, the warmest temperature here in this spot was several weeks ago...42C yes i am lockated in the Netherlands, but this corner has NO wind or shade...
Temp was measured at 16.00 hours.
When the picture was taking it was in this corner 32C....

20210627_184517.jpg
Left track is #1
The one that has two screws, one at the beginning and one at the end.
(for the pictures i lifted the track on top of each other, it was next to each other)

The track on the right is #2 with some more screws, it is not dead strait anymore......And it was dead strait....

Yes i need to do some gardening......

With best regards Igor
 
Yes, you have now advanced to stage 2 in the beginners path on how to secure track.

But you are blaming google that they had incorrect expansion data for aluminum? Really? With a bit more thought I think you can figure out why your calculations were off.

Clearly I should not tell you because I know nothing, and don't even have rudimentary knowledge (as per your nasty rant on MLS).

Greg
 
Igor, I think many of us tried to warn about Ally and its expanding characteristics, but there could be a solution. The real thing uses expansion gaps, effectively one side of a join is thinner and the other side on the next rail is at the other side. When laying the rail a median temperature is chosen and the thinner parts overlaid halfway. At all times there is rail present with luck. My rough sketch should show what I mean looking at the top of the rails.
3596EAA0-5C08-4CF3-87C9-A80B5EF91527.png
 
I think many of us tried to warn about Ally
2 people did mention something :cool:

I am in for now on the hottest side of the garden with a 2mm gap on a 1meter 25/4 foot cm section of rails when i would like to drive at 10C
A 2mm gab is to big for 10C, 1mm is tolerable..

The drawing you have is unfortunately not possible with that alu strip.
It is 2 mm thick.
How ever several moths ago i thought about a worse case scenario, i just had a feeling.
Yes you are close very close...
The real thing uses expansion gaps,
Talking about real life:

1.png
2.png
3.png
This resembles more "real life" now this day, 2 decades ago they stop with putting a rubber profile into it( for the Netherlands for sure)
This is not only very easy to do in the shed but as you mentioned it will provide some surface.
Two pluses, yes: here is the annoying but, there is always the but:cool:

But to make it myself more easy i am planning to make 62.5 cm/2 foot pieces of track for in the warm sunny spots.
And calculate back from 60C....at 60c it must be closed.
So at 10C i will have 0.75 mm/.035 inch gab, i can live with that
No air temp btw, just real life garden...

As mentioned : yes i was experimenting with AIR temperature...i know the sun will make it much more warmer.
When on a hot day a scaffolding on south, you can not grab it, more than 70c...
I made a warm water heating collector with tyleen...125C was the max, yes the sun melted the experiment when i turned of the pump.(layer rockwoll piece of epdm, glass ect)

As a metric system fanatic i made a clear 10 meter/33 foot strait piece( with screws ect 12.5 meter exactly but 10/33 to do easy calculations)
Always those imperial bastards(star-wars joke, dont get offended) are making the calculations more difficult...

With best regards Igor
 
gone fishing ages ago!
I miss that, just a morning when it is still dark, prepare your hook line and sinker....break your neon "cork??"??floating thing and watch the sun rise over a open field.....
Watch the fog go away, hear all the birds, watch the hunting birds catch there prey ect...
With a fresh nice hot coffee from a fire....

And then the whistle and noise of the aa20 breaks the silence....full power steaming ahead like it was meant to be....hill up.... raging, blasting, thundering, stamping, puffing, struggling, ploughing on,.... unstoppable....hauling 100 times 60 ton coal cars.

And all the fish are gone.....
Yes a hobby :cool:
 
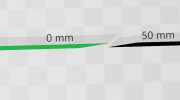
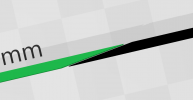
If you do what is suggested by Jon, the minimum rail head thickness will be 1mm at the expansion area when there is no overlap.

With your idea of angled ends, your minimum thickness will be a knife edge, and the wheels will wear it down quickly. You complained 1mm would be too thin, but a knife edge is infinitely thinner. Your reason for objection does not stand up to logic.

Also, your idea puts side thrust on the rails as the come closer together which will negatively affect the gauge.

The "rectangular overlap" has already been successfully manufactured by Split Jaw and some others and people using them have reported success.

split-jaw-rail-clamps-910831-ss_1_2ad4918bb3a3295ae3c2f278b1191277.jpg

Greg
 
I THINK that i am ready for production.
At least for the strait pieces and the curved pieces.
Turnouts and simuiair need a different approtce, ooo yes figured out that one..
Please just wait till i have the time to built THE jig to make what ever you want.
Yes i am doing it for myself but i would like to give other people some ideas for there track making...
All i want is track(1200 meters minimum)

20210723_181120.jpg
20210723_185159.jpg
20210723_181214.jpg20210723_181140.jpg


The photo's are not complete in the right order, sorry for that.
But i made clear that i order them in 5 meter lengths and cut them at 1 meter 25 precise at 20C to 25C in the shed(for thermal expansion.)


20210723_181158.jpg
20210723_190922.jpg


Now the nice part....
65 meters of track done and ready....

20210723_193727.jpg
20210723_193738.jpg

I ordered 3 new saw blades, lets see what i can do with them.(special for this project alone! believe me i a not done after my 1200 meters garden project....)

One to cut the wood length wise (10mmx9mm )hard wood(azobe)
One to cut to length the hardwood(81mm)(azobe)
And one that will give me a 2mm exact slot....( if all will be oke! keep on reading, please)

So i will get 65x65mm azobe wood in lenght of 4 meters and i will cut them to 10x9x81mm for sleepers...with a precision slot, i hope.

For the slots to hold the alu strip
The 1.8 mm cut blade was not good for the strip/wood, i needed to hammer it in, wood will brake
The 1.9mm was also not good for the strip(wood will give in and brake/rupture, ect.)
2.1mm wide cut need putty also the 2,2 mm wide cut needs putty also....yes i could order a 2mm thick cutting saw blade, they will deliver tomorrow, i can't wait...
And shit.... i have no time next week...but HEE i have the desired saw blade for cutting the slots after 6 months of surcharging, if it does what i want him to do!
I can't believe i found one at 2mm cutting...

Thanks for reading i hope you liked this update, comments and thoughts are very welcome as always
With best regards Igor
 
Back
Top