What happened at your workbench today?

Not much modeling done today, but I've been hard at work on these load details for Chr- ... er... the holidays.
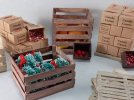
load details.jpg
I'm still getting the hang of model painting styrene, but practice - and screwing up - will teach me plenty in the coming ... hm ... decades?
I did not make the wreaths or gourds. Most of the materials pictured is styrene, the candy cane cases are paper, and the apples and candy canes are clay. I have instructions for how to make all of these on my website!

The above photo has pretty much everything I've been working on, but I am very proud of a couple of the others I took, so they are below as thumbnails...
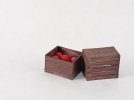
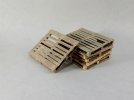
apple boxes.jpgpallets.jpg
 
Not much modeling done today, but I've been hard at work on these load details for Chr- ... er... the holidays.
View attachment 332616
I'm still getting the hang of model painting styrene, but practice - and screwing up - will teach me plenty in the coming ... hm ... decades?
I did not make the wreaths or gourds. Most of the materials pictured is styrene, the candy cane cases are paper, and the apples and candy canes are clay. I have instructions for how to make all of these on my website!

The above photo has pretty much everything I've been working on, but I am very proud of a couple of the others I took, so they are below as thumbnails...
View attachment 332617View attachment 332618
Great attention to detail. I like the "extremely" on the Candy Cane boxes. I look forward to seeing your full day after the 24th Dec layout. It certainly gets you in the "Bah Humbug" spirit. Anyone worked out how many sleeps yet?
 
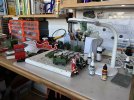
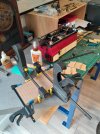
Just a very messy view of my workbench at the moment, as in the middle of a project, which I am keeping secret:

IMG_2444.jpeg
 
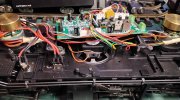
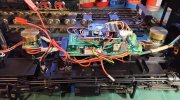
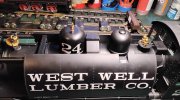
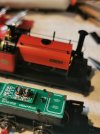
Been busy bee this afternoon. Finished up the battery/dcc rc install on my Bachmann 2-6-6-2. Everything under the domes or in the water tanks. It works ! Time to get back 5o the Zillertal #2. Max

Got the main board down 5 mm. Nice low profile Visaton speaker
20240916_165522.jpg

ESU card sits on Bachmann PnP board. Yes, there is insulation to stop pins stabbing wires. Recharging socket and switch exit below the running plate.
20240916_170641.jpg


It all fits under the hood, really !
20240916_170847.jpg
 
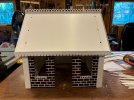
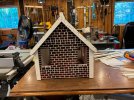
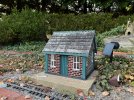
IMG_8849.jpegIMG_8850.jpeg Madman Madman How do you create the brick look?

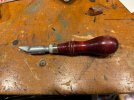
First I ran the wall through the table saw, with the blade just high enough that it cut the horizontal mortar joint. Then, using a tool I used to use when installing rubber cove base, I gouged out the vertical joints. When installing rubber cove base you have to make it fit around outside corners. The rubber won't bend without wanting to come off the corner, so by gouging out a vertical slot on the back of the base, it bends around the corners much better and stays in place.
 
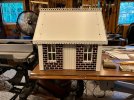
Here's the building in its completed state in the garden. I'm not quite happy with the color of the roof yet. I made the shingles from 1/4" thick PVC sheet with embossed wood grain on one side. I first ripped the sheet into 1" wide strips. Then I ran the strips though the table saw again, but this time they were run through vertically with the blade set to 1/8" from the rip fence. Finally, I marked off two inch increments on each strip and scored those with a utility knife. Breaking each two inch shingle off gave me a rough looking edge, similar to a wood shingle.

IMG_8848.jpeg
 
Decided to spend a few minutes investigating space within the Bachmann NG7 (sic) 0-16.5mm 'Alice' I bought at the Llanfair show..

Glad that I did:
IMG_20240920_140510.jpg
Look what is pirouetting on top of the board... A 'spare' screw. Just being held in place by the magnetism from the motor.

Nothing changes!
PhilP.
 
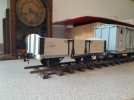
I didn't think there was much point in producing a build log for the IOM H wagon, as it's been a straightforward 'locate and cement' assembly of parts that I laser cut before retiring. Suffice to say, I started work on it on September 5th
20240907_140337.jpg

and have completed it more or less a fortnight later, albeit with a week in Wales along the way. Centre buffers were fitted and the pivot (that also doubles as a hook for those who use bog chain) was removed and fitted upside down.
20240920_152137.jpg
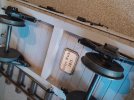
Finally, the thing that marks out one of my builds from anyone else's...
20240920_152304.jpg

I only went up to 2025 when I ran off my last batch of maker's plates, so I'll either have a very busy Autumn, or will have to arrange an alternative...
 
I didn't think there was much point in producing a build log for the IOM H wagon, as it's been a straightforward 'locate and cement' assembly of parts that I laser cut before retiring. Suffice to say, I started work on it on September 5th
View attachment 333070

and have completed it more or less a fortnight later, albeit with a week in Wales along the way. Centre buffers were fitted and the pivot (that also doubles as a hook for those who use bog chain) was removed and fitted upside down.
View attachment 333071
Finally, the thing that marks out one of my builds from anyone else's...
View attachment 333072

I only went up to 2025 when I ran off my last batch of maker's plates, so I'll either have a very busy Autumn, or will have to arrange an alternative...
Time travel Dr Northsider ? :nerd::nerd:
 
When is a workbench not a workbench? When it's a lathe...
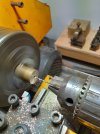
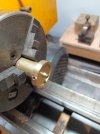
Rhinochugger having put a shout out for a lathe, I was like the donkey in Shrek, ie 'Pick me! Pick me!'. And so it came to pass that a nice, brass flywheel landed on the doormat. First task was to make up a mandrel to hold it: a piece of brass bar was faced off and drilled 1.8mm, tapping size for 8BA.20240920_142728.jpg

To make sure that the thread started square, the tap was mounted in the tailstock and the chuck turned by hand, applying a very gentle pressure to the tailstock feed -any faster, and the tap will break. Once a start had been made, the rest of the thread was cut by hand.
20240920_142924.jpg

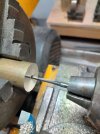
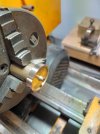
The flywheel was mounted on the mandrel and adjusted to as close to centre as possible -the hole was 2mm diameter, the screw slightly less. Once centred, it was nipped up and the flywheel was reduced in diameter.
20240920_143300.jpg

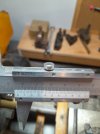
I was using the cross slide dial, so was confident that I'd removed enough metal to get the desired diameterof 26.5mm, but it was good to have this confirmed!
20240920_145253.jpg

A quick tickle with a needle file removed the burrs, and that was it: job done!

20240920_145348.jpg
 
When is a workbench not a workbench? When it's a lathe...
Rhinochugger having put a shout out for a lathe, I was like the donkey in Shrek, ie 'Pick me! Pick me!'. And so it came to pass that a nice, brass flywheel landed on the doormat. First task was to make up a mandrel to hold it: a piece of brass bar was faced off and drilled 1.8mm, tapping size for 8BA.View attachment 333094

To make sure that the thread started square, the tap was mounted in the tailstock and the chuck turned by hand, applying a very gentle pressure to the tailstock feed -any faster, and the tap will break. Once a start had been made, the rest of the thread was cut by hand.
View attachment 333095

The flywheel was mounted on the mandrel and adjusted to as close to centre as possible -the hole was 2mm diameter, the screw slightly less. Once centred, it was nipped up and the flywheel was reduced in diameter.
View attachment 333096

I was using the cross slide dial, so was confident that I'd removed enough metal to get the desired diameterof 26.5mm, but it was good to have this confirmed!
View attachment 333097

A quick tickle with a needle file removed the burrs, and that was it: job done!

View attachment 333098
Way beyond my pay grade :emo: :emo: :emo:
 
Back
Top