What happened at your workbench today?

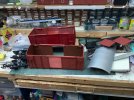
Ok so the Brown Bogie van has been integrated to the DR garden fleet. Not a lot of work but some. This is it as bought, my previous post shows it on the workbench after spraying.
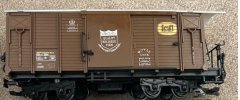
IMG_8256.jpeg
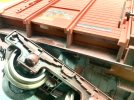
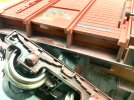
Next up some work to the base, for some reason the Newquid bogies required (by previous owner no criticism I was very happy to get this van at the GSC bargain price) stepping up with a lot of washers to get them to turn. This caused much wobble, not acceptable to the management of the DR. Thus a plate was glued into the base either side of 1 bogie turning area with a small piece of plasticard glued to the bogie either side to stop the wobble. Sounds very lashy but it works, hopefully will be quite long lasting. Things do not round and round for long periods on this line so with some suitable plastic lubrication should be fine. Pic below should help to explain the lash up.IMG_8254.jpeg
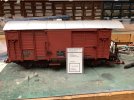
Finally in all its revised splendour with that all important DR labelling, number and Wagon Card.
IMG_8255.jpeg
 

Attachments

  • IMG_8251.jpeg
    IMG_8251.jpeg
    1,003.6 KB · Views: 0
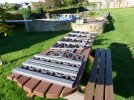
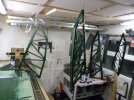
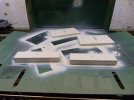
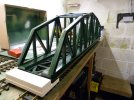
Over the last few days I have started to change the colour of the first of all my bridges, going for a shade of green to match RhB coaching stock, with a limestone sort to concrete look for the support ends and column...

P1040405.JPGP1040407.JPGP1040412.JPGP1040413.JPG

...it's not perfect, it wouldn't be me if it was, but I can accept that. It's a learning curve, one (Spiral loop bridge.) done, Lawnmower, and the double Collins bridges to do next.
 
Ok so the Brown Bogie van has been integrated to the DR garden fleet. Not a lot of work but some. This is it as bought, my previous post shows it on the workbench after spraying.
View attachment 334576
Next up some work to the base, for some reason the Newquid bogies required (by previous owner no criticism I was very happy to get this van at the GSC bargain price) stepping up with a lot of washers to get them to turn. This caused much wobble, not acceptable to the management of the DR. Thus a plate was glued into the base either side of 1 bogie turning area with a small piece of plasticard glued to the bogie either side to stop the wobble. Sounds very lashy but it works, hopefully will be quite long lasting. Things do not round and round for long periods on this line so with some suitable plastic lubrication should be fine. Pic below should help to explain the lash up.View attachment 334580
Finally in all its revised splendour with that all important DR labelling, number and Wagon Card.
View attachment 334577
now having just bought 3 of these box cars but I don't have them yet, I thought they were single axle carriages or was that a fiendish conversion by the PO
I have read Rik's post of what he did to a couple of he's and I plan on doing something similar and with a UV resistant coat of paint as I was told they wont stand up to a lot of sun light
It's looking great by the way.
Yes the originals were 4 wheelers a fiendish conversion by PO and quite light in weight to boot, metal wheels help and I never mentioned but a set of Bachmann metal wheels have been added to the Van. There are spigots in the base for a bogie. I reckon an undercoat of matt black with a spray in final colour should help with UV. My stock tends to live a shed with little light or UV pollution but is outside all day during operating sessions. I have a couple of NQ Tank Wagons plus 2 other smaller conversions using open sides, none show UV problems. A pal of mine leaves 2 of his NQ Vans outside 24/7/365 (some 3-4 years now) and whilst the colour has gone very off the vans are not at all brittle.
 
Yes the originals were 4 wheelers a fiendish conversion by PO and quite light in weight to boot, metal wheels help and I never mentioned but a set of Bachmann metal wheels have been added to the Van. There are spigots in the base for a bogie. I reckon an undercoat of matt black with a spray in final colour should help with UV. My stock tends to live a shed with little light or UV pollution but is outside all day during operating sessions. I have a couple of NQ Tank Wagons plus 2 other smaller conversions using open sides, none show UV problems. A pal of mine leaves 2 of his NQ Vans outside 24/7/365 (some 3-4 years now) and whilst the colour has gone very off the vans are not at all brittle.
What you are saying regarding vans living outside all the time and being ok probably would not apply here in Australia , the uv radiation can be very intense and damaging to plastics (people too). Many plastic things just don't last here if left outside too much. On my new railway we budgeted in the cost of 3 expensive shade sails to protect me and my trains.
 
What you are saying regarding vans living outside all the time and being ok probably would not apply here in Australia , the uv radiation can be very intense and damaging to plastics (people too). Many plastic things just don't last here if left outside too much. On my new railway we budgeted in the cost of 3 expensive shade sails to protect me and my trains.
Stewie, that is a good investment I think, and I may do the same, no getting any younger and 53 years of working in the sun takes it's toll.
 
Stewie, that is a good investment I think, and I may do the same, no getting any younger and 53 years of working in the sun takes it's toll.
Does it what, just at the end of 3 weeks of burning skin cancers off my face, wearing a hat nearly all the time only protected the top half of my face . The bottom half 5 areas from 5mm to 18mm round reacted to the chemo cream. No fun at all.
 
Does it what, just at the end of 3 weeks of burning skin cancers off my face, wearing a hat nearly all the time only protected the top half of my face . The bottom half 5 areas from 5mm to 18mm round reacted to the chemo cream. No fun at all.
Yeah my poor old Pop had fair skin and worked as a gardener most his life, died at 90, had over 400 sun cancers cut out of him over the years and that doesn't count
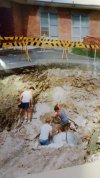
the ones done with Co2. I've been lucky with my skin type. This photo was taken 35 years ago, I'm the dark one and the fair one near me is my Brother.
Hope all goes well for you Stewie.

2016-03-12 08.19.09.jpg
 
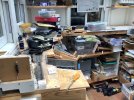
Yesterday was a bit of a chaos day. I have a love hate affair with 00 having for a few years now on/off building of a Coal Mine Railway. It got mixed up with my Gauge 3 dabblings so had to go. Stock all packed in 64 litre stock boxes, buildings in another plus a slightly smaller one. Boards pulled apart and moved to spare bedroom, stock n buildings in loft. 2 pics of chaos that ensued.IMG_8259.jpegIMG_8258.jpeg
 
Two sidelined items have morphed together.
A pre owned Piko 218 DB twin bogie diesel that had severely modified internal wiring.
A pre owned Digitrax decoder

The loco had a chain of diodes forming a voltage dropper, thus reducing the motor’s speed. I assume to run with Playmobil or other similar lower voltage motive power items.

EDIT Thinking about the diode dropper, this will have the opposite effect..the track voltage will need to be higher for the loco to start running
This type of circuit was in some pre digital locos, LGB called it EAV, which allowed a smaller shunting loco to run on the same track, whilst the EAV or diode dropper fitted loco remained stationary.
EDIT ended


I restored the wiring for DC to do a basic chassis test which was ok
The loco lighting wiring had also been modified, so this too was restored. As sold, this loco only had white directional headlights, so I added red taillights.

The decoder is a pre owned one from a respected eBay trader and was guaranteed working. The motor function was fine, but I couldn’t get the forward light output to work. I tried to map another function output to be the forward headlight output, but failed.
It was then that I found the problem. Digitrax use the NMRA colour code for decoder wiring, red and black to the track, orange and gray the other way. Directional lights are white and yellow, with blue as positive. This DG380L has another 5 outputs, some of which use a white wire with a very feint colour stripe.
Yes, you guessed it, the previous user had used F5 for the front headlight, a white wire with a very feint blue trace colour. And had cut all the unused output wires quite short, and heat shrinked them all together!

Lesson (re)learnt. Never assume someone else has wired things up correctly!

Malcolm
9C3675A3-A107-4569-8AA4-9B05F0B9A660.jpeg
 
Last edited:
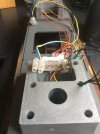
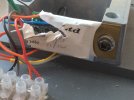
The two sets of free choc blocks are to connect to the lighting in the loco body.
The decoder does get warm, so I drilled and tapped a 4mm hole in one of the weights. A previous owner of the decoder had cut the track and motor wires just a bit too short, that’s why the decoder shrink covering is torn just to get a few more mm. I could have extended them.....
9C8ADA6C-8EB6-4347-8A97-DDB9FB4CF32E.jpeg
 
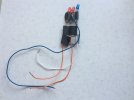
One thing I did find useful....for sorting out the directional lighting.
A little test jig of leds with resistors. Much easier to connect to decoder function pins than the loco body with lighting.
ACC32CEF-48A4-489B-A4EB-E6571844A877.jpeg
 
Back
Top