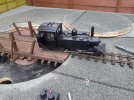
What happened at your workbench today?

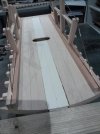
Further progress on the turntable. The side frames include several angles, which makes applying clamping pressure virtually impossible. So glue was applied, the parts pressed together, and left to dry.
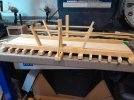
20241126_094442.jpg
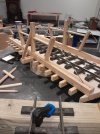
The truss rods were next, glued in place with epoxy, and the turnbuckles fixed in place with lo-melting point solder.
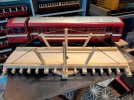
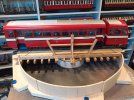
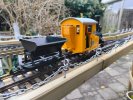
20241126_152759.jpgJust to show Fezwig Fezwig , I dug out the ex-County Donegal railcar: ta-daa!
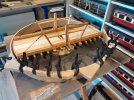
However, there was a snag: length was fine, but width wasn't. So there was only one thing for it: saw the thing in half and fit a strip along the whole length...
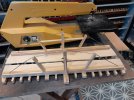
20241126_154154.jpg
20241126_171118.jpg
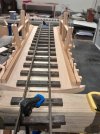
Timber braces have been cut and glued in place. The next step is to fit a 40mm wide strip of 3mm ply into the deck. If it was good enough for the Morris Minor, it's OK for me...
 
Further progress on the turntable. The side frames include several angles, which makes applying clamping pressure virtually impossible. So glue was applied, the parts pressed together, and left to dry.
View attachment 335352
The truss rods were next, glued in place with epoxy, and the turnbuckles fixed in place with lo-melting point solder.
View attachment 335353Just to show Fezwig Fezwig , I dug out the ex-County Donegal railcar: ta-daa!
However, there was a snag: length was fine, but width wasn't. So there was only one thing for it: saw the thing in half and fit a strip along the whole length...
View attachment 335355
View attachment 335356
Timber braces have been cut and glued in place. The next step is to fit a 40mm wide strip of 3mm ply into the deck. If it was good enough for the Morris Minor, it's OK for me...
PLY! on a Morris Minor! Ash dear boy, Ash:smirk: That's a shame, At least you found out now. perhaps you should have used a set of CDR locomotive frames:giggle:
 
So, two steps forward, one step back. I had a plastic lazy susan bearing, but it was only 65mm diameter, which meant there was a fair bit of rocking. When I was in Hobbycraft this morning, I picked up a 95mm diameter bearing, which is much better. So, the deck has been widened, and whilst the infill isn't a good match, it won't be visible under the bridge decking.
20241127_162627.jpg
With the whole thing being 40mm wider, the ends needed re-profiling on the bandsaw and tidying up on the sander; I think they are pretty close now.
Next up was to fit it onto a base: I've laminated some ply to give a central pillar, which the bearing sits on top of.
20241127_163518.jpg

The deck needed checking to ensure that the rails were a) at the correct height and b) aligned when turned through 180⁰, the latter needing quite a bit of care, thought and adjustment-better known as trial and error.

20241127_163512.jpg
 
One photo is enough to show today's progress:
View attachment 335417
The structure is complete, the bearing centred, and it's had a first application of wood dye. After which, I cut formers for the well walls and glued strips of 6mm flexiply to them. Finally, the Fezwig Fezwig Test: will the railcar fit?
View attachment 335418
:party::party::party:
Lovely job and will do all required, hope it is not going to live outside with all that ply?
 
Lovely job and will do all required, hope it is not going to live outside with all that ply?
The turntable itself won't, but the well will. All of the well will get a coat of bitumen paint; the base will get drainage holes, a piece of roofing felt and horticultural grit, while the walls (which will sit underneath a small overhang of the baseboard) will have brick-embossed plasticard stuck to them. I will use the disc of baseboard that I cut out as a cover for the hole when not in use, too...
 
The turntable itself won't, but the well will. All of the well will get a coat of bitumen paint; the base will get drainage holes, a piece of roofing felt and horticultural grit, while the walls (which will sit underneath a small overhang of the baseboard) will have brick-embossed plasticard stuck to them. I will use the disc of baseboard that I cut out as a cover for the hole when not in use, too...
Good luck with all that, I sincerely hope that all works and does not end in tears.
 
Ah well, a bit of 4mm.

I have removed the 'Southern Railway and other yellow lettering from the luggage van. I have also swapped the Wrenn spoked wheels for something a bit more solid - they're meant to be solid, but all I had was Hornby 3-hole, but they look better than spokes (and will never be seen as the van will be beside the platform, viewed from the platform side)

Not worth photographing until I put a coat of something on it :shake::shake:
 
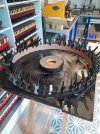
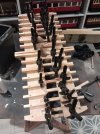
Having read an article in Railway Modeller where someone used N gauge/scale brick-embossed plasticard instead of 00, I have fitted O Gauge brick plasticard to the turntable well. Although I used impact adhesive, it was creeping away from walls a little, so I went all-out on the clippy-clamps...

20241206_124642.jpg
 
Having read an article in Railway Modeller where someone used N gauge/scale brick-embossed plasticard instead of 00, I have fitted O Gauge brick plasticard to the turntable well. Although I used impact adhesive, it was creeping away from walls a little, so I went all-out on the clippy-clamps...

View attachment 335650
Screenshot_20241206_144754_Chrome.jpg
 
IMG_20241210_194252281.jpg
IMG_20241210_194334910.jpg
IMG_20241210_194613137.jpg
IMG_20241210_194735778.jpg
IMG_20241211_125039348.jpg
IMG_20241211_125051638.jpg
IMG_20241211_125706765.jpg
IMG_20241211_120119025.jpg
IMG_20241211_120238969.jpg
IMG_20241211_120323571.jpg


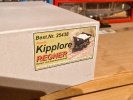
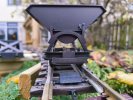
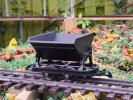
I recently ordered this skip wagon from Regner. It currently costs €225, which I think is a lot, but my curiosity got the better of me.

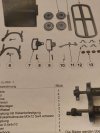
It arrives in kit form. The parts are made from steel, lacquered black. My kit is well made, and the lacquer is impeccable. There's an instruction sheet, with pics, that includes a list of parts. My sheet is in German only, which is fine for me, but I'm assuming one exists in English.

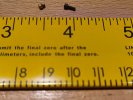
The kit is mainly assembled with very tiny bolts. You do need a 3 mm pipe wrench for these bolts. This isn't included but they offer one on their webshop.

The model has Regner's own take on LGB-compatible couplings, including a sprung hook.

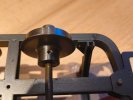
The wheels are isolated for two-rail power, and they can be adjusted anywhere from 30 mm to 45 mm. This is done with some screws that go into small holes in the wheel (see photo) and secure it to the axle. To do this you need a 1.5 mm allen wrench and this they did include. Unfortunately, one of the wheels in my kit had the holes badly made, so it wouldn't take the allen screws.

I emailed Regner about the bad wheel and the 3 mm pipe wrench. They sent me one of both, free of charge. This arrived within a few days (within the EU). Still, at this price point, I feel they could have included the pipe wrench (which sells for €2) in the kit to begin with. I also feel they could have checked the wheels before putting them in the box, especially since they told me it's a known problem.

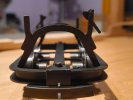
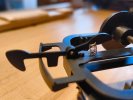
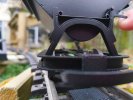
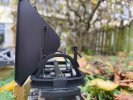
Anyway, once it's finished it's a nice model. It looks good, and it's nicely heavy at 420 grams. On each side there's a lever that you need to lift in order to tilt and empty the skip. The lever falls back into position by gravity, and when the skip is in normal position the two levers hold it firmly in place, to the extent that you can lift the wagon by grabbing it from above.
At first I thought of the two levers as just for looks, but in practice this feature has definite play value. Nice.

Overall, I'm happy with this model. Would I buy it again? Maybe. For one, it's quite expensive. For another, while a long string of skips looks great on some layouts, I feel it'll look out of place on mine. So I'll just enjoy this one for now.


IMG_20241211_115033221.jpg
IMG_20241211_115503887.jpg
 
Last edited:
View attachment 335792
View attachment 335791
View attachment 335789
View attachment 335788
View attachment 335780
View attachment 335779
View attachment 335778
View attachment 335786
View attachment 335782
View attachment 335781


I recently ordered this skip wagon from Regner. It currently costs €225, which I think is a lot, but my curiosity got the better of me.

It arrives in kit form. The parts are made from steel, lacquered black. My kit is well made, and the lacquer is impeccable. There's an instruction sheet, with pics, that includes a list of parts. My sheet is in German only, which is fine for me, but I'm assuming one exists in English.

The kit is mainly assembled with very tiny bolts. You do need a 3 mm pipe wrench for these bolts. This isn't included but they offer one on their webshop.

The model has Regner's own take on LGB-compatible couplings, including a sprung hook.

The wheels are isolated for two-rail power, and they can be adjusted anywhere from 30 mm to 45 mm. This is done with some screws that go into small holes in the wheel (see photo) and secure it to the axle. To do this you need a 1.5 mm allen wrench and this they did include. Unfortunately, one of the wheels in my kit had the holes badly made, so it wouldn't take the allen screws.

I emailed Regner about the bad wheel and the 3 mm pipe wrench. They sent me one of both, free of charge. This arrived within a few days (within the EU). Still, at this price point, I feel they could have included the pipe wrench (which sells for €2) in the kit to begin with. I also feel they could have checked the wheels before putting them in the box, especially since they told me it's a known problem.

Anyway, one it's finished it's a nice model. It looks good, and it's nicely heavy at 420 grams. On each side there's a lever that you need to lift in order to tilt and empty the skip. The lever falls back into position by gravity, and when the skip is in normal position the two levers hold it firmly in place, to the extent that you can lift the wagon by grabbing it from above.
At first I thought of the two levers as just for looks, but in practice this feature has definite play value. Nice.

Overall, I'm happy with this model. Would I buy it again? Maybe. For one, it's quite expensive. For another, while a long string of skips looks great on some layouts, I feel it'll look out of place on mine. So I'll just enjoy this one for now.


View attachment 335784
View attachment 335783
At that price, it'll be a rake of one, then ? :worried:
 
It seems odd to be putting this under 'What Happened at Your Workbench?', when the subject is not only bigger than  my workbench, it's bigger than any workbench that I've ever used!
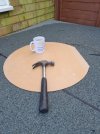
The main task was to fit the turntable well that I've made. I had cut a template out of hardboard, which was pinned to the baseboard, the positioning being largely dictated by the framework underneath.
20241215_114955.jpg
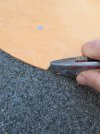
I then cut around the template with a craft knife
20241215_115456.jpg
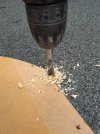
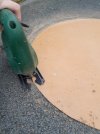
...and drilled a 10mm diameter hole to take the jigsaw blade:
20241215_115615.jpg
Heart in mouth, I started cutting; it may not be as high-risk as cutting the roof of a car to fit a sunroof, but it doesn't bear thinking about how much work will be needed if I get it wrong...
20241215_115904.jpg
Before too long, I have that 'no going back now' moment:
20241215_120419.jpg
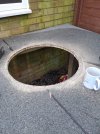
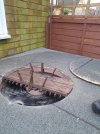
A test fit shows all is in order: the edge needs a little bit of fettling, but otherwise I'm very pleased with it.
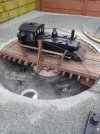
20241215_122643.jpgEven the rail height is within a mm or so, although the turntable tilts a little under load; a (prototypical) block on the well wall will cure this.
20241215_125140.jpg
But it does the job it was intended to. The circle that I removed needs a little work to turn it into a cover for the well when not in use.
20241215_125057.jpg
 
Back
Top