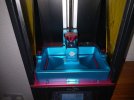
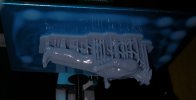
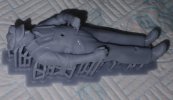
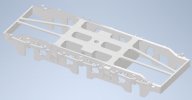
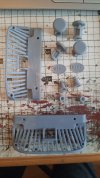
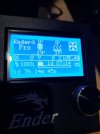
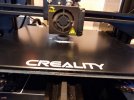
What have you been printing.

I know for a model, it does not really matter..
But what material are you printing it in, and what type of adhesive will you be using?

Do you also have stl files for a depressed centre car therapist? - The mental health of our railways is important. :nerd::D:D
Hi PhilP
the stl's are available here: Depressed Center Flat Car
 
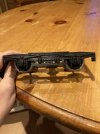
Overnight I printed off some SR bogies to see how they looked.

It’s so much nicer being able to adjust the design to meet wheelset width and just assemble it, than to be doing filing, drilling and general fettling!
0FD6AC01-0FD1-4C59-AEC9-B5132B68B2AC.jpeg
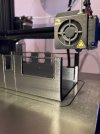
Then this morning I decided to test the ‘miracle carriage’ section again as I couldn’t quite believe it printed without supports last time.

This time I captured it using its magic, ‘invisible supports’ option on the long window spans which definitely overhang by more than 40 degrees.

I’m not entirely sure how it’s managing this but I assume Curas dynamic setting is pretty dialled in!
E7FD6859-5E4B-4B4F-B971-6AAEB97E6255.jpeg
 
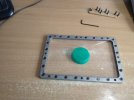
It's FEP change got a whole year out the last one :) 24 screws back in and pretension over a bottle top with no holes :sweating:


fep1.jpg


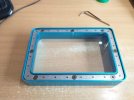
fitted back in frame only 8 screws this time still no holes :)

fep2.jpg

quick drum test sounds good so back in the printer..

fep3.jpg


Test print to see if all is good :think:... No 5 hour print in for a penny in for a pound :rofl::rofl: Engine driver time

Update Time Print finished.


fep4.jpg


The Only holes in him this time is the ones I put there so back in business again , so the YMCA group can expand :)

fep5.jpg
 
Last edited:
Next project is a SSym 46.
SSym 46 boogie total.jpg
First step will be the bogie. Have a look at the stl and give some feed-back.
 

Attachments

It's FEP change got a whole year out the last one :) 24 screws back in and pretension over a bottle top with no holes :sweating:


View attachment 279274


fitted back in frame only 8 screws this time still no holes :)

View attachment 279275

quick drum test sounds good so back in the printer..

View attachment 279276


Test print to see if all is good :think:... No 5 hour print in for a penny in for a pound :rofl::rofl: Engine driver time

Update Time Print finished.


View attachment 279283


The Only holes in him this time is the ones I put there so back in business again , so the YMCA group can expand :)

View attachment 279284
He's been shot! :)

Seriously nice quality. Worth the wait, eh?!
 
Maintance here, replacing the extruder, as I've had a few miss prints , filament jamming..new metal twin gear version..and a weird set of foamy prints. Which have printed fine before ,but suddenly,..they start of ok..then as they build up..became open foam ..
Replaced the print nozzle.
 
Maintance here, replacing the extruder, as I've had a few miss prints , filament jamming..new metal twin gear version..and a weird set of foamy prints. Which have printed fine before ,but suddenly,..they start of ok..then as they build up..became open foam ..
Replaced the print nozzle.
Could it be damp filament?
 
Could it be damp filament?
Ah yes, who could not enjoy the sight of a steaming extruder, spitting merrily away as the moisture is purged from the filament. I bought some cheap stuff one that did just that. It all needed baking in an over for a few hours to drive out the moisture and then it was OK.
 
I spent yesterday installing a BLTouch on my old Ender3 and made the mistake of using Crealitys firmware which resulted in a lot of headscratching when it wouldnt apply the Z offset it had so obviously stored! In the end i applied a later firmware from an excellent site I found and was back in business with automatic bed levelling.

Today I decided to upgrade the motherboard to a whizzy 32bit one in order to gain a few benefits. I should have learnt my lesson but instead flashed the firmware with the latest Creality firmware and found they'd managed to put a bug in that as well.

So i compiled my own from the latest Marlin source, edited it to accommodate the BLtouch and now i have bilinear bed levelling, some nice new features and totally silent printing. Result! And I've inadvertently learnt all about the firmware which is a bonus :)
 
Last edited:
Could it be damp filament?
No, it seems.. as I'm using the same filament now, with no problem,..
I uninstall the soft wear, ...re installed it fresh..incase I had corrupted it ..flashed the printer,(quite at the back no sniggering)..which did nothing....and changed the print nozel...which cured it..
Fitted a dual geared extruder, and since then I have just finished a longer print,with no fuzzy ness or jamming of filament...glass beds just arrived.. 20210125_221604.jpg
 
OK.. tried the glass bed.. tried it with the cleaner, the hair spray...and yes it looks shiny.. but its doesn't work for me..prints are falling off the base, ie..60% done..and suddenly..bugger.
So . Swaped back to my old flex bed..
 

Attachments

  • 20210127_115238.jpg
    20210127_115238.jpg
    324.6 KB · Views: 0
OK.. tried the glass bed.. tried it with the cleaner, the hair spray...and yes it looks shiny.. but its doesn't work for me..prints are falling off the base, ie..60% done..and suddenly..bugger.
So . Swaped back to my old flex bed..

Mike, your brim may have distorted when it detached, but looks a mess. Did you do a first layer calibration print and tune similar to this:-

Ben
OK.. tried the glass bed.. tried it with the cleaner, the hair spray...and yes it looks shiny.. but its doesn't work for me..prints are falling off the base, ie..60% done..and suddenly..bugger.
So . Swaped back to my old flex bed..
That's a shame as I believe the flex bed may have a limited life.

It's probably the hairspray isn't strong enough. I read somewhere that diluted wood glue can assist, but I've never tried it.
A proprietary brand such as PrimaCreator Fix (Amazon) may sound pricey at approx £10, but it will last for ages.
I don't even need to apply it for every print run and if anything I find it difficult sometimes to remove the print.
 
Well I can accurately say exactly what I've been printing today. Nothing at all! :rolleyes:

I'm starting to wonder if such a thing as The Cursed Print exists... Four times now I've tried to print the same set of coach bogies. Each time it's a 15h print in super detail. Each time there's also been prep work in getting custom supports put in for them.

The first 2 times, our main circuit tripped over night thanks to the torrential rain we've had finding its way into an outside socket.
The third time I inadvertently caught the USB cable sending the Gcode to the printer and couldn't find a way to convince Cura to continue the print.
The fourth and final time, the hotend and/or thermister left the building at some point overnight and the print failed about 12h in. Gargh!

After clearing out the filament from the Bowden tube, I brought the hotend up to temp in the display and tried extruding a few mm of filament as I'd usually do, to prime everything. Nothing. The extruder was trying to push the filament, the display said it was at it's 208c target but the hotend seemed cold.

This struck me as strange. Thermisters sometimes go, but I'd expect it to think the hotend was at zero, not my requested temperature!
power everything down. Go and have a cup of coffee, power it all up and try again. Same.
Dug out an IR thermometer which confirmed the hotend was cold. The printer was still convinced it had reached temperature.

At this point I decided to rule out the wiring and board, given I'd recently upgraded the motherboard. I put a voltmeter across the hotend feed and told it to heat. Sure enough, 24v appeared.

Gave up and ordered a hotend/thermistor/capricorn Bowden tube package from Amazon, then sulked as I couldn't print for another 24h ;)
 
Last edited:
OK.. tried the glass bed.. tried it with the cleaner, the hair spray...and yes it looks shiny.. but its doesn't work for me..prints are falling off the base, ie..60% done..and suddenly..bugger.
So . Swaped back to my old flex bed..
I used to use a glass bed on my old Wanhao but haven't seemed to need anything with the Creality.
The only advantage I can see with the glass bed is it provides an known level across its entire surface and mitigates the possibilty of a slightly warped bed, which is not entirely uncommon on consumer 3d printers - you level the four corners nicely only to find a dip or high point somewhere causes a first layer issue.
An alternative to the glass bed is bilinear auto-levelling which will probe a sample mesh of the bed, store the probed heights and then apply the height map automatically to any prints, so (in theory) taking into account any anomalies. The usual 9 or 12 probe mesh though has a good chance of missing something, so a high probe count is really needed to make it worth while IMHO.
When I was using a glass bed, I used a thermal transfer sheet between the glass and the bed (like a thin sheet of blu-tac type stuff) to help transfer the heat to the glass and on to the filament. From memory that and an increased bed temperature was needed to get the same amount of heat to the print. I'm pretty sure without these tweaks, the print won't get enough heat to stay stuck :)
 
Back
Top