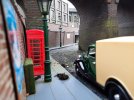
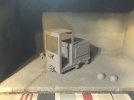
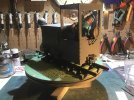
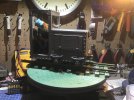
What have you been printing.

Must be catching my Filliment printer has spent the last two days making more rubbish than useable parts , Cura managed to update itself, been stopping it for months and months well now its managed to do it, my hours of tweaking to get PETG to print perfect every time has gone out the window. I wish had written all the settings down, now its back to working with Mr blobby and watching the dam printer all the time till I get it working again without blobbing all over my prints :(
 
For some slicers the print settings, in a commented form, can be read from the GCode.
 
Last edited:
Well I can accurately say exactly what I've been printing today. Nothing at all! :rolleyes:

I'm starting to wonder if such a thing as The Cursed Print exists... Four times now I've tried to print the same set of coach bogies. Each time it's a 15h print in super detail. Each time there's also been prep work in getting custom supports put in for them.

The first 2 times, our main circuit tripped over night thanks to the torrential rain we've had finding its way into an outside socket.
The third time I inadvertently caught the USB cable sending the Gcode to the printer and couldn't find a way to convince Cura to continue the print.
The fourth and final time, the hotend and/or thermister left the building at some point overnight and the print failed about 12h in. Gargh!

After clearing out the filament from the Bowden tube, I brought the hotend up to temp in the display and tried extruding a few mm of filament as I'd usually do, to prime everything. Nothing. The extruder was trying to push the filament, the display said it was at it's 208c target but the hotend seemed cold.

This struck me as strange. Thermisters sometimes go, but I'd expect it to think the hotend was at zero, not my requested temperature!
power everything down. Go and have a cup of coffee, power it all up and try again. Same.
Dug out an IR thermometer which confirmed the hotend was cold. The printer was still convinced it had reached temperature.

At this point I decided to rule out the wiring and board, given I'd recently upgraded the motherboard. I put a voltmeter across the hotend feed and told it to heat. Sure enough, 24v appeared.

Gave up and ordered a hotend/thermsite/capricorn Bowden tube package from Amazon, then sulked as I couldn't print for another 24h ;)
This sounds like the insulation on the thermistor has failed and is shorting to the block. This gives exactly the fault with the heater you describe, as the block is connected to the heater earth. I've had the same on mine and it took some head scratching to work out what was happening!
 
Mike, your brim may have distorted when it detached, but looks a mess. Did you do a first layer calibration print and tune similar to this:-

Ben
hi Ben, yes, probably a poor choice of photo on my part, it tends to fail at exxatly the same point,
the flexy magnetic bed , dosnt give me as much greif, as the glass,, ok, the glass looks great, but the magnet bed just works, for me..
 
For some slicers the print settings, in a commented form, can be read from the GCode.
thanks, Today I was going to try that, print a file that has printed perfect in the past if that prints as it should then I know its Cura update that caused the problem, they see if there is a way of getting the settings out of the Gcode file , I have all the ones I have printed in the past .
 
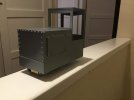
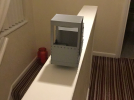
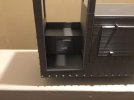
My latest 7/8th scale creation, loosely based on an AEG battery locomotive. I drew up the plans and Jason has carried out the 3D printing:-

C95CE6A6-B79B-4D80-923D-94ADCEC3738B.jpegD203621A-9F75-4D69-84E8-CBC05AD368CF.pngE5668960-8060-4489-A89A-9531F75DF7FA.jpeg

More detail parts need to be added. It will be radio controlled, fitted with rechargeable batteries and has a SwiftSixteen chassis.
I hope to start the detailing and initial painting on Monday .
 
My latest 7/8th scale creation, loosely based on an AEG battery locomotive. I drew up the plans and Jason has carried out the 3D printing:-

View attachment 279762View attachment 279763View attachment 279764

More detail parts need to be added. It will be radio controlled, fitted with rechargeable batteries and has a SwiftSixteen chassis.
I hope to start the detailing and initial painting on Monday .
Interesting looking bix Casey, 7/8th’s scale I assume? The way you are going you will need to do all new buildings again as the larger scale appears to be taking over!
 
Interesting looking bix Casey, 7/8th’s scale I assume? The way you are going you will need to do all new buildings again as the larger scale appears to be taking over!
No danger of that Jon. I just don’t want to get stale whilst waiting to continue with the CFR extension. The 7/8ths stuff is fun to run as a diversion.
 
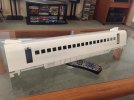
Working on a Japanese bullet train. First is a passenger car. Printed in 3 sections.
 

Attachments

  • E2DA2C59-F993-4BAE-8027-BDCD58803445.jpeg
    E2DA2C59-F993-4BAE-8027-BDCD58803445.jpeg
    450.3 KB · Views: 0
Tssting for size, unpainted ect20210130_145113.jpg
 
This sounds like the insulation on the thermistor has failed and is shorting to the block. This gives exactly the fault with the heater you describe, as the block is connected to the heater earth. I've had the same on mine and it took some head scratching to work out what was happening!
Yay...replacement head is on and we're back in business.

I'll look to pull the thermistor cartridge out of the old head and inspect/replace it in slow time
 
Must be catching my Filliment printer has spent the last two days making more rubbish than useable parts , Cura managed to update itself, been stopping it for months and months well now its managed to do it, my hours of tweaking to get PETG to print perfect every time has gone out the window. I wish had written all the settings down, now its back to working with Mr blobby and watching the dam printer all the time till I get it working again without blobbing all over my prints :(
You still have the original firmware????Deinstall the program an clean your pc/laptop incl cold start.....than after restart: reinstall.....you are welcome....
BUT if problems keep on being there AND you keep your filament DRY&DUST-FREE, I suggest to take your hot end apart and clean it(or time for a replace!)
If problems dont go away....than your are in for a professional 3d printer man------>calibrating your 3d printer.......
Start with extrusion...
No one can help you with that, it is you and the machine in one cage.....round one!

3d printing is nice---> IF you can understand why things work or why things DONT work....

Good luck and i hope it will go all right with the suggestions i give you.
Why do you think second hand places are full of those things???calibrating and wear out issues!!!!

With best regards Igor
 
The new locomotive went into the paint shop this morning:-
C601F12E-5841-4A7A-8392-4551B19A4991.jpeg

Once the paint was dry the lamps were added:-
26FB0A8A-2DED-4F43-9A37-D09E042FF90A.jpeg
Shack checks out the locomotive:-
87FDC89B-E468-462A-8496-E2E7B8F7B501.jpeg
 
Casey Jones snr,
military precision as usual.
Big thumbs up
I would love to see you do the red devil or the aa20
But keep a eye on your printer layers.....
 
You still have the original firmware????Deinstall the program an clean your pc/laptop incl cold start.....than after restart: reinstall.....you are welcome....
BUT if problems keep on being there AND you keep your filament DRY&DUST-FREE, I suggest to take your hot end apart and clean it(or time for a replace!)
If problems dont go away....than your are in for a professional 3d printer man------>calibrating your 3d printer.......
Start with extrusion...
No one can help you with that, it is you and the machine in one cage.....round one!

3d printing is nice---> IF you can understand why things work or why things DONT work....

Good luck and i hope it will go all right with the suggestions i give you.
Why do you think second hand places are full of those things???calibrating and wear out issues!!!!

With best regards Igor

Hi, Funny it went wrong when Cura updated, but watching it print the excess filiment is not coming out the end of the nozzel it's somehow coming out from inside the head somewhere and running down and making blobs, not easy to see in a fully enclosed machine where the nozzle is at the top with the bed moving up and down rather than the usual. So it's a strip down on the head to find why its leaking . So it's nothing to do with the Cura settings :) First time this one has gone wrong in 9 months so they are quite reliable considering the technology they are based on.
 
I dont think it is the update.
I think it is wear out of curtain parts.
Please check if your bowden tube is still a tight seal with your nozzle.
Probably when you take it apart you must cut off 5cm/2 inch from that tube, squire please and make sure it sits tight on the nozzle when you attach it again.
Calibrate your extruder aswel, this can rule out any over extrusion problems---> to much pressure on your hot end can coase leaking also...
 
Oozing material suggests that the nozzle itself is loose and the plastic is being forced out and down the threads. I usually nip mine up a but tighter when the hot end is hot, as you can normally get another 1/2 turn without too much effort.

I normally fine a new nozzle sorts out many problems. Carbonised material builds up, causing a partial blockage, so either take it off and use a blowtorch and needle to clear it, or if this is too much effort, just fit a new one :)

As justme igor justme igor says, failure of the teflon feeder tube across the heat break will also cause leakage, so do check this as well.
 
so either take it off and use a blowtorch
???
Old fashion gas operated kitchen stove will do, but that does not mean i dont like your thinking:devil:
My mental picture....roof burning torch the big one

Indeed dismantle your nozzle while hot, clean, put back together with a pre heated hot end, cool down, level the bed.
While your at it...dismantle the whole end every screw sensor what ever you can take apart.
Give it a day, you will learn so much
As the saying goes, it can't be stuck if its molten.. I find that to get all the deposits out, you really need some heat - and you can use a blow torch on a metal vice that is holding the nozzle. I run out of hands using a gas stove!!
 
it was just a lose grub screw that holds the hot end into it's cooling fins against the feed tube, not detectable when cold, but once warmed up then there is just enough play for the filiment to escape out of the topside of the hot end where it fits into the cooling fins, once tightened all works as it should do again. And its not possible to tighten that screw without removing the hotens as its hidden :) Never (touch wood) had a problem with getting the old filament out of nozzles, but this machine came with long pins / needles that will clear the nozzle when hot in the machine.
 
Back
Top